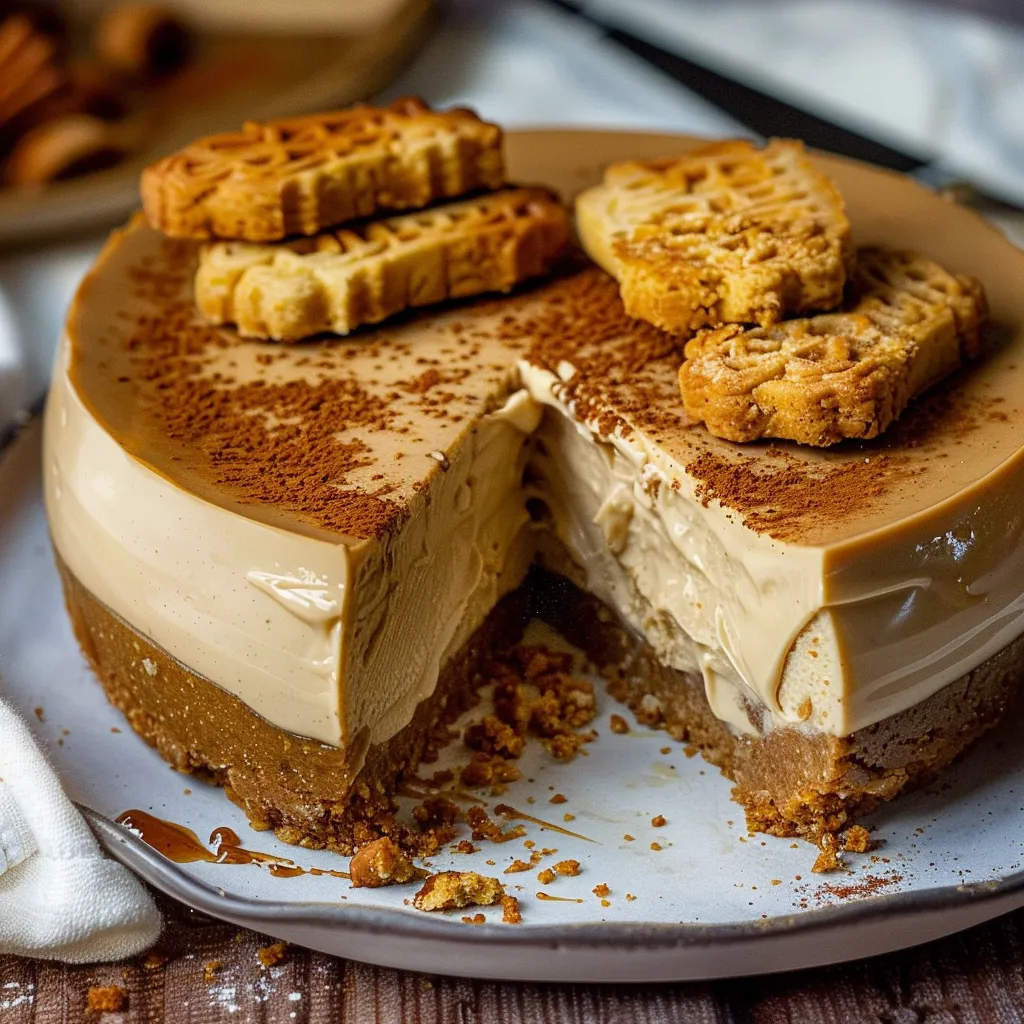
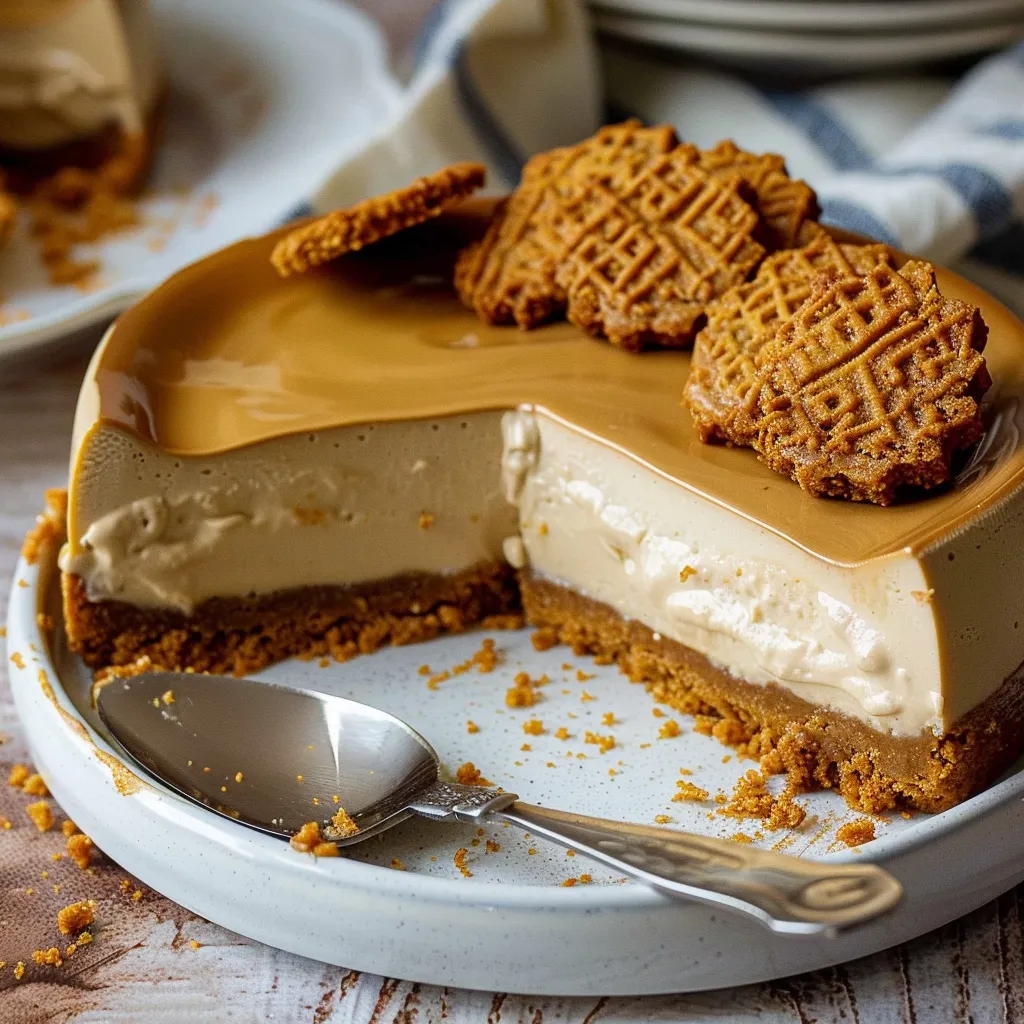
There’s nothing quite like the comfort of a homemade dessert, especially when it combines creamy, decadent textures with a hint of spice. The Biscoff Cheesecake is perfect for cozy evenings or festive gatherings, beckoning loved ones to gather around the table and share sweet moments. Inspired by the delectable caramelized flavor of Biscoff cookies, this cheesecake captures the essence of warmth and joy, making it an instant favorite.
What truly sets this cheesecake apart is its blend of unique flavors and the ease of preparation. With a buttery cookie crust, rich cream cheese filling, and a glorious Biscoff drizzle, this dessert is a striking centerpiece that anyone can make. It’s also a delightful way to share a piece of the joy that comes from innovative baking traditions, merging the beloved spice notes of a cookie with a classic cheesecake.
Why You’ll Love This Recipe
Picture this: a velvety cheesecake that melts in your mouth, paired with the distinct flavor of Biscoff cookies, creating a dessert experience that you won’t soon forget. This Biscoff Cheesecake is not only visually stunning but also exceptionally flavorful, striking a perfect balance between sweetness and spice. Beyond its delectable taste, the straightforward preparation makes it accessible for bakers of all skill levels.
Moreover, it’s the type of dessert that can easily suit various occasions—from holiday gatherings to date nights at home. Plus, the Biscoff cookie influence resonates with those who adore deliciously unique flavors. Once you’ve tasted this dessert, you’ll understand why it’s quickly becoming a staple in many homes!
What Does The Recipe Taste Like
Imagine sinking your fork into a slice of this cheesecake; the first bite reveals the rich, creamy filling that boasts just the right touch of sweetness. The Biscoff flavor shines through, bringing a slightly spiced, caramel-like experience that dances beautifully on your palate. The crust adds a comforting crunch, creating an enjoyable contrast with the soft filling.
Whether you’re a fan of traditional cheesecakes or looking to broaden your dessert horizons, this Biscoff Cheesecake will surprise and delight your senses. Each element of the dish works harmoniously, resulting in a dessert that feels both luxurious and comforting.
Ingredients You’ll Need
To whip up this scrumptious Biscoff Cheesecake, gather the following ingredients:
- Biscoff Cookies: 250g, finely crushed. These cookies form the base of the crust and infuse the dessert with their signature caramelized flavor.
- Unsalted Butter: 100g, melted. The butter binds the cookie crumbs together, creating a rich and sturdy crust.
- Cream Cheese: 500g, softened. The cream cheese is the star of the cheesecake filling, providing that iconic creamy texture.
- Sugar: 150g. Sugar sweetens the cheesecake while ensuring balance with the Biscoff’s natural flavors.
- Sour Cream: 200g. Sour cream contributes a slight tang and helps create a creamy texture.
- Vanilla Extract: 1 teaspoon. Vanilla enhances the overall flavor profile of the cheesecake.
- Gelatin Powder: 2 teaspoons, optional for firming, if desired. It can help stabilize the cheesecake, particularly during warmer months.
- Biscoff Spread: 200g, for drizzling on top. This creates a beautiful layer over the cheesecake that packs a punch of Biscoff flavor.
Optional Additions
If you want to personalize your Biscoff Cheesecake, consider these variations:
- For a chocolatey twist, add mini chocolate chips to the cream cheese filling.
- To increase the spice factor, mix in a dash of cinnamon or ginger.
- For a seasonal flair, incorporate pumpkin puree during the fall months for a pumpkin pie cheesecake hybrid.
Special Garnishes
Garnishing can elevate your cheesecake presentation. Here are some ideas:
- Crushed Biscoff cookies sprinkled on top for a crunchy finish.
- Fresh whipped cream dolloped on each slice for a luxurious feel.
- A drizzle of caramel sauce or melted chocolate to add rich sweetness.
Step-by-Step Instructions
Let’s dive into the simple steps to craft your delightful Biscoff Cheesecake:
- Preheat your oven to 160°C (320°F). Line the bottom of a 9-inch springform pan with parchment paper.
- In a bowl, combine the crushed Biscoff cookies and melted butter. Stir until the mixture resembles wet sand.
- Press the cookie mixture firmly into the bottom of the prepared springform pan to form an even crust. Bake in the preheated oven for 10 minutes. Remove from the oven and let it cool.
- In a large mixing bowl, beat the softened cream cheese until smooth. Gradually add in the sugar, blending until combined.
- Mix in the sour cream and vanilla extract until everything is well incorporated, scraping down the sides of the bowl as necessary.
- If you’re using gelatin, sprinkle it over 2 tablespoons of cold water and let it bloom for 5 minutes. Then, heat it gently until dissolved and mix it into the cream cheese mixture.
- Pour the cream cheese filling over the cooled crust and smooth the top with a spatula.
- Bake in the oven for approximately 45 minutes, or until the edges are set but the center still has a slight jiggle.
- Turn off the oven and let the cheesecake sit inside for an additional hour. This helps reduce cracking.
- After the hour is up, remove the cheesecake from the oven and allow it to cool to room temperature before refrigerating for at least 4 hours, or overnight for best results.
- Before serving, warm the Biscoff spread slightly and drizzle it over the chilled cheesecake.
- Garnish as desired, slice, and serve to eager guests!
Recipe Variations
This Biscoff Cheesecake can be modified in various ways to suit your cravings or dietary preferences. For a no-bake version, substitute regular gelatin with agar-agar, and set it in the refrigerator without baking. You can also swap the Biscoff cookies for any similar spiced cookies, like speculoos or ginger snaps, for a slightly different flavor profile. If you prefer a lighter cheesecake, try incorporating Greek yogurt in place of sour cream for a tangy twist!
Serving and Storage Tips
To serve your Biscoff Cheesecake, slice it carefully using a sharp, warm knife for clean cuts. It’s best enjoyed chilled, ideally after refrigerating overnight to let flavors meld together. Any leftover cheesecake should be covered in plastic wrap or stored in an airtight container in the fridge, where it can stay fresh for up to 5 days. For longer storage, consider freezing individual slices — wrap them tightly to avoid freezer burn. Just let them thaw in the fridge overnight before serving!
Helpful Tips
Here are some expert tips to guarantee your Biscoff Cheesecake turns out perfectly:
- Ensure your cream cheese is at room temperature before mixing to avoid lumps.
- Consider placing a pan of water at the bottom of the oven to create steam, helping prevent cracks in the cheesecake.
- Be cautious not to overbake; a slight shake in the center indicates it’s ready!
Special Equipment
The preparation of this Biscoff Cheesecake requires just a few basic kitchen tools:
- Springform Pan: Essential for achieving the coveted cheesecake shape and allowing for easy removal from the pan.
- Mixing Bowls: Preferably one large bowl for mixing the cream cheese filling and a smaller one for the crust.
- Electric Mixer: Useful for achieving a smooth and creamy filling without lumps.
- Spatula: Handy for smoothing the filling and drizzling the Biscoff spread.
Frequently Asked Questions
Can I make this cheesecake gluten-free?
Yes! Substitute regular Biscoff cookies with gluten-free alternatives that have a similar taste and texture.
How long should I let the cheesecake cool before refrigerating?
It’s best to allow the cheesecake to cool at room temperature for at least 1 hour before placing it in the refrigerator.
Can I make this cheesecake a day in advance?
Absolutely! In fact, making it a day ahead will enhance its flavors as it has time to set perfectly overnight.
What should I serve with Biscoff Cheesecake?
This cheesecake pairs beautifully with whipped cream, fresh fruit, or even a scoop of vanilla ice cream for an extra treat!
Conclusion
The Biscoff Cheesecake is more than just a dessert; it’s a delightful experience that brings people together. Whether you’re celebrating a special occasion or simply sweetening an ordinary day, this cheesecake is sure to impress with its rich flavors and creamy texture. Don’t forget to share your baking stories and any creative adaptations you come up with in the comments below; I’d love to hear how this recipe shines in your home. Happy baking!
Print
Irresistible Biscoff Cheesecake Recipe
- Total Time: 5 hours
- Yield: 12 servings 1x
Description
Indulge in this easy decadent Biscoff cheesecake recipe A rich dessert that’s a must try for all Biscoff lovers Satisfaction guaranteed
Ingredients
- 250g Biscoff Cookies, finely crushed
- 100g Unsalted Butter, melted
- 500g Cream Cheese, softened
- 150g Sugar
- 200g Sour Cream
- 1 teaspoon Vanilla Extract
- 2 teaspoons Gelatin Powder, optional
- 200g Biscoff Spread, for drizzling on top
Instructions
- Preheat your oven to 160°C (320°F). Line the bottom of a 9-inch springform pan with parchment paper.
- In a bowl, combine the crushed Biscoff cookies and melted butter. Stir until the mixture resembles wet sand.
- Press the cookie mixture firmly into the bottom of the prepared springform pan to form an even crust. Bake in the preheated oven for 10 minutes. Remove from the oven and let it cool.
- In a large mixing bowl, beat the softened cream cheese until smooth. Gradually add in the sugar, blending until combined.
- Mix in the sour cream and vanilla extract until everything is well incorporated, scraping down the sides of the bowl as necessary.
- If you’re using gelatin, sprinkle it over 2 tablespoons of cold water and let it bloom for 5 minutes. Then, heat it gently until dissolved and mix it into the cream cheese mixture.
- Pour the cream cheese filling over the cooled crust and smooth the top with a spatula.
- Bake in the oven for approximately 45 minutes, or until the edges are set but the center still has a slight jiggle.
- Turn off the oven and let the cheesecake sit inside for an additional hour. This helps reduce cracking.
- After the hour is up, remove the cheesecake from the oven and allow it to cool to room temperature before refrigerating for at least 4 hours, or overnight for best results.
- Before serving, warm the Biscoff spread slightly and drizzle it over the chilled cheesecake.
- Garnish as desired, slice, and serve to eager guests!
- Prep Time: 30 minutes
- hours: 4
- Cook Time: 45 minutes
- Category: Dessert
- Cuisine: International
Nutrition
- Serving Size: 1 slice
- Calories: 400 calories
- Sugar: 20 grams
- Fat: 26 grams
- Saturated Fat: 26 grams
- Carbohydrates: 38 grams
- Fiber: 1 gram
- Protein: 6 grams


