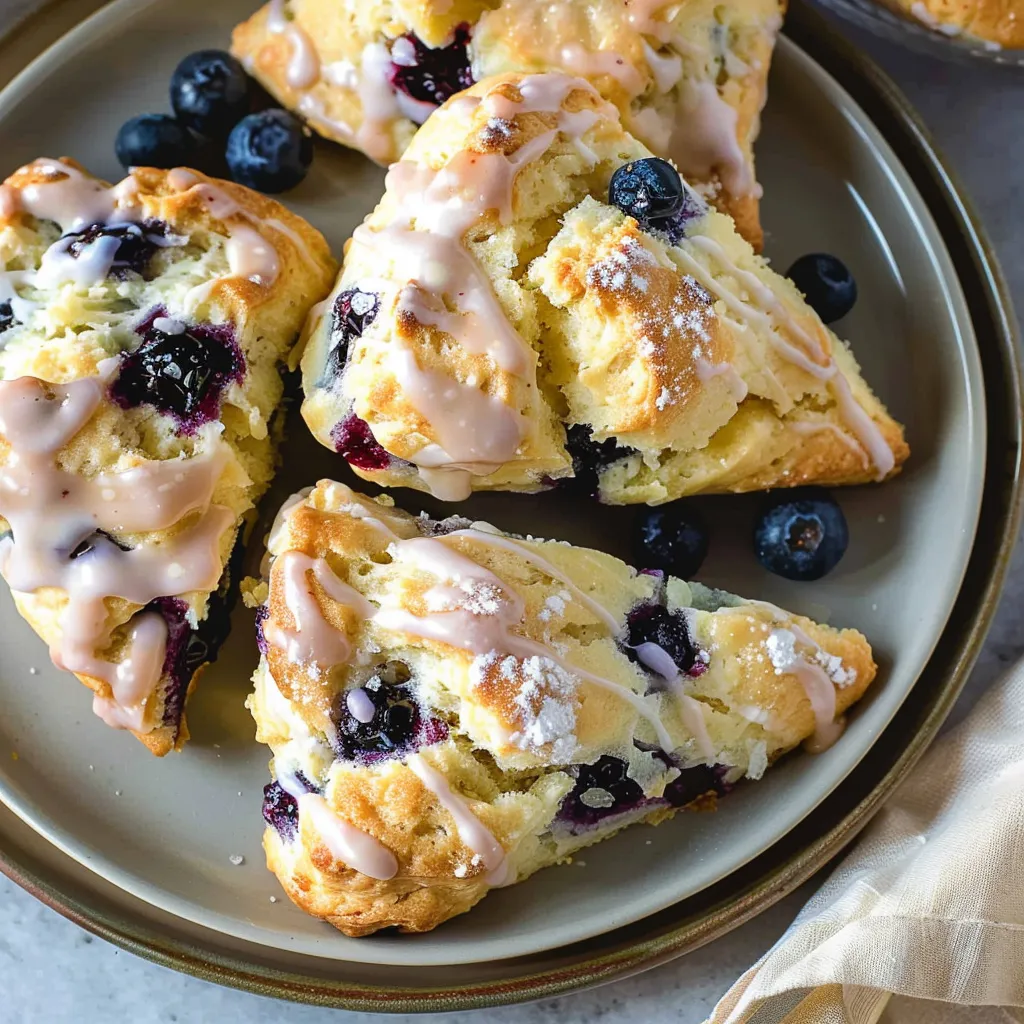
Ah, spring! The season when nature wakes up from its winter slumber and treats us to blooming flowers, chirping birds, and that all-too-tempting aroma of fresh cookies wafting through the air. A memory comes to mind: a sunny afternoon spent with my grandmother, her kitchen filled with laughter and stories while we baked. Under the soft pink cherry blossom trees in our backyard, she introduced me to a delightful treat that has become a cherished recipe in my home: Cherry Blossom Cookies. These cookies not only encapsulate the effervescent spirit of spring but are also incredibly simple to whip up. What makes them special is the unique blend of flavors and artistry in their presentation. Let’s embark on this sweet journey together!
Why You’ll Love This Recipe
Now, you might ask yourself, “What makes these cookies worth my time?” Oh, where do I begin? For starters, Cherry Blossom Cookies are a celebration of spring captured in a cookie—a little sprinkle of magic that brings joy with every bite. They’re perfect for any occasion, from a casual afternoon tea to a fancy gathering. Plus, they save time on busy days while still offering that “wow” factor to impress friends and family. They evoke that warm, fuzzy feeling of nostalgia reminiscent of those sweet moments spent with loved ones.
What It Tastes Like
Picture this: biting into a Cherry Blossom Cookie is like stepping into a cozy spring day. It begins as a soft, buttery embrace, followed by the sweet yet tart flavor of cherries dancing on your palate. The delicate crunch of the cherry blossoms gives a floral twist that’s almost like a fragrant whisper of spring. Each bite feels like indulging in a harmonious blend of nostalgia and fresh beginnings—perfect after a long, tiring day. They’re not just cookies; they’re little bites of joy!
Ingredients You’ll Need
Let’s gather the magic ingredients that bring these cookies to life!
- 1 cup unsalted butter: Adds that creamy mouthfeel that brings everything together!
- 1 cup granulated sugar: Sweetens the deal, ensuring each bite is perfectly delightful.
- 1 large egg: Binds the mixture, making every cookie soft and chewy.
- 2 cups all-purpose flour: The cornerstone of any cookie, providing that essential structure.
- 1 teaspoon baking powder: Helps the cookies rise lightly, adding a fluffy texture.
- 1/2 teaspoon salt: Balances out the sweetness, bringing everything together beautifully.
- 1 teaspoon vanilla extract: A splash of warmth that complements the flavors perfectly.
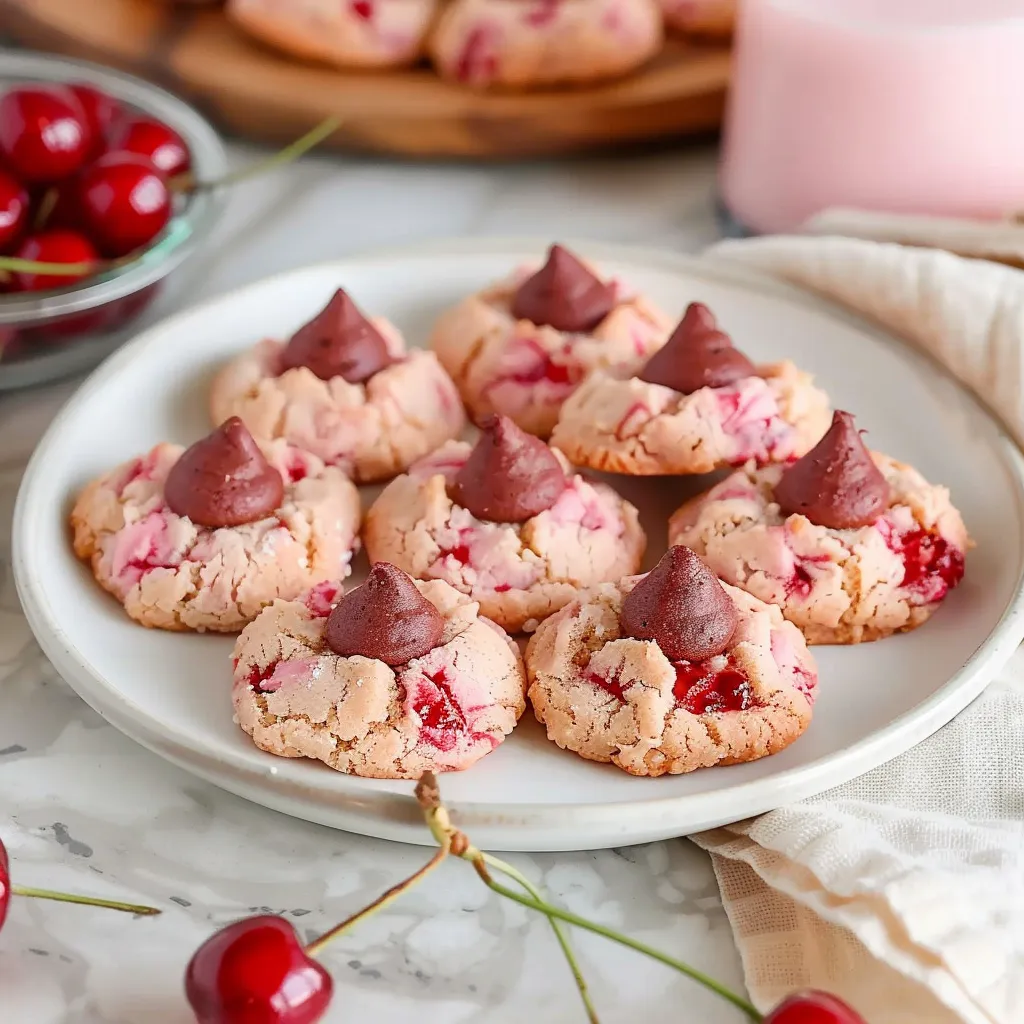
- 1 cup chopped cherries (fresh or frozen): They’re the heart of our cookies, bursting with summer vibes.
- Edible flower petals (for decoration): Because cookies should always look as amazing as they taste!
Optional Additions:
- Use almond extract instead of vanilla for a different flavor twist.
- Add a sprinkle of chocolate chips for a delightful chocolate-cherry combo.
Special Garnishes:
- Powdered sugar dusting for a snowy finish.
- Fresh mint leaves for a pop of color.
Step-by-Step Instructions
Let’s get our hands a little floury and bake some cheerful cookies!
- Preheat Your Oven: Begin by preheating your oven to 350°F (175°C). This step is vital—don’t rush it, as even temperature ensures a perfectly baked cookie.
- Cream the Butter and Sugar: In a large mixing bowl, combine softened butter and granulated sugar using an electric mixer until it’s light and fluffy. This step is where the magic begins—don’t forget to scrape down the sides, as we want every bit mixed in!
- Add the Egg and Vanilla: Incorporate the egg and vanilla extract into your creamy mixture, mixing until smooth. It’s starting to smell delightful!
- Sift the Dry Ingredients: In a separate bowl, whisk together the flour, baking powder, and salt. Slowly add this mix to your wet ingredients, stirring until just combined. Don’t overmix—trust me, that’s where disaster strikes!
- Add the Cherries: Gently fold in your chopped cherries. This is where you get to play artist—make sure they are evenly distributed without crushing them too much!
- Shape the Cookies: Using a cookie scoop or your hands (floured hands keep things tidy!), drop rounded tablespoons of dough onto a baking sheet lined with parchment paper. Be sure to leave some space between each cookie, as they’ll spread a bit.
- Bake: Pop those trays in the oven and let them bake for around 12-15 minutes or until the edges are lightly golden. This step might test your patience, so perhaps pour yourself a cup of coffee while you wait—it’s worth it!
- Cool and Decorate: Once baked, pull the cookies out of the oven and let them rest on the baking sheet for about 5 minutes before transferring to a cooling rack. When cool, sprinkle with powdered sugar and add your edible flowers for that beautiful touch. Voilà!

Recipe Variations
Like any good recipe, Cherry Blossom Cookies can be a canvas for creativity:
- Cherry Almond Cookies: Use almond extract and toast some slivered almonds for a crunch!
- Chocolate Cherry Cookies: Fold in chocolate chips or drizzle melted chocolate on top for a divine twist.
- Gluten-Free Version: Substitute all-purpose flour with almond flour for a gluten-free treat.
Serving & Storage Tips
Once you’ve baked your cherry blossom cookies, it’s hard to stop at just one! Serve them warm with a glass of milk, or present them as a charming addition to any spring gathering. If you happen to have leftovers (though I doubt it!), store the cookies in an airtight container at room temperature where they’ll stay fresh for about a week.
For creative leftovers, you can crumble them over vanilla ice cream for a delightful sundae. Trust me; there’s nothing quite like a Cherry Blossom Cookie sundae to cheer you up!
Helpful Tips
Now, a few words of wisdom from my kitchen adventures to make your cookie-baking experience even smoother:
- Soft Butter: Use softened butter—it’s key for that creamy texture. If you forget to take it out beforehand, you can microwave it in short bursts, but be careful not to melt it!
- Don’t Skip Cooling: Resist the urge to eat them straight from the oven! Cooling them helps them set perfectly.
- Use Fresh Cherries: If using frozen, make sure to thaw and drain them well, or your dough might get soggy.
Special Equipment
You won’t need any fancy gadgets to make these cookies, but here are a couple of helpful tools:
- Cookie Scoop: This makes portioning your dough easier and gives you even-sized cookies (because who doesn’t love uniform cookies?).
- Parchment Paper: Lining your baking sheet with parchment helps in easy cleanup and prevents sticking.
Frequently Asked Questions
Can I freeze these cookies?
Absolutely! Once baked, let them cool completely, then store them in an airtight container in the freezer. They can last for up to three months. Just thaw them at room temperature when you’re ready to enjoy them.
Can I use dried cherries instead of fresh?
Yes, dried cherries can be used, but consider reducing the sugar slightly, as they are often sweeter than fresh cherries.
What can I do if my dough seems too sticky?
If your dough is overly sticky, simply add a little more flour, a tablespoon at a time, until it reaches a manageable consistency. The dough should be soft but not too sticky to handle.
How can I make these cookies more visually appealing?
Using edible flower petals for decoration, or drizzling melted chocolate on top, will elevate their appearance and make them even more inviting!
Conclusion
So, there you have it! A lovely recipe for Cherry Blossom Cookies that swirls together the joys of baking, nostalgia, and the beautiful spirit of spring. These cookies remind me that the simplest things can bring the greatest joy. Whether you whip up a batch for a gathering or just for yourself to savor on a quiet evening, I can assure you they’ll bring a smile to your face. So, roll up those sleeves, get baking, and don’t forget to share your cookie adventures in the comments below. I can’t wait to hear your stories and variations!
Print
Delicious Cherry Blossom Cookies Recipe for Spring Festivities
- Total Time: 30 minutes
- Yield: 24 cookies 1x
Description
Try this delightful Cherry Blossom cookie recipe for spring festivities. Perfect for celebrations, these treats will impress your guests!
Ingredients
Instructions
Notes
These Cherry Blossom Cookies capture the essence of spring with a delightful blend of sweet cherries and buttery goodness, perfect for any occasion.
- Prep Time: 15 minutes
- Cook Time: 15 minutes
- Category: Dessert
- Cuisine: American
Nutrition
- Serving Size: 24 cookies
- Calories: 120 calories
- Sugar: 8g
- Fat: 5g
- Carbohydrates: 18g
- Fiber: 0g
- Protein: 1g