Ah, the holiday season! A time for cozy gatherings, the scent of pine, and more delicious cookies than you can shake a whisk at. This year, I decided to create something a bit different, something that beckons all the odds and ends floating around in your pantry. Enter the Christmas Kitchen Sink Cookies! Think of them as the “everything-but-the-kitchen-sink” cookies, where you can toss in what you love and leave out what you don’t. The result? Brilliantly chewy, flavorful bites that will have everyone reaching for just one more—if they can manage to stay away from the cookie jar!
So grab your favorite festive mug, perhaps fill it with hot cocoa or even spiced cider, and let’s dive into this cookie adventure that promises the warmth of home and the joy of shared memories.

Why You’ll Love This Recipe
Okay, let’s get real here. Who doesn’t love cookies? But these are Christmas Kitchen Sink Cookies, and they come with a myriad of perks. First off, they are perfect for using up those half-eaten bags of candy, nuts, and dried fruits cluttering your kitchen. You’ll feel like a cookie magician, conjuring deliciousness from what seems like leftovers.
Secondly, the versatility of this recipe is unmatched. Is your family a fan of dark chocolate? Go for it! Prefer tangy cranberries over nuts? You do you! These cookies adapt to your whims, and that’s what makes this recipe worth trying. With a mix of crispy edges and soft, chewy centers, it’s like each bite gives you a warm hug after a long day. Who wouldn’t want that?!
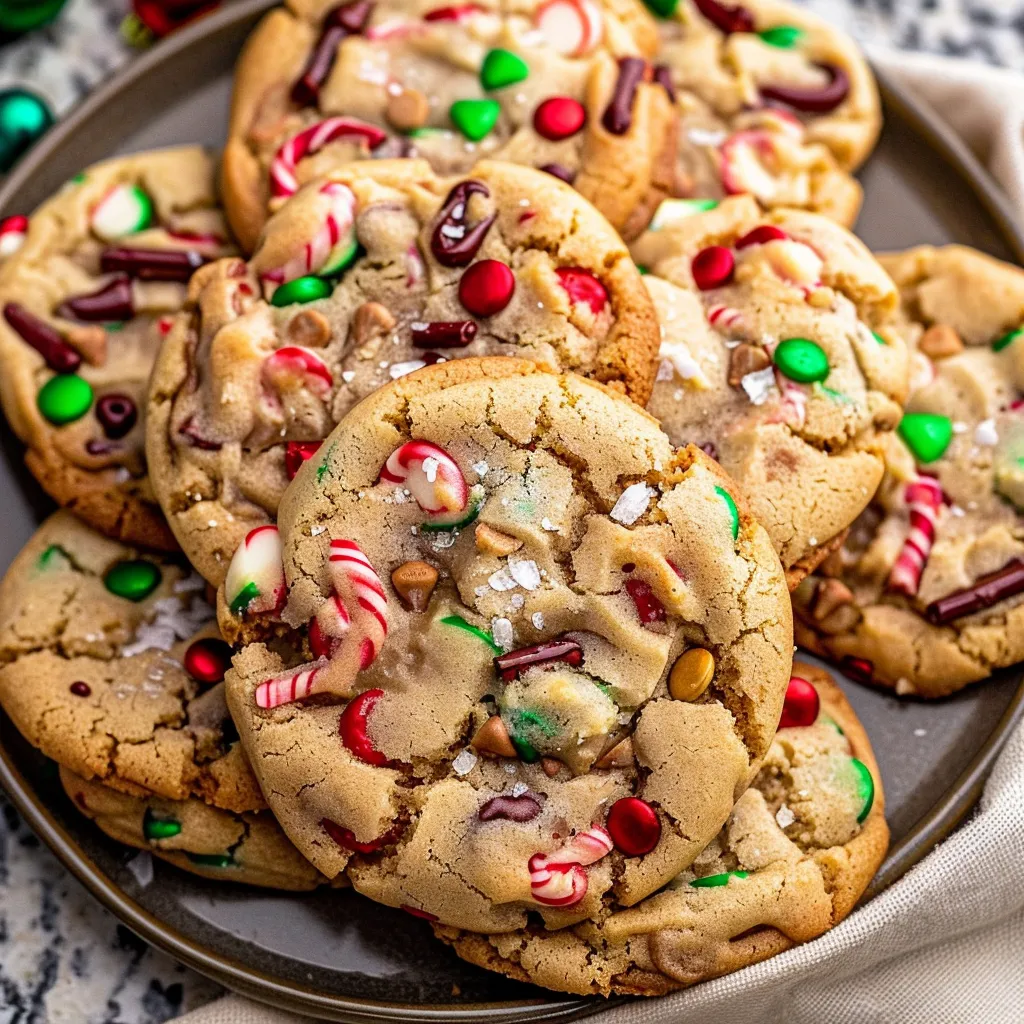
What It Tastes Like
Imagine this: you sink your teeth into a cookie, and at first, there’s that delightful crunch on the outside. But as you chew, it gives way to a warm, chewy center packed with flavor—like that first cozy bite of a winter dessert that carries all the nostalgia of holiday cheer. The melty chocolate mingles with pops of tart cranberries, crunchy nuts, and even a surprise or two if you’ve opted for a fun mix-in.
It’s harmonious, it’s festive—and believe me when I say, your taste buds will sing in the most joyous carol. They’re sweet, with just the right hints of saltiness and textures that keep the cookies interesting. Trust me, these cookies will be your new holiday staple, and perhaps even the star of your Christmas cookie platter!
Ingredients You’ll Need
Here’s what you need to gather before you embark on your cookie-baking journey:
- 2 cups all-purpose flour: The backbone of your cookie, providing that essential structure.
- 1 teaspoon baking soda: This is your little magic pixie that helps the dough rise and creates that fluffy texture.
- ½ teaspoon salt: Balances the sweetness and enhances the other flavors.
- ¾ cup unsalted butter, softened: Adds a creamy richness and helps achieve that coveted chewy texture.
- 1 cup brown sugar: For that warm, caramel-like sweetness that screams comfort.
- ½ cup granulated sugar: A classic sweetener that gives balance.
- 2 large eggs: Essential for binding everything together and adding moisture.
- 1 teaspoon vanilla extract: This simple addition brings a beautiful depth of flavor.
- 1 cup chocolate chips (dark, milk, or a mix!): Because who can say no to chocolate?
- 1 cup chopped nuts (walnuts, pecans, or your favorite!): Adds crunch for that satisfying bite.
- 1 cup dried cranberries (or raisins): For a festive twist and a little tartness.
Optional Additions:
- Baking M&Ms or holiday sprinkles for a fun twist.
- Substitute half the flour with oats for a chewy texture.
- A scoop of shredded coconut for that tropical flair.
- Different nut butters instead of butter for a richer flavor.
Special Garnishes:
- Flaky sea salt sprinkled on top before baking.
- A dusting of powdered sugar after they cool for that snowy effect.
Step-by-Step Instructions
Now that we’ve gathered our ingredients, let’s jump into the joyful process of bringing these cookies to life. Baking should always feel like a comforting adventure—like putting together a cozy puzzle.
- Preheat your oven: Start by preheating it to 350°F (175°C). This is crucial, so don’t skip it! Prepping your ingredients while the oven warms up makes for smooth sailing.
- Mixing the dry ingredients: In a large bowl, whisk together the flour, baking soda, and salt. Just imagine the scent of the flour and salt mingling—so delightful!
- Cream the butter and sugars: In another large bowl, beat the softened butter, brown sugar, and granulated sugar until it’s light and fluffy. This is where the magic happens! You’re creating a base that’s airy and ready to embrace the other flavors.
- Add the eggs and vanilla: Beat in the eggs one at a time, then stir in the vanilla extract. It will feel like a creamy hug for your ingredients—totally comforting.
- Combine wet and dry ingredients: Gradually add the flour mixture to the butter mixture. Mix just until combined—careful not to overmix! That could result in tough cookies, and we don’t want anything tough around here!
- Stir in the mix-ins: Fold in the chocolate chips, nuts, and cranberries (or whatever else your heart desires). This is where it gets really fun. You can practically hear them whispering, “Pick me, pick me!”
- Portion out the dough: Using a cookie scoop or tablespoon, drop rounded tablespoons of dough onto ungreased baking sheets, spaced about 2 inches apart.
- Bake: Pop them into the preheated oven and bake for about 10-12 minutes, or until the edges are light golden brown. The centers may still look a tad soft—that’s perfect! They’ll continue to cook a little while cooling.
- Cool on wire racks: After baking, let them sit on the baking sheet for about 5 minutes before transferring them to wire racks. Patience pays off here as they firm up!
Recipe Variations
Feeling adventurous? Here are a few fun twists:
- Swap chocolate chips for white chocolate or butterscotch chips for a completely different flavor profile.
- Add spices, like cinnamon or ginger, for a holiday zing!
- Try using nut butters (like peanut or almond) in place of butter for a richer taste.
Serving & Storage Tips
These cookies are best enjoyed fresh, but they can stay delightful for a few days. Store them in an airtight container at room temperature to keep that chewy goodness alive. If you happen to have leftovers (and that’s a big if!), they can easily be frozen. Just make sure to cool them completely first, then layer them in a freezer bag with parchment paper between layers to prevent sticking. When you’re ready, thaw at room temperature and the magic is back!
Helpful Tips
Here are a few pointers I’ve learned along the way:
- Don’t rush chilling the dough—or you might end up with a blob of cookie batter! A quick chill helps them hold their shape while baking.
- If you feel adventurous, give the dough a little extra time in the fridge. Overnight chilling can develop deeper flavors!
- Don’t skip the sprinkle of salt on top before baking; it adds a pop that contrasts beautifully with all that sweetness.
Special Equipment
While you can get away with basic tools, having the following can make your life easier:
- Cookie scoop: This handy tool helps portion out uniform cookies and takes the guesswork out of measuring!
- Silicone baking mats: These provide even heat distribution and prevent sticking—no need for baking spray!
- Mixing bowls in various sizes: It’s great to have multiple on hand; trust me, you’ll be thankful when it’s time to do the mixing dance.
FAQ
Can I make these cookies gluten-free?
Absolutely! Just substitute the all-purpose flour with a 1:1 gluten-free flour blend, and you’ll be all set!
Can I use fresh fruit instead of dried?
It’s not recommended as fresh fruit has more moisture, which might affect the texture. Stick to dried for the best results!
How do I keep cookies chewy instead of crunchy?
Bake them just until the edges are golden, and let them cool completely on the baking sheet before transferring. The residual heat will keep them nice and soft!
How many cookies does this recipe make?
About two dozen, depending on how big you scoop them! It’s a wonderful excuse to share—or not!

Conclusion
So there you have it, my beloved Christmas Kitchen Sink Cookies! They’re more than just a dessert; they’re a way to bring people together, fill the kitchen with scents that spark joy, and celebrate the little things that make the holidays bright. Whether you’re leaving them out for Santa or gifting a jar to a friend, these cookies are bound to create sweet memories.
Give them a try and let me know how yours turn out! Did you try any fun mix-ins? I can’t wait to hear your stories in the comments. Happy baking and cheers to the holiday season!
Print
Irresistible Christmas Kitchen Sink Cookies Recipe to Wow Guests
- Total Time: 32 minutes
- Yield: 24 cookies 1x
Description
Delight in these Christmas kitchen sink cookies that combine festive flavors perfect for impressing your guests this holiday season
Ingredients
Instructions
- Prep Time: 20 minutes
- Cook Time: 12 minutes
- Category: Dessert
- Cuisine: American
Nutrition
- Calories: 150
- Sugar: 10g
- Fat: 7g
- Carbohydrates: 22g
- Fiber: 1g
- Protein: 2g


