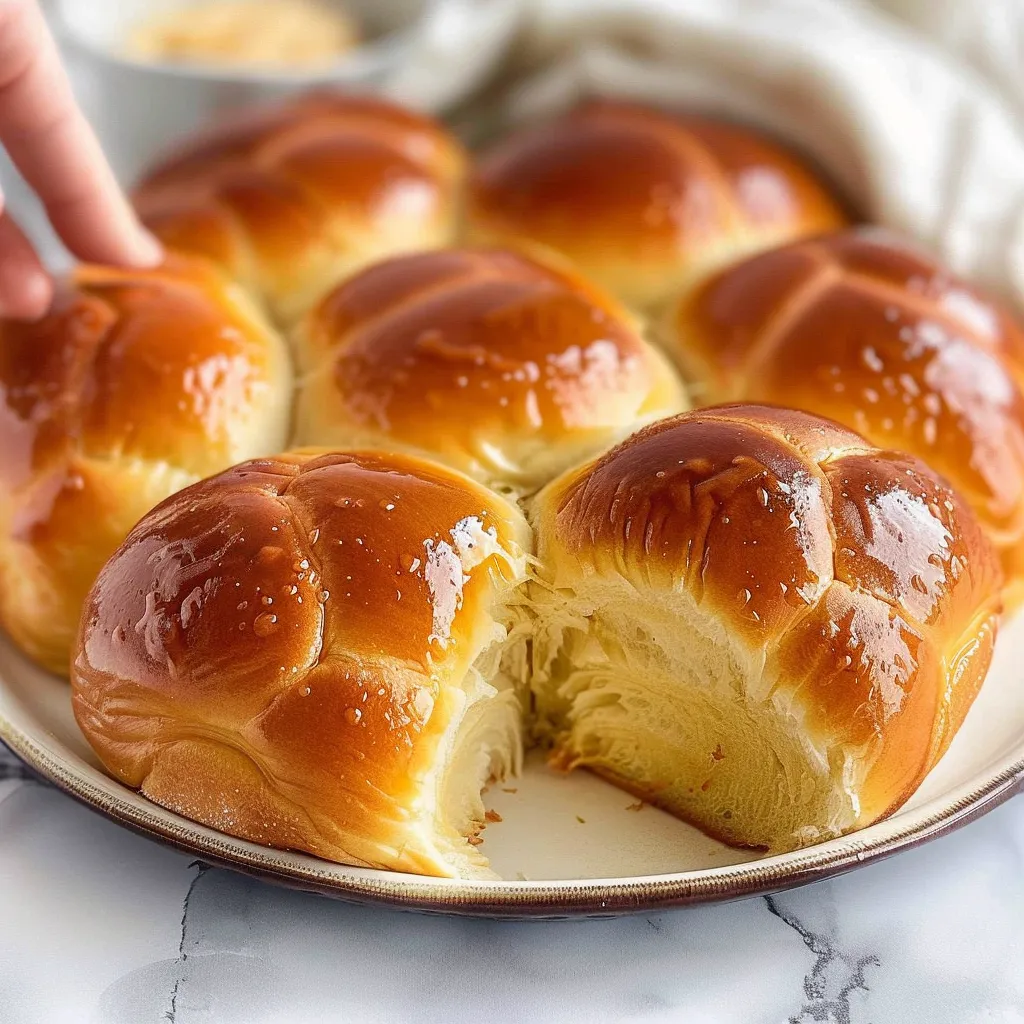
There’s something undeniably magical about pulling a tray of freshly baked rolls from the oven, their golden tops enticingly crackling and their soft, pillowy interiors whispering promises of warmth and comfort. I remember one particular Sunday afternoon, the sky a lovely shade of blue, with my kids giggling in the backyard as I stood in the kitchen, enveloped in the delightful aroma of baking bread. It was in that serene moment I decided to try my hand at Fluffy Japanese Dinner Rolls, a recipe that has always intrigued me with its promise of soft, cloud-like goodness. Little did I know that these rolls would become a beloved staple at family dinners, delicate yet hearty enough to complement any dish.
Why You’ll Love This Recipe
Imagine the satisfaction of sinking your teeth into a roll that’s as light as a whisper yet rich in flavor—this is what makes Japanese dinner rolls such a cherished recipe. They’re the perfect solution for busy weeknights and lazy Sundays alike, adding a touch of elegance to your meals without requiring a culinary degree. They’re like a warm hug from your grandma—a simple pleasure that can brighten your day. And let’s be honest, there’s something incredibly satisfying about making bread at home. It’s a bit like your own magic show; you start with simple ingredients, and after some time and love, you conjure up these beautifully fluffy rolls. Plus, they freeze beautifully, so why not make a batch to have on hand for those nights when life feels a bit too hectic?
What It Tastes Like
As you take that first bite, the sensation is akin to fluffy cotton clouds dissolving on your tongue. There’s a slight sweetness—that’s the secret ingredient of milk and sugar—paired with a buttery richness that feels like a cozy blanket on a chilly day. They’re lightly golden on the outside, with a soft, tender crumb that makes you want to savor each mouthful. Whether enjoyed with a spread of butter, your favorite jam, or dipped into savory soups, these rolls become a delightful accompaniment to almost everything. Trust me, once they grace your table, they won’t last long!
Ingredients You’ll Need
- 4 cups all-purpose flour: This is the backbone of your rolls, providing the necessary structure while still allowing for that coveted fluffiness.
- 1/4 cup granulated sugar: A touch of sweetness to invite flavor and enhance browning.
- 1 tablespoon instant yeast: This little powerhouse is what helps our dough rise, bringing those rolls to life!
- 1 teaspoon salt: A crucial element for enhancing flavors; salt makes everything better!
- 1 cup whole milk: Adds creaminess and helps create that tender texture we love so much.
- 1/4 cup unsalted butter: Make sure it’s softened; butter is what gives these rolls their iconic richness and softness.
- 1 large egg: Acts as a binder and adds a lovely richness to the dough.
Optional Additions: Consider tossing in some herbs (like rosemary or thyme) for a hint of savory goodness, or even a dollop of garlic butter for an extra flavor kick. For a sweet version, you could fold in chocolate chips or dried fruits. The possibilities are pretty endless!
Special Garnishes: A sprinkle of flaky sea salt or a brush of melted butter right before serving can make these rolls look as beautiful as they taste.
Step-by-Step Instructions
Ready to embark on this culinary adventure? Let’s go!
Mix the Dry Ingredients: In a large bowl, whisk together the flour, sugar, yeast, and salt. Remember, mixing the dry ingredients thoroughly helps ensure even distribution of flavors.
Heat the Wet Ingredients: In a small saucepan, heat the milk and butter over low heat until warm and the butter has melted. Let it cool slightly—trust me; you don’t want to scramble that egg when you mix them together!
Combine: Gradually pour the warm milk mixture into the dry ingredients, followed by the egg. Stir until everything is combined and a soft dough begins to form. It’s a bit sticky, but don’t panic—this is where the magic happens!
Knead: Turn the dough out onto a floured surface and knead for about 10 minutes. This is a good time to shake off the week’s stress! The dough should become smooth and elastic.
Shape the Dough: Form the dough into a ball and place it in a lightly greased bowl. Cover it with a clean kitchen towel and let it rise in a warm, cozy spot until it has doubled in size—about 1 hour.
Preheat the Oven: Preheat your oven to 350°F (175°C). The aroma of baking bread will make your kitchen feel like a warm embrace!
Shape the Rolls: Once the dough has risen, punch it down gently to release the air, then turn it out onto a floured surface again. Divide the dough into 12 equal pieces and shape each piece into a ball. This is where you can get creative with sizes, too—if you want mini rolls, go for it!
Baking Time: Place the rolls in a greased 9×13-inch baking dish, cover with the towel again, and let them rise for another 30-40 minutes. They’ll puff up beautifully! Then, bake for 20-25 minutes, or until they’re golden brown.
Cool and Enjoy: Let them cool slightly before serving. If you can resist the temptation to dive right in, it’s worth waiting just a few minutes!
Recipe Variations
Feeling adventurous? Here are a few tweaks to consider:
- Cheesy Rolls: Add shredded cheese into the dough before shaping. Imagine a gooey, cheesy center—heavenly!
- Herb-Infused Rolls: Mix in fresh herbs like chives or dill for an aromatic twist that pairs beautifully with soups.
- Sweet Rolls: Swirl in your favorite jam or cinnamon sugar before rolling them up for a sweet treat!
Serving & Storage Tips
These rolls are best served warm, straight from the oven. They make an excellent side for any meal! If you have any leftovers—though I highly doubt it after a gathering—store them in an air-tight container at room temperature for a couple of days. You can also freeze them for up to a month. Just ensure they are completely cooled before wrapping them tightly. When you’re ready to enjoy, reheat them in a 350°F (175°C) oven for about 10 minutes, and they’ll be as fluffy as the day you made them!
If you end up with a few rolls lingering around, consider making mini sandwiches for lunch or using them to soak up a lovely stew or soup. Waste not, want not!

Helpful Tips
Here are some little nuggets of wisdom from my baking journey:
- Make sure your yeast is fresh; expired yeast won’t give your dough the rise it deserves.
- Use the “poke test” to check if the dough is ready. If you poke it and the indent springs back slowly, it’s good to go!
- Don’t rush the rising process; it’s where the magic truly happens and gives those rolls their signature fluffiness.
Special Equipment
- Stand Mixer (Optional): While mixing by hand is totally doable, a stand mixer with a dough hook can really cut down on your effort.
- 9×13-inch Baking Dish: A must-have for those perfectly shaped rolls. It holds them snugly together while baking!
- Kitchen Scale: If you want to be precise, weighing your ingredients can lead to even better consistency.
Frequently Asked Questions
Can I use bread flour instead of all-purpose flour?
Absolutely! Bread flour has a higher protein content, which can give your rolls even more chewiness and height.
What should I do if my dough doesn’t rise?
Check the temperature of your kitchen; it may be too cold. Try moving the dough to a warmer spot or creating a little “proofing box” by placing it in an oven that’s turned off but with the light on.
Can I add whole grains or flours?
A bit of whole wheat flour can be a nice addition, but make sure to adjust the liquid as it absorbs more moisture.
How do I know when they’re done baking?
The rolls should be golden brown on top, and you can also tap them lightly on the bottom; they should sound hollow when they’re done!
Conclusion
Fluffy Japanese Dinner Rolls have quickly become a cherished piece of our family’s meal traditions, a recipe that brings both comfort and joy. Whether it’s a cozy Sunday dinner, a festive gathering, or just a moment of celebration on an otherwise ordinary day, these fluffy delights hold a special place in our hearts—and on our table. I can’t wait for you to experience the happiness that these rolls can bring. Please share your own adaptations or stories about your baking adventures in the comments below; I’d love to hear all about your own roll-making journey!
Print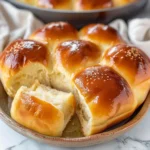
Master Fluffy Japanese Dinner Rolls: A Game-Changing Recipe
- Total Time: 1 hour 30 minutes
- Yield: 12 rolls 1x
Description
Create the ultimate Fluffy Japanese Dinner Rolls with this game-changing recipe. Light, airy, and perfect for any meal. Impress your guests today!
Ingredients
Instructions
Notes
Deliciously soft and fluffy Japanese dinner rolls that are perfect for any meal.
- Prep Time: 30 minutes
- Cook Time: 25 minutes
- Category: Bread
- Cuisine: Japanese
Nutrition
- Serving Size: 12 rolls
- Calories: 150
- Sugar: 2g
- Fat: 5g
- Carbohydrates: 24g
- Fiber: 1g
- Protein: 4g


