There’s something magical about the aroma of fresh doughnuts wafting through your kitchen, isn’t there? Those fluffy, sweet confections topped with a shiny glaze can turn an ordinary day into a delightful experience. Making your own glazed doughnuts at home isn’t just a treat; it’s a fun adventure that fills your space with warmth and joy. Whether you’re hosting a brunch, surprising your loved ones, or simply craving something sweet, this recipe will guide you step-by-step to create the perfect glazed doughnuts that melt in your mouth.
Why You’ll Love This Recipe
Imagine sinking your teeth into a warm doughnut—soft, sweet, and topped with a glossy glaze that dances on your taste buds. This recipe is a crowd-pleaser, and here’s why:
- Easy to Follow: Even if you’re a beginner in the kitchen, these doughnuts are simple to make with step-by-step instructions.
- Customizable: Want to add a twist? You can easily infuse flavors or add fillings, making each batch uniquely yours.
- Freshness Guaranteed: There’s nothing quite like fresh doughnuts. You control the ingredients, ensuring they’re as delicious as they are safe.
- Perfect for Any Occasion: From breakfast to a sweet surprise for guests, these glazed doughnuts fit the bill anytime.
Ingredients You’ll Need
Before you dive in, let’s gather everything you’ll need to whip up these delightful treats. Here’s a comprehensive ingredient list:
- 2 ¾ cups all-purpose flour
- ⅓ cup granulated sugar
- 2 ¼ teaspoons active dry yeast (or one packet)
- 1 teaspoon salt
- ½ teaspoon ground nutmeg
- ½ cup milk, warmed
- 2 large eggs
- ¼ cup unsalted butter, melted
- Oil for frying (vegetable or canola)
- For the glaze:
- 2 cups powdered sugar
- 2 tablespoons milk
- 1 teaspoon vanilla extract
Step-by-Step Instructions
Now that you have everything ready, it’s time to create your masterpiece. Follow these detailed steps, and soon you’ll find yourself surrounded by the delightful scent of homemade glazed doughnuts.
1. Prepare the Dough
Start by activating the yeast. In a small bowl, combine the warm milk with the yeast and let it sit for about 5-10 minutes until frothy. This step is crucial because it ensures your dough rises beautifully.
2. Mix Dry Ingredients
In a large mixing bowl, whisk together the all-purpose flour, sugar, salt, and nutmeg. This blend will provide the basic structure and flavor for your doughnuts.
3. Combine Wet and Dry Ingredients
Once your yeast is ready, add it along with the eggs and melted butter to the dry ingredient mixture. Stir until the dough begins to take shape. You can use a wooden spoon or your hands for this task.
4. Knead the Dough
Transfer the dough to a floured surface. Knead for about 5-7 minutes until the dough is smooth and elastic. This process helps develop the gluten, giving your doughnuts that delightful texture.
5. Let the Dough Rise
Shape the dough into a ball and place it in a greased bowl, covering it with a clean kitchen towel. Let it rise in a warm area for about 1 to 1.5 hours until it doubles in size. Patience is key during this stage!

6. Shape the Doughnuts
After the dough has risen, punch it down to release the air. On a floured surface, roll it out to about ½ inch thick. Using a doughnut cutter or two round cutters, cut out doughnuts and their centers.
7. Second Rise
Place the doughnuts on a floured baking sheet, and let them rest for another 30-45 minutes. This second rise is essential for achieving that light and fluffy texture.
8. Prepare for Frying
In a deep fryer or large pot, heat your oil to 350°F (175°C). To test if it’s ready, drop a small piece of dough into the oil; if it bubbles and rises to the surface, you’re good to go.
9. Fry the Doughnuts
Carefully place the doughnuts into the hot oil, frying a few at a time to avoid overcrowding. Fry each side for about 1-2 minutes, or until golden brown. Use a slotted spoon to remove them and place them on paper towels to absorb excess oil.
10. Make the Glaze
While the doughnuts cool slightly, prepare the glaze by whisking together powdered sugar, milk, and vanilla extract in a bowl until smooth. You want a nice dipping consistency.
11. Glaze the Doughnuts
Once the doughnuts are warm but not too hot, dip the tops into the glaze, allowing excess to drip off. Place them on a wire rack over parchment paper to let the glaze set.
Serving and Storage Tips
Now that your glazed doughnuts are ready, it’s time to enjoy them! A fresh batch is best served warm, but here are some tips for serving and storing:
- Serving: Serve doughnuts as they are or with a side of coffee or milk for a cozy treat. They also pair well with fresh fruit.
- Storage: If you have leftovers (though they may not last long!), store them in an airtight container at room temperature for 1-2 days. For longer storage, consider freezing them; just ensure they’re properly sealed to prevent freezer burn.
Helpful Tips
- Make sure your ingredients are at room temperature. It helps create a smoother dough.
- Experiment with flavors! Add spices like cinnamon or nutmeg, or infuse your glaze with citrus zest.
- For a fun twist, try filling the doughnuts with jam, custard, or even whipped cream after frying.
Frequently Asked Questions (FAQ)
Can I bake these doughnuts instead of frying them?
Yes, you can! If you prefer baked doughnuts, preheat your oven to 375°F (190°C) and bake for about 10-15 minutes. They may not be as fluffy as fried doughnuts but will still be delicious!
What kind of oil should I use for frying?
A neutral oil like vegetable or canola oil is best for frying doughnuts. Avoid using strong-flavored oils like olive oil, as they can impart unwanted flavors to your doughnuts.
Can I make doughnut holes with this recipe?
Absolutely! Just use the leftover dough scraps or create smaller rounds from the main dough. Fry them just like the doughnuts for delicious treats!
How do I know when the oil is hot enough?
Dropping a small piece of dough into the oil is a reliable method. If it bubbles and rises quickly, the oil is sufficiently hot. Use a thermometer for more precision, aiming for 350°F (175°C).
What can I do if my dough isn’t rising?
If your dough isn’t rising, it may be due to inactive yeast. Ensure that your yeast is fresh and that the milk wasn’t too hot when you activated it. A warm, draft-free environment also helps. If all fails, you might need to start over.
Conclusion
Homemade glazed doughnuts aren’t just a recipe; they’re an experience filled with warmth and joy. The process of making them—from mixing the ingredients to watching them rise and fry—is satisfying, and the end result is pure bliss. Whether you’re preparing them for a special occasion or treating yourself, these doughnuts are sure to impress. So roll up your sleeves, put on that apron, and let the sugary goodness unfold. Enjoy every bite of your homemade glazed doughnuts!
Print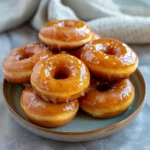
Irresistible Glazed Doughnuts Delightful Treats to Savor
- Total Time: 50 minutes
- Yield: 12 doughnuts 1x
Description
Savor irresistible glazed doughnuts delightful treats perfect for any occasion Indulge in their sweet glaze and soft texture today
Ingredients
- 2 ¾ cups all-purpose flour
- ⅓ cup granulated sugar
- 2 ¼ teaspoons active dry yeast (or one packet)
- 1 teaspoon salt
- ½ teaspoon ground nutmeg
- ½ cup milk, warmed
- 2 large eggs
- ¼ cup unsalted butter, melted
- Oil for frying (vegetable or canola)
- For the glaze:
- 2 cups powdered sugar
- 2 tablespoons milk
- 1 teaspoon vanilla extract
Instructions
- Activate the yeast by combining warm milk with the yeast and letting it sit for about 5-10 minutes until frothy.
- In a large mixing bowl, whisk together the all-purpose flour, sugar, salt, and nutmeg.
- Add the activated yeast, eggs, and melted butter to the dry ingredients, stirring until the dough begins to take shape.
- Transfer the dough to a floured surface and knead for about 5-7 minutes until smooth and elastic.
- Shape the dough into a ball, place it in a greased bowl, cover with a towel, and let it rise in a warm area for 1 to 1.5 hours.
- Roll the dough out to about ½ inch thick on a floured surface, and cut out doughnuts using a cutter.
- Let the cut doughnuts rest on a floured baking sheet for 30-45 minutes.
- Heat oil to 350°F (175°C) in a deep fryer or large pot.
- Fry the doughnuts a few at a time, for about 1-2 minutes on each side, until golden brown.
- Prepare the glaze by whisking powdered sugar, milk, and vanilla extract until smooth.
- Dip the warm doughnuts in the glaze and let them rest on a wire rack.
- Prep Time: 30 minutes
- hours: 1-1.5
- Cook Time: 20 minutes
- Category: Dessert
- Cuisine: American
Nutrition
- Calories: 250 calories
- Sugar: 15 grams
- Fat: 10 grams
- Saturated Fat: 10 grams
- Carbohydrates: 38 grams
- Fiber: 1 gram
- Protein: 4 grams


