Picture this: a warm summer evening, the sun dipping low on the horizon, painting the sky in hues of orange and pink. You’re gathered with family and friends, the laughter bubbling like the spring water that quenches your thirst. Someone mentions dessert—and suddenly the air is filled with anticipation. Enter the star of the show: my homemade Key Lime Pie Bars. These delightful treats are a taste of paradise, merging the tangy brightness of fresh key limes with a buttery, crumbly crust, all enveloped in comforting creaminess. Really, they’re like summer captured in a bite. What inspired this recipe? Let’s just say, every ounce of nostalgia comes rushing back to me from beach vacations and sunny picnics where these bars were a staple.
Why You’ll Love This Recipe
Let’s get real for a moment. You’re busy. I get that! Between juggling work, family, and—let’s be honest—life’s unexpected challenges, finding time to whip up elaborate desserts can feel impossible. That’s where these Key Lime Pie Bars come into play. They’re uncomplicated yet pack a flavorful punch, making them the perfect dessert for any occasion. You’ll be amazed at how something so simple can taste like it was crafted by a master pastry chef. Plus, these bars save time and trouble. You can make them ahead of time; they store beautifully, always ready to impress last-minute guests or satisfy your late-night sweet tooth.
What It Tastes Like
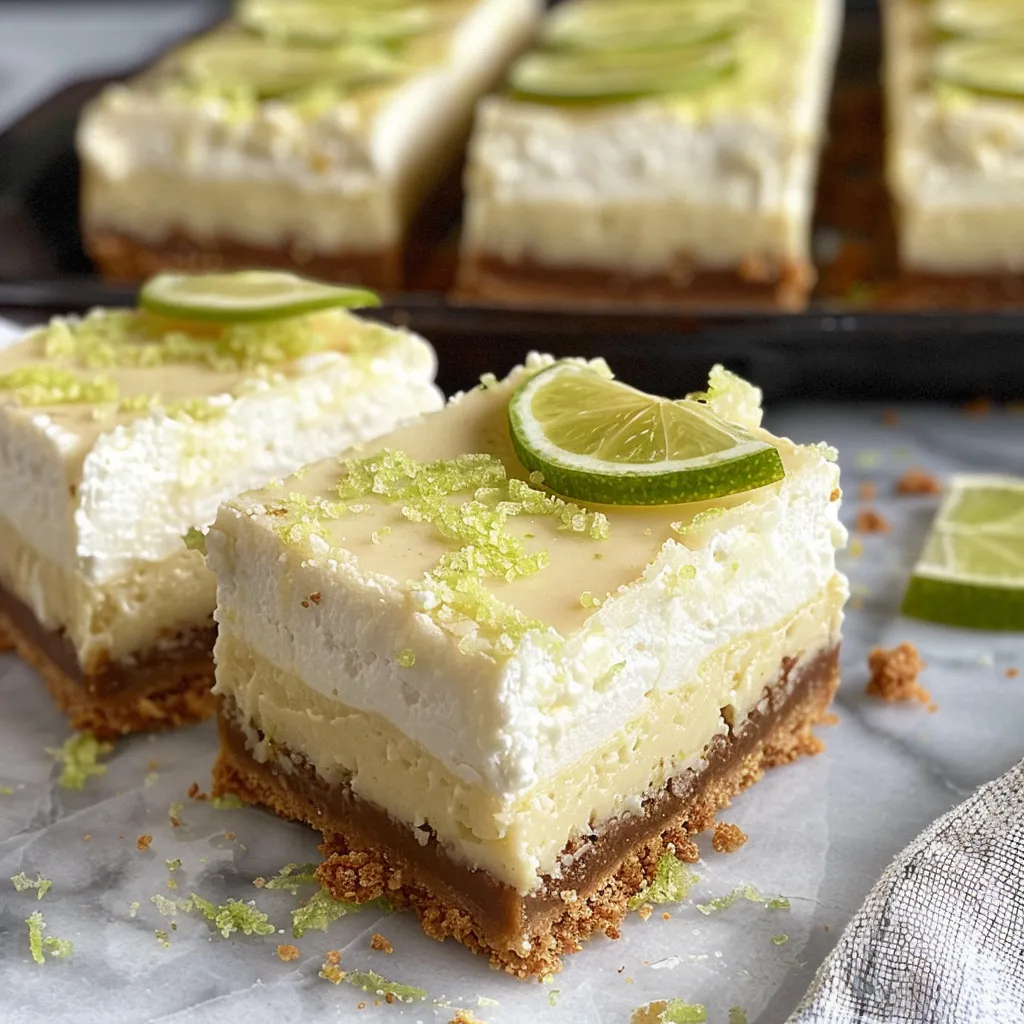
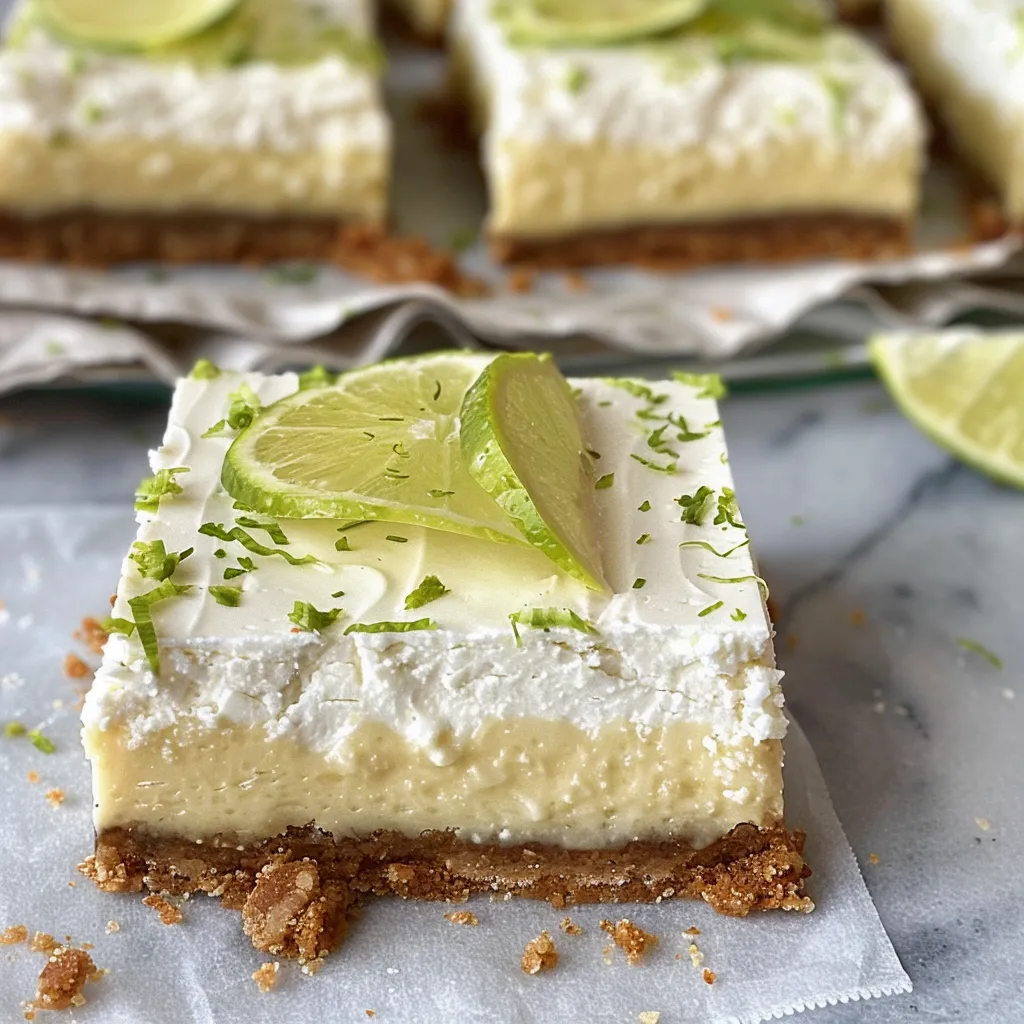
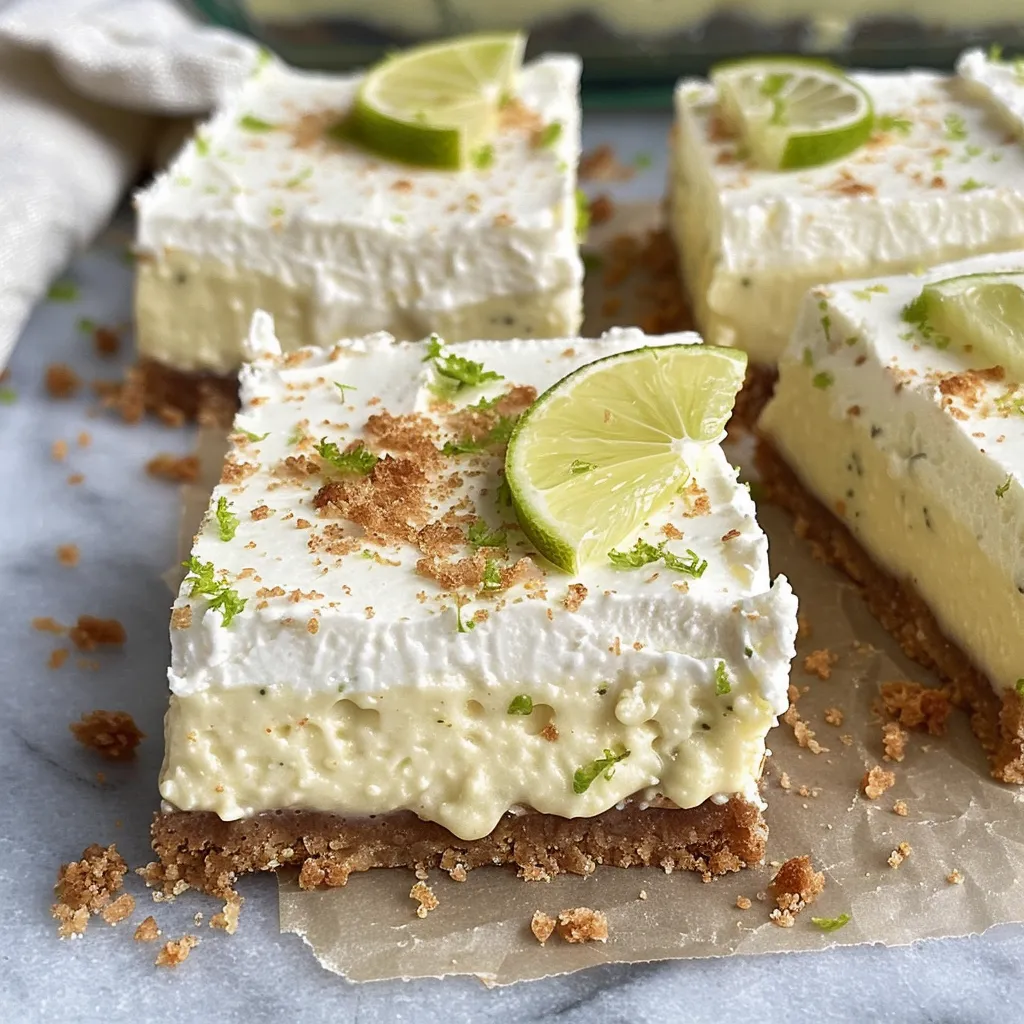
Imagine taking that first bite. You’re welcomed by the cool, velvety smoothness of the filling and that bright, citrusy zing from the key limes. It dances on your taste buds, offering a refreshing tingle that feels invigorating. That crumbly graham cracker crust provides a delightful crunch that pairs perfectly with the creamy filling. Together, they create a harmony that sings of summer days—a perfect blend of tart and sweet that makes every moment feel like a vacation.
Ingredients You’ll Need
- For the crust:
- 1 ½ cups graham cracker crumbs – A buttery base that adds depth and sweetness.
- 1/3 cup granulated sugar – Sweetens the crust just enough.
- 1/2 cup unsalted butter, melted – Binds the crumbs together and gives that rich flavor.
- For the filling:
- 1 can (14 oz) sweetened condensed milk – Adds creaminess and sweetness that is oh-so-satisfying.
- 1/2 cup key lime juice (fresh is best!) – The star of the show, bringing that tart flavor that makes your mouth pucker in the best way.
- 3 large egg yolks – Helps create a creamy texture and provides richness.
- Optional Additions:
- Zest of 2 key limes – For an extra burst of citrus flavor and beautiful color.
- Whipped cream – A dollop on top is always a good idea for that classic pie feel.
- Special Garnishes:
- Thin lime slices – Visually stunning and a great way to hint at the bright flavor awaiting you.
- Fresh mint leaves – For a pop of color and a refreshing aroma.
Step-by-Step Instructions
This recipe is as easy as pie—well, almost! Here’s how you can make it:
- Preheat the oven: Set your oven to 350°F (175°C). You want it nice and toasty before you get started.
- Make the crust: In a mixing bowl, combine the graham cracker crumbs, sugar, and melted butter. Stir until the mixture resembles wet sand. Don’t rush this step—it’s where the magic happens!
- Press and bake: Firmly press the crumb mixture into the bottom of a greased 9×9-inch baking pan. Bake for about 8-10 minutes or until it’s golden and fragrant. Let it cool slightly.
- Mix the filling: In a bowl, whisk together the sweetened condensed milk, key lime juice, and egg yolks until smooth. Make sure there are no lumps. Add in the zest if you’re using it!
- Pour and bake: Pour the filling over the cooled crust, spreading it evenly. Bake for another 15-20 minutes, or until the center is set. It should have a slight jiggle when you shake it, but it shouldn’t be soupy.
- Chill: Let the bars cool completely at room temperature, then refrigerate for at least 2 hours (or even overnight) to help them set perfectly.
- Serve: Once chilled, cut into squares. Top each square with a dollop of whipped cream, a slice of lime, or a mint leaf for that extra touch!
Recipe Variations
Want to shake things up a bit? Here are a few fun ideas:
- Coconut Key Lime Bars: Add shredded sweetened coconut to the crust for a tropical twist.
- Berry Toppings: Serve the bars with a topping of fresh berries, like blueberries or strawberries, to complement that lime flavor.
- Chocolate Drizzle: Drizzle some melted chocolate on top for a unique flavor combination that will leave everyone guessing.
Serving & Storage Tips
These Key Lime Pie Bars are perfect for make-ahead desserts! Once they’ve set, store them in an airtight container in the refrigerator for up to one week. Trust me, they never last that long! If you happen to have leftovers (which is a rare occurrence), they can also be frozen for up to a month. Just wrap them tightly in foil or plastic wrap—this keeps them from getting freezer burn.
When you’re ready to enjoy your dessert again, let them thaw in the fridge overnight before serving. For an extra touch, you can add fresh toppings just before serving!
Helpful Tips
Now that you’re all ready to bake, here are a few things I’ve learned the hard way:
- Make sure to use fresh key lime juice. The bottled stuff just doesn’t cut it!
- Don’t skip the chilling part. It’s crucial for achieving that perfectly set bar.
- If you notice the edges getting too brown while baking, tent with foil to prevent burning.
- Watch your oven timer; every oven is different. Keep an eye out after the 15-minute mark!
Special Equipment
- 9×9-inch baking pan: This is the perfect size for the bars. If you want deeper bars, you could also use an 8×8-inch pan, just adjust the baking time a bit.
- Mixing bowls: A good set of nesting mixing bowls is essential for this recipe, allowing you to prep efficiently.
- Whisk: Necessary for getting that filling nice and smooth. You could use a mixer, but a simple whisk does the trick just fine!
Frequently Asked Questions
Can I use regular limes instead of key limes?
Absolutely! While key limes have a distinct flavor, regular limes will work in a pinch. Just be aware the taste will be slightly different, but still delicious!
Can I make these bars gluten-free?
Yes! Simply swap out the graham cracker crumbs for gluten-free alternatives, like crushed gluten-free cookies or graham-style crackers. It’ll still hold up beautifully!
Do these bars need to be refrigerated?
Yes! Keeping them refrigerated helps maintain their texture and flavor. Plus, who doesn’t love a cool treat on a hot day?
How do I know when the filling is set?
Look for a slight jiggle in the center. If it looks just a bit wobbly but not liquidy, you’re good to go!
Conclusion
Key Lime Pie Bars have a special place in my heart. They remind me of carefree summer days and late-night chats on the porch—if there’s one recipe that brings sunshine, it’s this one. Whether you’re serving them at a family gathering, a backyard barbecue, or simply treating yourself, these bars are a delightful companion.
So, gather your ingredients, put on your favorite playlist, and get to baking! When you make your first batch, I’d love to hear about it. Did you try a twist, or stick to the classic recipe? Share your stories or your very own creations in the comments below. Happy baking!
Print
Key Lime Pie Bars
- Total Time: 2 hours 45 minutes
- Yield: 16 bars 1x
Description
Savor tangy Key Lime Pie Bars with this easy recipe. Delight in refreshing treats perfect for any occasion. A must-try dessert for lime lovers!
Ingredients
Instructions
Notes
Key Lime Pie Bars offer a wonderful combination of tangy key lime flavor and creamy filling atop a buttery graham cracker crust, perfect for summer gatherings.
- Prep Time: 15 minutes
- Cook Time: 30 minutes
- Category: Dessert
- Cuisine: American
Nutrition
- Serving Size: 16 bars
- Calories: 220
- Sugar: 18g
- Fat: 10g
- Carbohydrates: 30g
- Fiber: 1g
- Protein: 3g