There’s something almost magical about the way a good dessert can transform an ordinary dinner into an extraordinary memory. I distinctly remember one sunny afternoon in the backyard, surrounded by friends, laughter ringing through the air as we sipped on homemade lemonades. That feeling inspired this Limoncello Cheesecake, a dish that channels sunshine and joy in every creamy bite. It’s a dessert that brings with it a feeling of celebration, whether you’re gathering for a special occasion or just wanting to treat yourself after a long week. Whip up this cheesecake, and you’ll find yourself basking in its bright, citrusy goodness.
Why You’ll Love This Recipe
Let’s face it—life can be chaotic, but this cheesecake offers a sweet reprieve. Not only is it surprisingly simple to make, but its flavor also transports you to an Italian café on the Amalfi coast, complete with sun-drenched lemon trees whispering in the breeze. It tastes like something you’d find at a fancy restaurant, yet you get the joy of making it at home with love. Plus, it can be prepped ahead of time, making it a perfect dessert for busy weeknights or last-minute gatherings. Trust me; this is a dessert you’ll want to keep in your back pocket!
What It Tastes Like
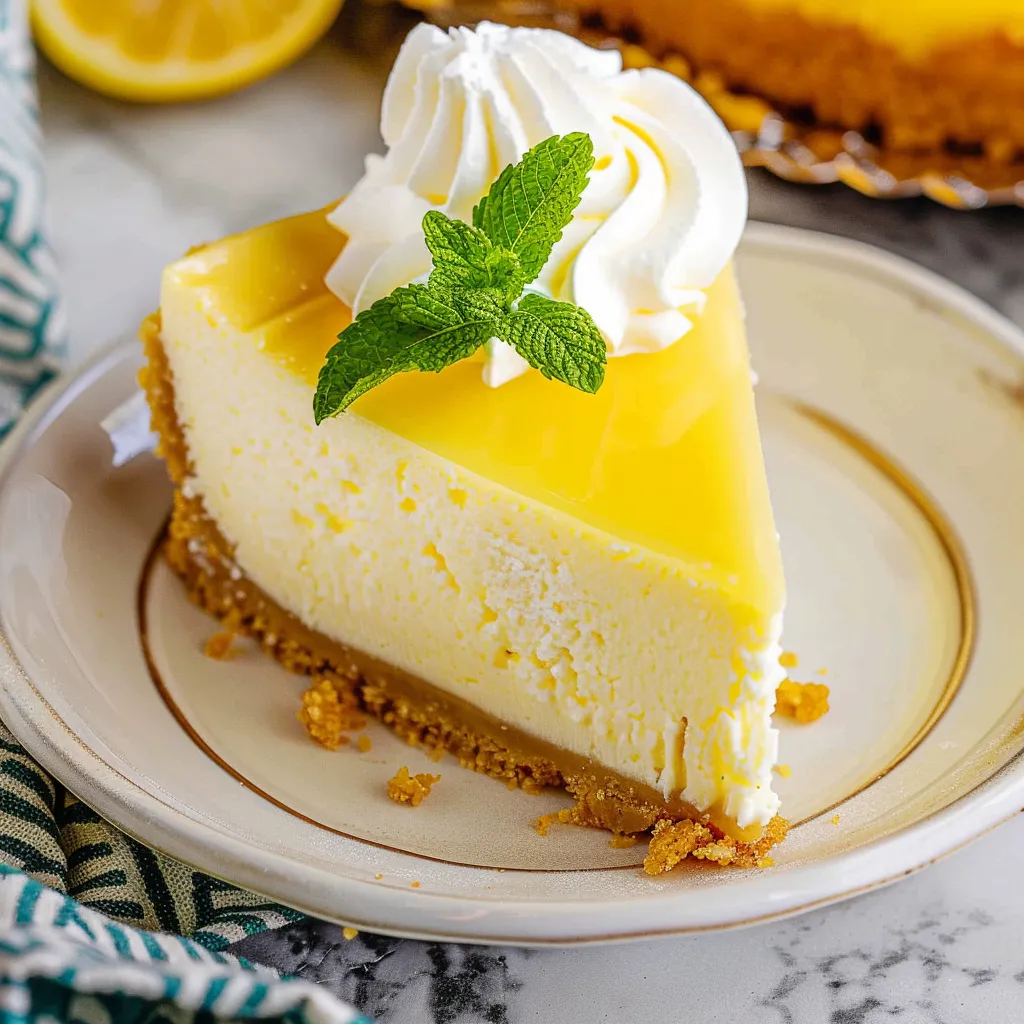
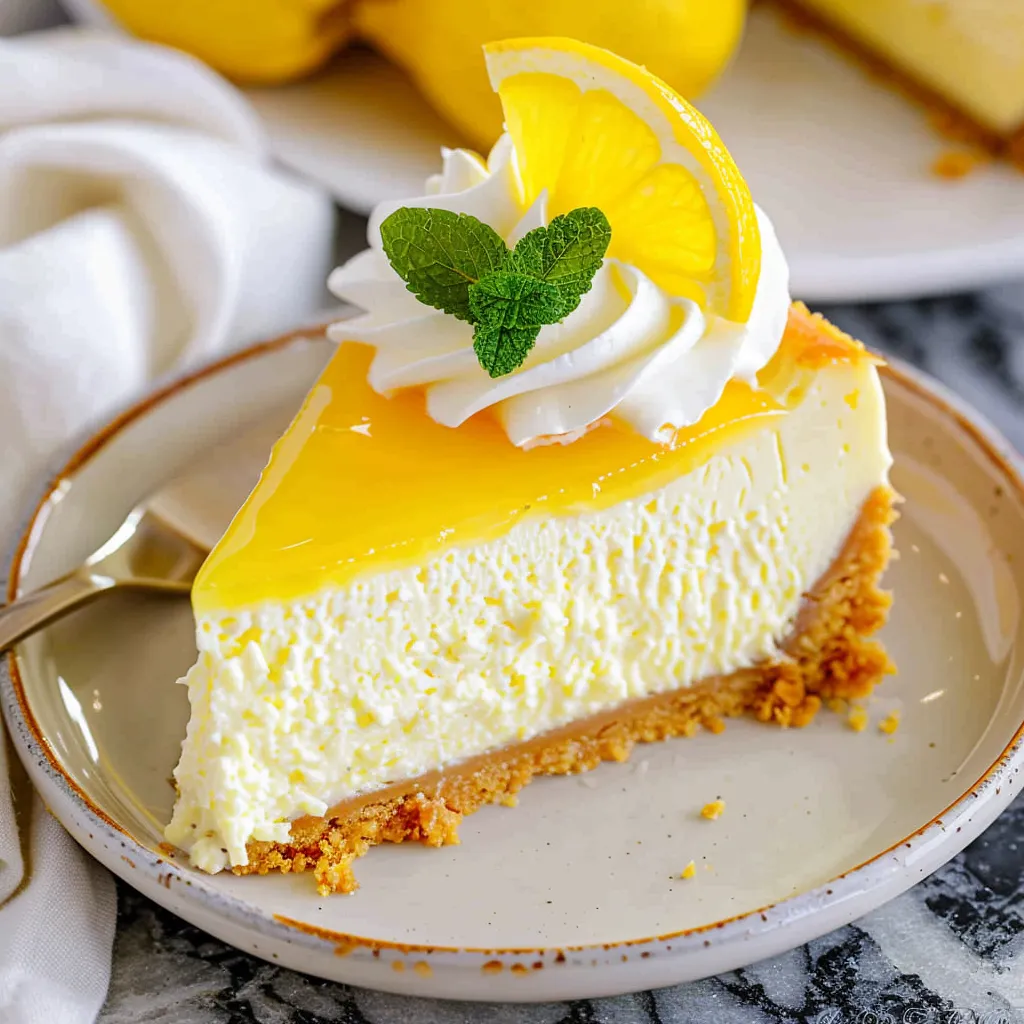
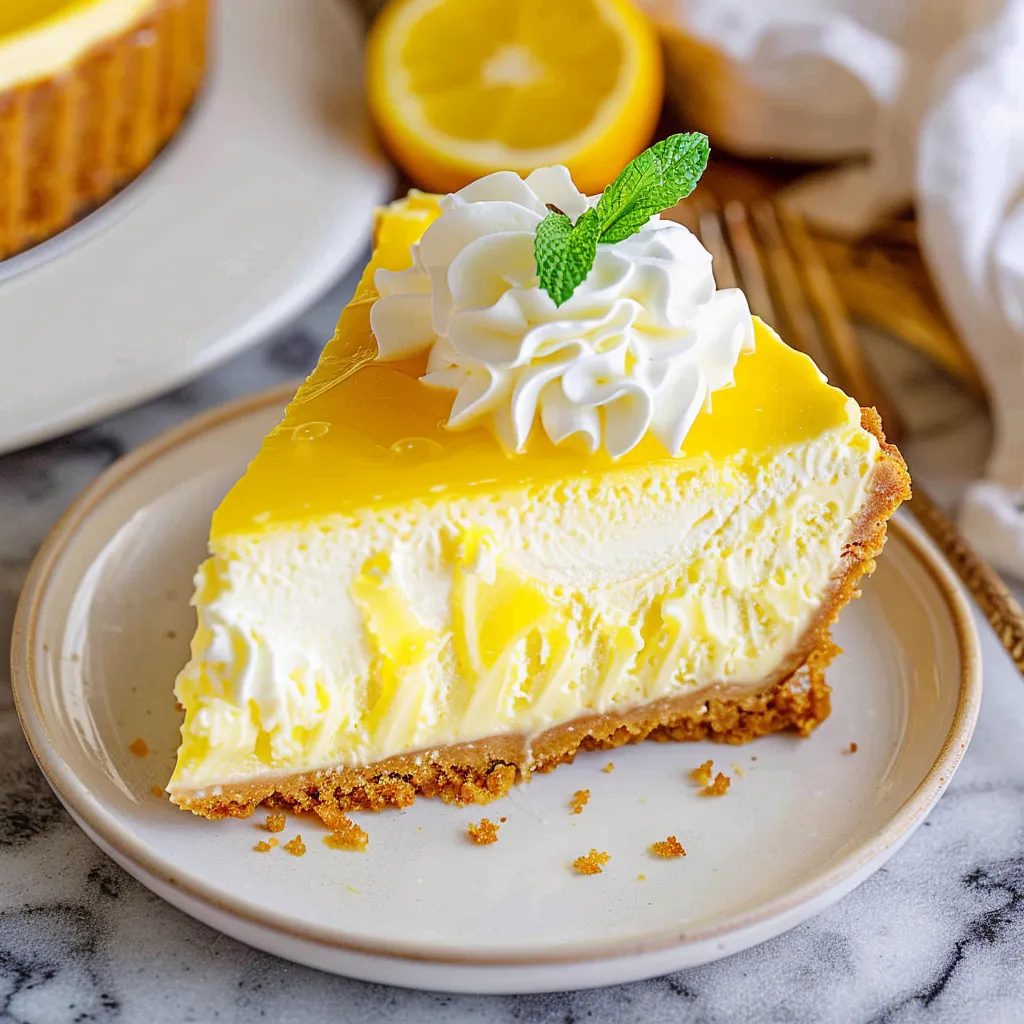
Imagine slicing into this Limoncello Cheesecake, the creamy, smooth texture almost melting on your tongue. The first bite hits with a fresh tang of lemon, a zesty burst that dances in perfect harmony with the rich, velvety cream cheese. It’s as if a slice of sunshine itself has found its way onto your plate. The sweetness of the sugar balances the citrus, resulting in a flavor profile that feels refreshing but not overwhelmingly sweet. And let’s not forget about that buttery graham cracker crust, adding just the right amount of crunch. Each mouthful is like a mini-vacation, a sweet escape from the everyday.
Ingredients You’ll Need
- For the crust:
- 1 ½ cups graham cracker crumbs – this gives a fantastic crunch and rich flavor.
- ½ cup unsalted butter, melted – the glue that holds the crust together, adding richness.
- ¼ cup granulated sugar – a bit of sweetness lifts the crust and complements the cheesecake.
- For the cheesecake filling:
- 3 (8-ounce) packages cream cheese, softened – the heart of the cheesecake, providing smoothness and creaminess.
- ¾ cup granulated sugar – this balances the tartness of the lemon nicely.
- 3 large eggs – helps the cheesecake set perfectly.
- 1 cup sour cream – for an extra layer of creaminess.
- ⅓ cup Limoncello – watermelon sunshine in liquid form!
- 1 tablespoon lemon zest – amplifies that fresh lemony flavor.
- Optional Additions:
- 1 tablespoon of cornstarch – for extra stability if you prefer a firmer texture.
- Fresh berries – to top it off for a sweet, tangy finish.
- Special Garnishes:
- Whipped cream – always a delightful addition.
- Extra lemon zest – for a pop of color and flavor on top.
Step-by-Step Instructions
Now that you have your ingredients, let’s jump into the fun part! Making this Limoncello Cheesecake is easier than you might think.
- Preheat your oven: Start by preheating your oven to 325°F (160°C). You want it warm and ready for that luscious cheesecake!
- Make the crust: In a medium bowl, mix together the graham cracker crumbs, melted butter, and sugar until well combined. It should resemble wet sand. Then, press the mixture into the bottom of a 9-inch springform pan evenly. Don’t rush this step—it’s where the magic happens! Bake the crust for about 10 minutes, or until lightly golden. Set it aside to cool.
- Prepare the filling: In a large mixing bowl, beat the softened cream cheese with an electric mixer until it’s smooth and creamy. Add the sugar and continue to mix until combined. You want to avoid any lumps here—nobody likes a chunky cheesecake!
- Add in the eggs: Add the eggs in one at a time, mixing well after each addition. Then, add the sour cream, Limoncello, and lemon zest, beating until everything is just combined. Make sure to scrape down the sides of the bowl to get every bit of that yummy mixture.
- Pour it in: Pour the filling onto your cooled crust, smoothing the top with a spatula. It’s like spreading joy—make sure it’s even!
- Bake: Place the cheesecake in the preheated oven and bake for about 60-70 minutes. You’ll know it’s ready when the edges are set and the center is slightly jiggly. It will firm up as it cools—don’t worry!
- Cool it down: Once baked, turn off the oven and crack the door open, letting the cheesecake cool inside for about an hour. This helps prevent cracks in your cheesecake. Once cooled, transfer it to the fridge for at least 4 hours, preferably overnight. Patience is key!
Recipe Variations
If you’re feeling adventurous, consider these simple twists to customize your cheesecake:
- Berry Bliss: Swirl in some mixed berry puree before baking for a fruity twist.
- Coconut Dream: Substitute coconut cream for sour cream and top with shredded coconut.
- Chocolate Lover: Add cocoa powder to the filling for a chocolate-limoncello combo that’s to die for!
Serving & Storage Tips
This cheesecake is best served chilled. To get that perfect slice, use a hot, wet knife for clean cuts. Leftovers? They can be stored in the fridge for about 5 days. If you’re feeling fancy (or lazy, who am I to judge?), you can turn leftovers into a delightful lemon trifle by layering pieces of the cheesecake with lemon curd and whipped cream.
Helpful Tips
I’ve made my share of cheesecakes (some splendid, others more of a learning experience), so here’s what I’ve gleaned:
- Be sure your cream cheese is truly softened—it makes a world of difference in texture.
- Don’t overmix the batter; this can introduce air bubbles, which aren’t ideal.
- Use a water bath (placing your springform pan inside a larger pan with hot water while baking) to create a moisture-rich environment that helps the cheesecake cook evenly.
Special Equipment
- Springform pan: This makes removing the cheesecake so much easier, and prevents that dreaded “squished slice” scenario.
- Electric mixer: A hand mixer will work too, but a stand mixer will really make light work of the mixing! You’ll want it ultra-smooth.
- Spatula: For those perfect smooth layers—because every layer counts!
Frequently Asked Questions
Can I make this cheesecake ahead of time?
Absolutely! It actually tastes better after sitting in the fridge for a day or two while the flavors meld together. Just make sure to cover it well!
What kind of Limoncello should I use?
Go for a quality brand if you can; it makes a big difference in flavor. But if it’s what you have on hand, get creative with what you got!
Why did my cheesecake crack?
Overmixing or baking at too high a temperature are the usual culprits. Remember, you want a gentle bake that lets it set gradually!
Can I freeze leftovers?
Yes! Freeze it in slices, wrapped tightly in plastic wrap, and it can last about two months. Just let it thaw in the fridge overnight when you’re ready to enjoy it again!
Conclusion
This Limoncello Cheesecake isn’t just a dessert; it’s a cozy hug in a slice, a ray of sunshine on your plate, and above all, a fantastic way to bring people together. I love making this for summer barbecues or a Monday night pick-me-up. Each bite invites you to linger a little longer at the table, savoring not just the fabulous flavors, but the moments shared. I can’t wait to hear your stories or see your own versions in the comments below. Here’s to joyful baking adventures!
Print
Decadent Limoncello Cheesecake Recipe for Sweet Indulgence
- Total Time: 100 minutes
- Yield: 12 servings 1x
Description
Savor the creamy goodness of Limoncello Cheesecake This recipe combines zesty flavors for a delicious treat perfect for any occasion
Ingredients
Instructions
Notes
A creamy and luscious Limoncello Cheesecake that brings the flavors of sunshine and joy in every bite, perfect for any celebration or a sweet treat.
- Prep Time: 30 minutes
- Cook Time: 70 minutes
- Category: Dessert
- Cuisine: Italian
Nutrition
- Serving Size: 12 servings
- Calories: 330
- Sugar: 22 grams
- Fat: 20 grams
- Carbohydrates: 32 grams
- Fiber: 1 gram
- Protein: 6 grams


