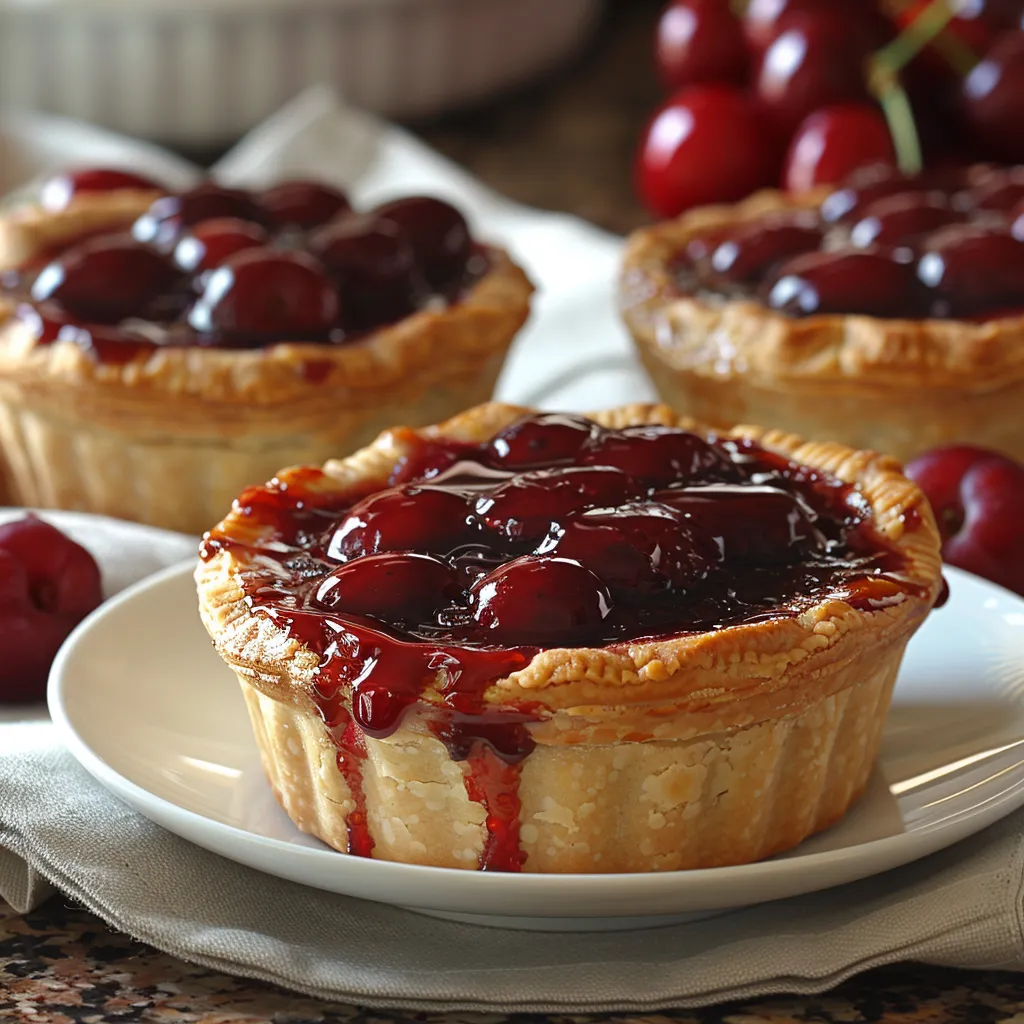
Mini Cherry Pies are one of those delightful desserts that whisk you away to summer picnics, family gatherings, and sweet memories. With their flaky crust and luscious cherry filling, these little pies are not only adorable but also incredibly easy to make. Whether you’re hosting a party or looking for a fun baking project with the kids, these mini treats are bound to steal the show!
Why You’ll Love This Recipe
Imagine biting into a warm, flaky crust filled with sweet and tangy cherry goodness. Sounds tempting, right? This recipe has several perks that make it a go-to in any dessert lover’s cookbook:
- Quick to Make: These mini pies can be whipped up in under an hour, making them a perfect last-minute dessert.
- Kid-Friendly: Get the little ones involved! They’ll love helping to roll out the dough and fill the pies.
- Portion Control: Mini pies mean no more overindulging – plus, they’re cute and can be shared easily!
- Versatile: Feel free to swap out cherry filling for other fruits if cherries aren’t your jam.
- Perfect for Any Occasion: Be it a summer cookout or a cozy winter night, these pies fit the bill.
Ingredients You’ll Need
Ready to gather your materials? Here’s what you’ll need to bake these delightful mini pies:
- 2 cups all-purpose flour
- 1/2 teaspoon salt
- 1 tablespoon granulated sugar
- 1/2 cup unsalted butter, chilled and cubed
- 1/4 cup ice water
- 1 can (21 oz) cherry pie filling
- 1 egg, beaten (for egg wash)
- Powdered sugar, for dusting (optional)
Step-by-Step Instructions
1. Prepare the Pie Crust
Start by making the pie crust, which is a simple process. In a mixing bowl, combine flour, salt, and sugar. Add the chilled, cubed butter and mix until the mixture resembles coarse crumbs.
2. Add the Ice Water
Gradually pour in the ice water, mixing until the dough comes together. Don’t overwork it! Divide the dough into two balls, flatten them into disks, wrap in plastic wrap, and refrigerate for at least 30 minutes.
3. Roll Out the Dough
Once chilled, flour your work surface and roll out one disk at a time to about 1/8 inch thick. Use a round cutter or a glass to cut out circles—aim for about 4 inches in diameter.
4. Fill the Pies
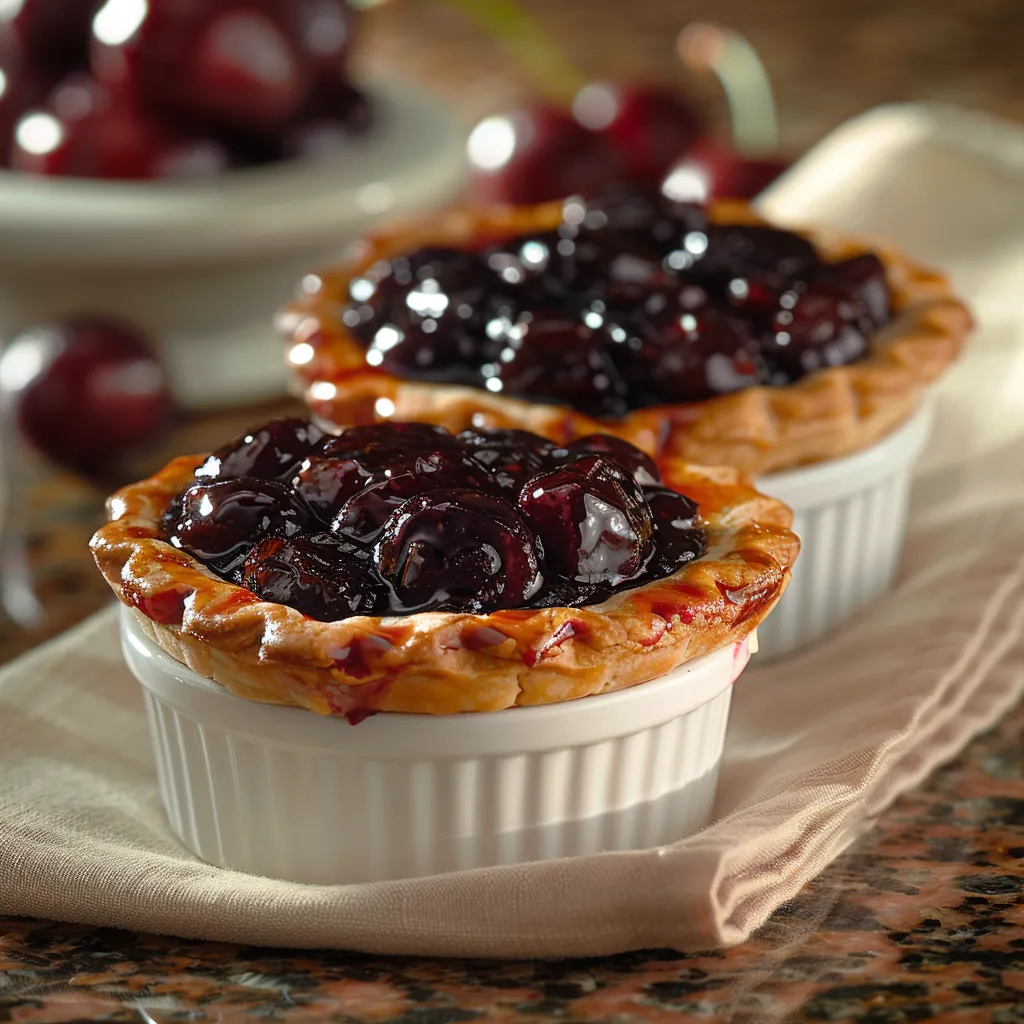
Place a spoonful of cherry pie filling in the center of half of the dough circles. Be careful not to overflow them!
5. Seal and Cut Slits
Top with another dough circle, and press the edges to seal. You can use a fork to crimp the edges for a decorative touch. Remember to cut a few slits in the top crust to allow steam escape during baking.
6. Brush with Egg Wash
Brush the tops with a beaten egg for a golden finish. This step adds a lovely shine to your mini pies.
7. Bake
Preheat your oven to 375°F (190°C). Line a baking sheet with parchment paper, arrange your mini pies, and bake for 20-25 minutes or until golden brown.
8. Cool and Serve
Remove from the oven and let these little beauties cool for a bit. Dust with powdered sugar before serving if you want to add a touch of sweetness!
Serving and Storage Tips
Serving
These mini cherry pies can be served warm or at room temperature. They pair beautifully with a scoop of vanilla ice cream or a dollop of whipped cream! Just imagine sitting on the porch, enjoying one of these while sipping on lemonade—pure bliss!
Storage
If you have any leftovers, store them in an airtight container at room temperature for up to 2 days. For longer storage, keep them in the fridge for about a week or freeze them. To freeze, place them in a single layer in a freezer-safe bag. They’ll keep well for up to 3 months. When ready to enjoy, just bake them at 350°F (175°C) until warmed through.
Helpful Tips
- Make sure the butter is very cold! This helps create a flaky crust.
- If you prefer homemade filling, you can make a quick cherry filling using fresh or frozen cherries, sugar, and cornstarch.
- Play around with spices! A pinch of cinnamon or almond extract in the filling can add a nice twist.
- For a more rustic look, use different shaped cutters or make the pies in various sizes!
Frequently Asked Questions (FAQ)
1. Can I use store-bought pie crust?
Absolutely! Using store-bought crust can save time, and it still tastes great. Just roll it out and follow the same cutting and filling instructions.
2. Can I make the filling from scratch?
Yes! Make a fresh cherry filling by cooking pitted cherries with sugar and a little cornstarch over low heat until thickened.
3. How do I prevent the crust from getting soggy?
Ensure you do not overfill the pies, and bake them until they’re golden. Allowing steam to escape through the slits helps, too!
4. Are these mini pies suitable for freezing?
Yes! They freeze well and can be baked directly from the freezer. Just add a few extra minutes to the baking time.
5. What can I serve with mini cherry pies?
Serve them with ice cream, whipped cream, or even a drizzle of chocolate sauce for an extra special treat.
Conclusion
Incorporating mini cherry pies into your dessert repertoire is a no-brainer. They are a feast for both the eyes and the taste buds! Whether you’re preparing for a special occasion or simply craving a sweet treat, these mini pies are sure to impress. They encapsulate the joy of baking and the pleasure of sharing delicious moments with friends and family. So, roll up your sleeves, grab those ingredients, and embark on this delightful baking adventure—you won’t regret it!
Print
Easy Mini Cherry Pies Authentic Flavors in Every Bite
- Total Time: 50 minutes
Description
Savor authentic flavors with easy mini cherry pies Delicious bites perfect for any occasion A delightful treat everyone will love
Ingredients
Instructions
- Prep Time: 15 minutes
- Chilling: 30 minutes
- Cook Time: 25 minutes
- Category: Dessert
- Method: Baking
- Cuisine: American


