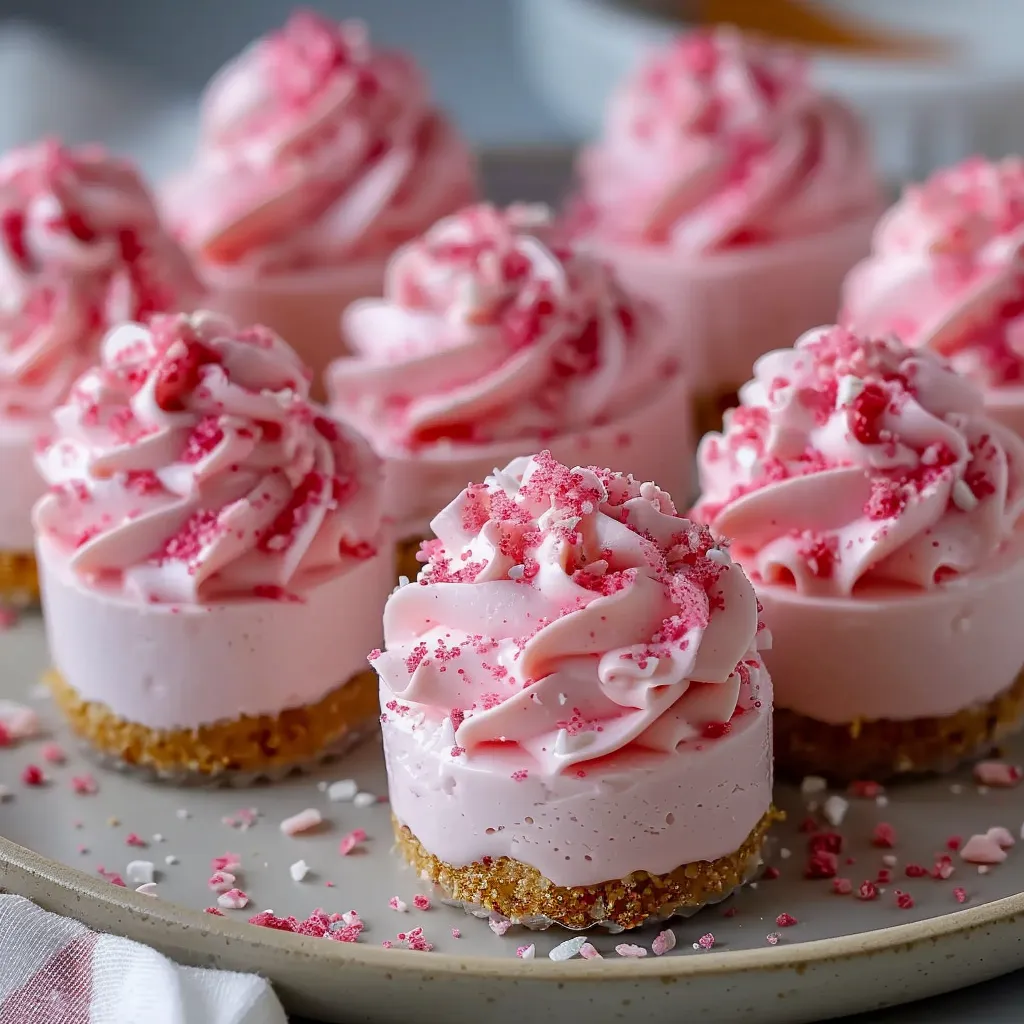
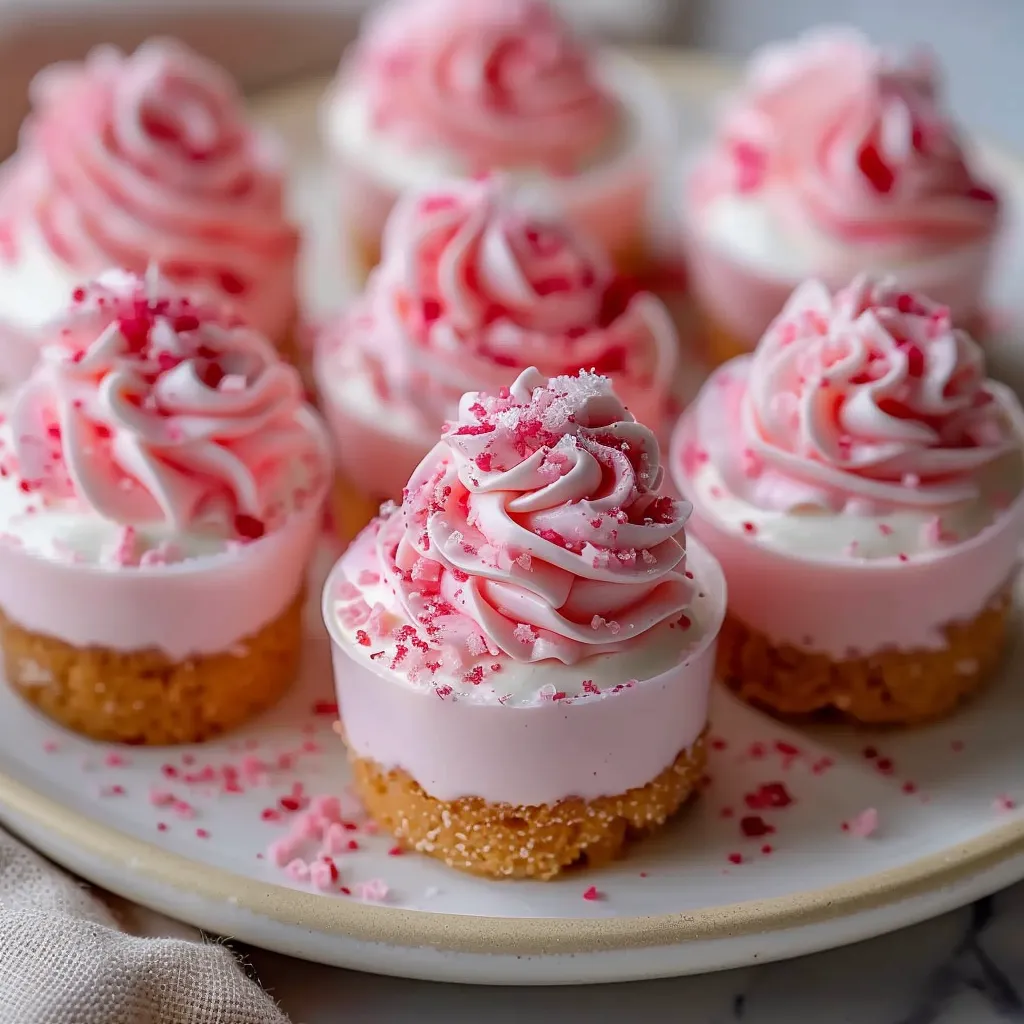
Sometimes, you find a recipe that perfectly embodies those warm, cozy moments in life, and today, I’m thrilled to share my No-Bake Pink Velvet Cheesecake Bites. Picture this: It’s a lazy Sunday afternoon, the kind where the sun streams through the kitchen window, and you can hear the gentle chirping of birds outside. I’m whisking together a luscious mixture of cream cheese and fluffy whipped cream, with the delicate euphoria of pink velvet swirling around me. These bites are surprisingly simple to make, and they’ve quickly become a favorite for my family gatherings and just because it’s Thursday type of days. They’re not just cheesecake bites; they’re little morsels of joy, perfect for sharing (or hoarding, no judgment here).
Why You’ll Love This Recipe
Now, let’s chat about why these cheesecake bites are worth your time. First off, they’re no-bake! That’s right—no turning on the oven, no worrying about whether you remembered to preheat. This means they’re the perfect solution for those busy evenings when you want a sweet treat but don’t have time to fuss about in the kitchen. They taste sensational—imagine biting into the softest, creamiest cheesecake enveloped in a slight hint of vanilla and just a whisper of cocoa. And let’s not forget that delightful pink hue that brightens up any platter and adds a splash of fun to your dessert table. These are the kind of treats that steal the show at family gatherings and perfectly complement a warm cup of coffee.
What It Tastes Like
If I were to describe the flavor of these little bites, it’s like a soft hug on a plate. The cream cheese provides a rich and creamy base, while the whipped cream adds an airy lightness—think of it as cheesecake meets cloud. The cocoa powder adds just enough earthy undertones to balance the sweetness while not overpowering the delicate vanilla flavor. Each bite melts in your mouth, leaving a subtle kiss of sweetness on your palate. Honestly, you might find yourself returning to the fridge for just one more, and then another—trust me, I’ve been there!
Ingredients You’ll Need
- 8 oz cream cheese: This is the star of the show, lending creaminess and flavor.
- 1/2 cup powdered sugar: Adds sweetness without any graininess.
- 1 cup heavy whipping cream: This makes everything light and fluffy—so essential!
- 1 teaspoon vanilla extract: Because, of course, we all need a little vanilla magic.
- 1 tablespoon cocoa powder: Just a hint for that signature pink velvet contrast.
- 1/4 cup crushed graham crackers: For a delightful crunch and base flavor.
- Pink food coloring: Optional, but it gives that beautiful pink hue that makes these bites pop!
Optional Additions: Feel free to add in some chocolate chips or a drizzle of caramel on top for a little extra indulgence.
Special Garnishes: Some fresh berries or mint leaves on top can bring a lovely pop of color and freshness!
Step-by-Step Instructions
Ready to whip up these delightful bites? Here’s how it’s done:
- Prepare the base: In a mixing bowl, combine the cream cheese and powdered sugar. Beat it with an electric mixer until it’s nice and smooth—don’t rush this step; it’s where the magic happens!
- Add the cream: In another bowl, whip the heavy cream until stiff peaks form—this is your light and fluffy magic. Gently fold this into the cream cheese mixture until well combined.
- Flavor it up: Stir in the vanilla extract and cocoa powder, then (if desired) add a few drops of pink food coloring until you reach your desired shade.
- Form the bites: Grab a small cookie scoop (or two spoons) and scoop the mixture onto a parchment-lined baking sheet. Each scoop should be about the size of a golf ball.
- Crush those crackers: In a small bowl, mix the crushed graham crackers with a pinch of sugar and melted butter, then sprinkle them over the cream cheese scoops to create a crumb crust.
- Chill out: Pop the baking sheet in the refrigerator for about 2-3 hours, or until they firm up. Trust me, the wait is worth it!
Recipe Variations
Feeling a bit adventurous? Here are a couple of easy variations to shake things up:
- Add a swirl of fruit puree like raspberry or strawberry for a fruity twist.
- Instead of cocoa, try adding a dash of lemon or orange zest for a fresh citrus flavor.
Serving & Storage Tips
These cheesecake bites keep really well in the fridge, so you can make them a day ahead—just cover them with plastic wrap. When you’re ready to serve, pull them out, arrange them on a lovely platter, and watch them disappear. If you have any leftover (which is unlikely, but let’s dream), you can store them in an airtight container for up to five days. Just note that the longer they sit, the more the texture might change, so they’re best enjoyed fresh!
Helpful Tips
Here are some nuggets of wisdom I’ve gathered from my own kitchen adventures:
- Use room temperature cream cheese; it blends so much better with the sugar, giving you that lovely creamy texture you want.
- Don’t over-whip the cream! You want stiff peaks, but if you go too far, it can turn grainy.
- If you find the mixture too soft after mixing, chill it for a bit to help it set before scooping.
Special Equipment
While you don’t need fancy gadgets to make this dessert, here are a few items that can make your life easier:
- Electric mixer: This will save you effort and time when whipping everything together. A hand mixer works great too!
- Cookie scoop: This handy tool ensures uniform sizes for even bites—plus, it’s less messy!
- Parchment paper: Lining your tray will make clean-up a breeze and will keep your bites from sticking.
Frequently Asked Questions
Can I use low-fat cream cheese?
Yes, you can! Just keep in mind that while it may still taste good, the texture might be a bit different—less creamy, perhaps.
Can I freeze these cheesecake bites?
Absolutely! Just make sure to place them in an airtight container with parchment paper in between layers. They’ll keep for about 2 months in the freezer—just thaw them in the fridge when you’re ready to enjoy!
What can I use instead of heavy whipping cream?
If you’re looking for a lighter option, you can try using whipped coconut cream or a dairy-free whipped topping. The flavor will change a bit, but it can still be delicious!
How long can I store the no-bake cheesecake bites?
These bites will stay fresh in the fridge for about 5 days if stored correctly in an airtight container—though I doubt they’ll last that long!
Conclusion
And there you have it, my friend—No-Bake Pink Velvet Cheesecake Bites that are just as delightful to make as they are to eat. I adore this recipe because it combines simplicity and joy in a way that feels nurturing and playful at the same time. Whether you whip them up for a cheerful gathering, a cozy night in, or just because it’s Tuesday, I hope these bites bring a little extra sweetness to your day. Don’t forget to share your own version or any exciting variations you come up with in the comments—happy baking (or chilling, in this case)!
Print
Delicious No-Bake Pink Velvet Cheesecake Bites Recipe Today!
- Total Time: 2 hours 30 minutes
- Yield: 24 bites 1x
Description
Satisfy your sweet tooth with easy no-bake pink velvet cheesecake bites. Perfect for parties, these treats are a delightful twist on classic cheesecake!
Ingredients
Instructions
Notes
Delightful no-bake pink velvet cheesecake bites that are easy to make and perfect for any gathering.
- Prep Time: 30 minutes
- Category: Dessert
- Cuisine: American
Nutrition
- Serving Size: 24 bites
- Calories: 100
- Sugar: 6g
- Fat: 7g
- Carbohydrates: 8g
- Fiber: 0g
- Protein: 1g


