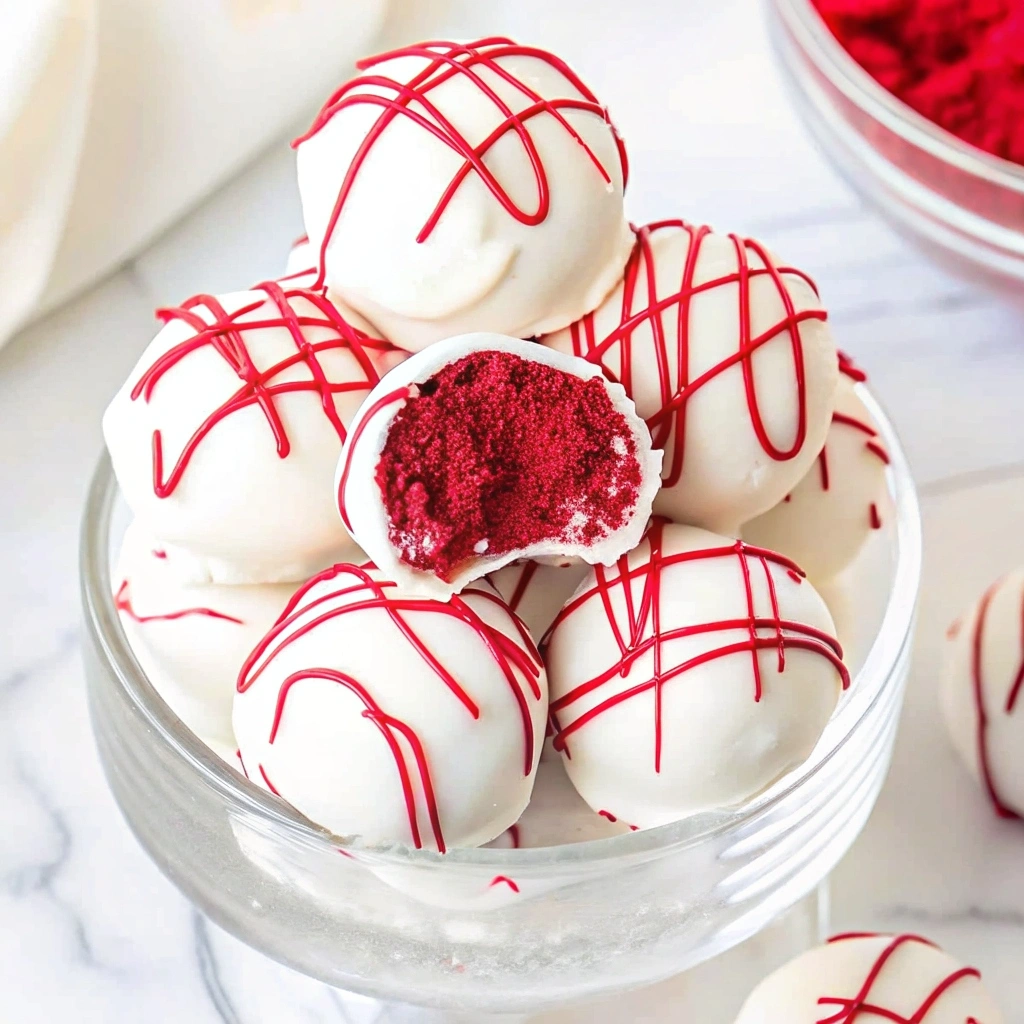
No Bake Red Velvet Snowball Truffles
There’s something cozy about gathering in the kitchen with family on a chilly winter afternoon, isn’t there? The scent of baking, warmth from the oven, and laughter echoing off the walls create an atmosphere that feels like a warm hug. It’s during one of these moments that I stumbled upon my new favorite treat: No Bake Red Velvet Snowball Truffles. A simple, delightful dessert that somehow captures the essence of winter celebration wrapped in a sweet little ball. I love the way these truffles come together effortlessly, without the need for an oven, and they taste fantastic—with their rich red velvet flavor and creamy center, they’re the perfect sweet treat for the holidays or any time you want to feel a little festive!

Why You’ll Love This Recipe
Let’s be real for a moment: sometimes we’re all in a whirlwind of living—balancing work, family, and the occasional scroll through social media can leave little time for elaborate cooking projects. That’s where these No Bake Red Velvet Snowball Truffles come to the rescue! They’re quick to make, easy to share, and oh-so-fun to eat. Picture this: you’re snuggled on the couch after a long day, one hand wrapped around a warm cup of cocoa, the other slowly savoring a snowy dusted truffle. Heaven, right?
Plus, they look stunning on the table. Their bright color and snowy finish have a way of stealing the show, even at the most festive gatherings. Seriously, friends will think you’ve spent hours crafting them. Spoiler alert: your secret is safe with me! These little gems shine with their creamy flavor, and they envelop you in warmth—perfect for sharing with friends or gifting to neighbors. What’s not to love?
What It Tastes Like
Imagine taking your first bite of a cozy red velvet cake, that hint of cocoa mingled with soft vanilla, but then—all of a sudden—you’re met with a luscious, creamy center. It’s like wrapping yourself in a sweet blanket. The contrast between the outer tender coating and the rich interior melts in your mouth, creating a satisfying texture that balances wonderfully. When I take the first bite, I’m reminded of that delightful moment you get when you finally relax after a long day—pure happiness!
Ingredients You’ll Need
- 1 cup of red velvet cake crumbs: This is the heart of our truffle, adding that rich, velvet texture and delicious flavor.
- 8 oz cream cheese, softened: This helps bind everything together while giving a lovely creaminess to each truffle.
- 1/2 cup powdered sugar: For touch of sweetness that makes everything pop! Who doesn’t love a little sugar?
- 1 tsp vanilla extract: A dash of warmth that enhances the overall flavor of our truffles.
- 1/2 cup chocolate chips: For coating, it’s where the decadence happens! Use milk or dark, whatever tickles your fancy.
- Sprinkles or shredded coconut: For that cute, snowy finish. It makes these truffles festive!
Optional Additions:
- Switch up the flavor with red velvet cake mix variations like devil’s food cake for a chocolate twist.
- Add a splash of peppermint extract for a holiday flair!
- Consider using nut-butters as a filling for a protein-boosted version.
Special Garnishes:
- Edible gold dust or shimmer highlights for a fancy touch.
- Cocoa powder dusting for an elegant look.
{{image}}
Step-by-Step Instructions
Ready to whip up some magic? Let’s dive in!
- In a medium bowl, mix the red velvet cake crumbs, softened cream cheese, powdered sugar, and vanilla extract. Get in there with a fork or your hands, it’s okay to get messy! This mixture can be a little stubborn at first—but don’t rush this step; it’s where the magic happens!
- Once it’s well combined, roll the mixture into small, bite-sized balls. Aim for about 1 inch in diameter—size matters! These are truffles, not golf balls, folks!
- Place the rolled truffles on a parchment-lined baking sheet. Chill them in the refrigerator for about 30 minutes—this helps them set nicely.
- While the truffles chill, melt the chocolate chips in a microwave-safe bowl. Heat them in 30-second intervals, stirring in between, until completely melted and smooth. You can totally do a double boiler if you’re fancy like that!
- Once melted, dip each truffle into the chocolate, fully coating them. Use a fork to lift them out, letting the excess chocolate drip off.
- While they are still wet, sprinkle them with your choice of sprinkles or shredded coconut to keep with our snowball theme. Don’t worry if some chocolate drips down the sides; it just adds character!
- Return the decorated truffles to the parchment-lined sheet and pop them back in the fridge for another 15 minutes to firm up.
Recipe Variations
These sweet bites are incredibly versatile! How about infusing some espresso powder for a mocha-flavored treat, or using white chocolate instead of milk chocolate for a creamy twist? You could even make them bite-sized and stack them in a festive box to create a holiday gift for your friends and family. The possibilities are endless!
Serving & Storage Tips
These beauties can be stored in an airtight container in the fridge for up to a week—if they last that long! (Good luck with that!) If you manage to have some left over, try adding them to a dessert charcuterie board or crumble some over ice cream for an extra treat. They’re also fantastic to share during holiday gatherings or office parties!
Helpful Tips
Here’s a little friendly advice I wish I’d known before diving into this recipe. If you find your mixture is too sticky, don’t hesitate to add a little extra powdered sugar or even a few more crumbs to get the right consistency. And when rolling the truffles, if your hands start to feel gooey, rinse them under cold water before continuing. It makes the rolling process way easier!
Special Equipment
- Mixing bowls: You’ll want a good-sized bowl to mix the ingredients. Bigger means less mess!
- Parchment paper: This prevents the truffles from sticking and makes clean-up a breeze.
- Melt-proof spatula: Essential for fondly coaxing the chocolate off the sides of the bowl for a perfect coating.
- Microwave-safe bowl: If you’re melting the chocolate in the microwave, make sure it’s safe to avoid any kitchen disasters!
Frequently Asked Questions
Can I use store-bought red velvet cake instead of making crumbs?
Absolutely! Store-bought red velvet cake can save time, and it can be a great shortcut for this recipe!
How can I make these gluten-free?
Simply use gluten-free red velvet cake mix instead of regular cake crumbs. Easy peasy!
Can I freeze these truffles?
Yes! They freeze beautifully. Just make sure they are stored in a single layer in a freezer-safe container for up to three months. Just let them thaw in the fridge before serving!
Is there a dairy-free option?
Sure! Use dairy-free cream cheese alternatives and dairy-free chocolate chips. There are plenty of tasty options out there!
Conclusion
So, my dear friends, whether it’s a cozy night in, a joyful holiday party, or a sweet little gift for someone special, these No Bake Red Velvet Snowball Truffles are ready to bring joy to the table. I adore how simple they are to make and how wonderfully they can adapt to suit any occasion! I can’t wait for you to try these and hear all about your yummy experiences. They truly are a treat that brings everyone together. Let me know your versions, and happy truffle-making!
Print
Delicious No Bake Red Velvet Snowballs Truffles Recipe
- Total Time: 45 minutes
- Yield: 24 truffles 1x
Description
Try this easy no bake red velvet truffle recipe for a perfect dessert treat Rich creamy and a festive addition to your dessert table
Ingredients
- 1 cup of red velvet cake crumbs
- 8 oz cream cheese, softened
- 1/2 cup powdered sugar
- 1 tsp vanilla extract
- 1/2 cup chocolate chips
- Sprinkles or shredded coconut for garnish
Instructions
- In a medium bowl, mix the red velvet cake crumbs, softened cream cheese, powdered sugar, and vanilla extract.
- Roll the mixture into small, bite-sized balls, about 1 inch in diameter.
- Place the rolled truffles on a parchment-lined baking sheet and chill in the refrigerator for 30 minutes.
- Melt the chocolate chips in a microwave-safe bowl, heating in 30-second intervals until smooth.
- Dip each truffle into the melted chocolate to coat, and sprinkle with your choice of sprinkles or shredded coconut while still wet.
- Return to the parchment-lined sheet and chill for another 15 minutes to firm up.
Notes
A simple and delightful no-bake dessert that captures the essence of winter celebrations. These No Bake Red Velvet Snowball Truffles feature a rich red velvet flavor and creamy center, perfect for the holidays.
- Prep Time: 15 minutes
- Category: Dessert
- Cuisine: American
Nutrition
- Serving Size: 24 truffles
- Calories: 120
- Sugar: 5g
- Fat: 8g
- Carbohydrates: 13g
- Fiber: 0g
- Protein: 2g


