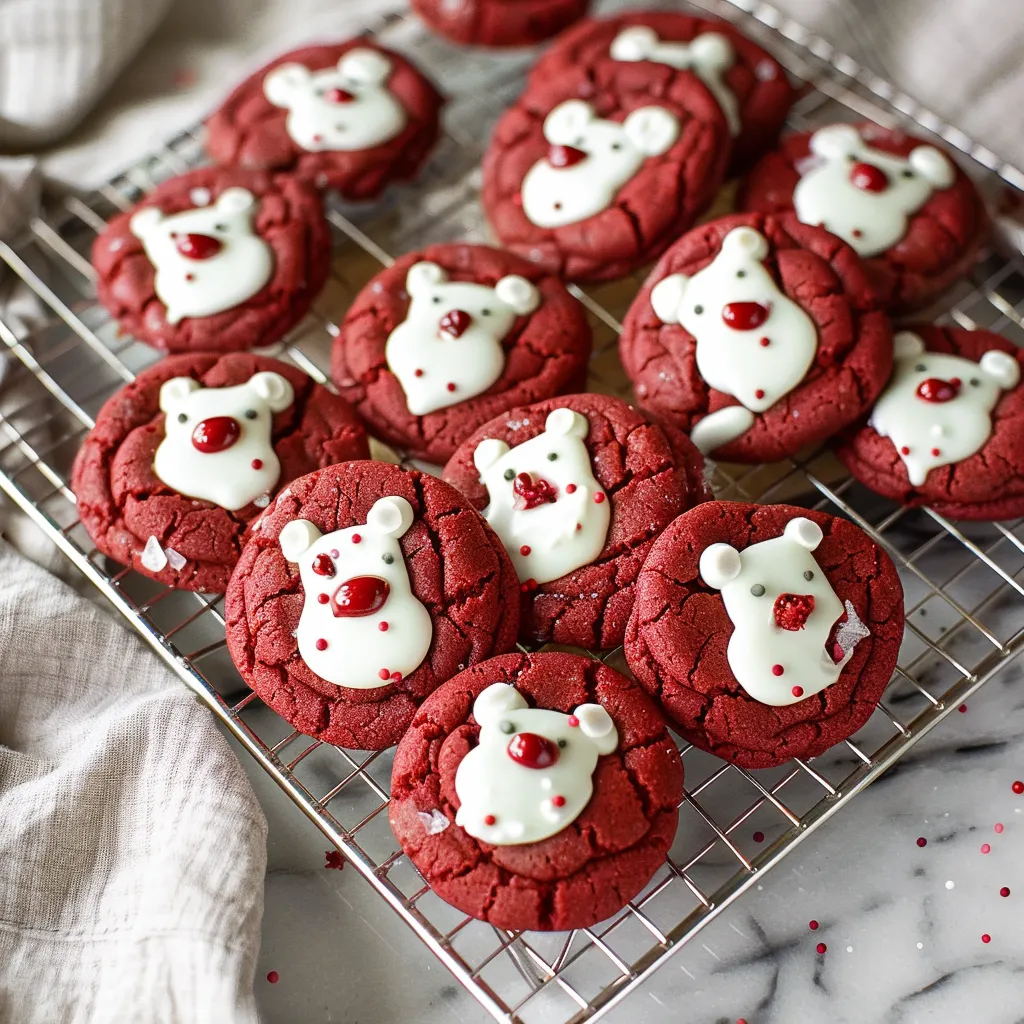
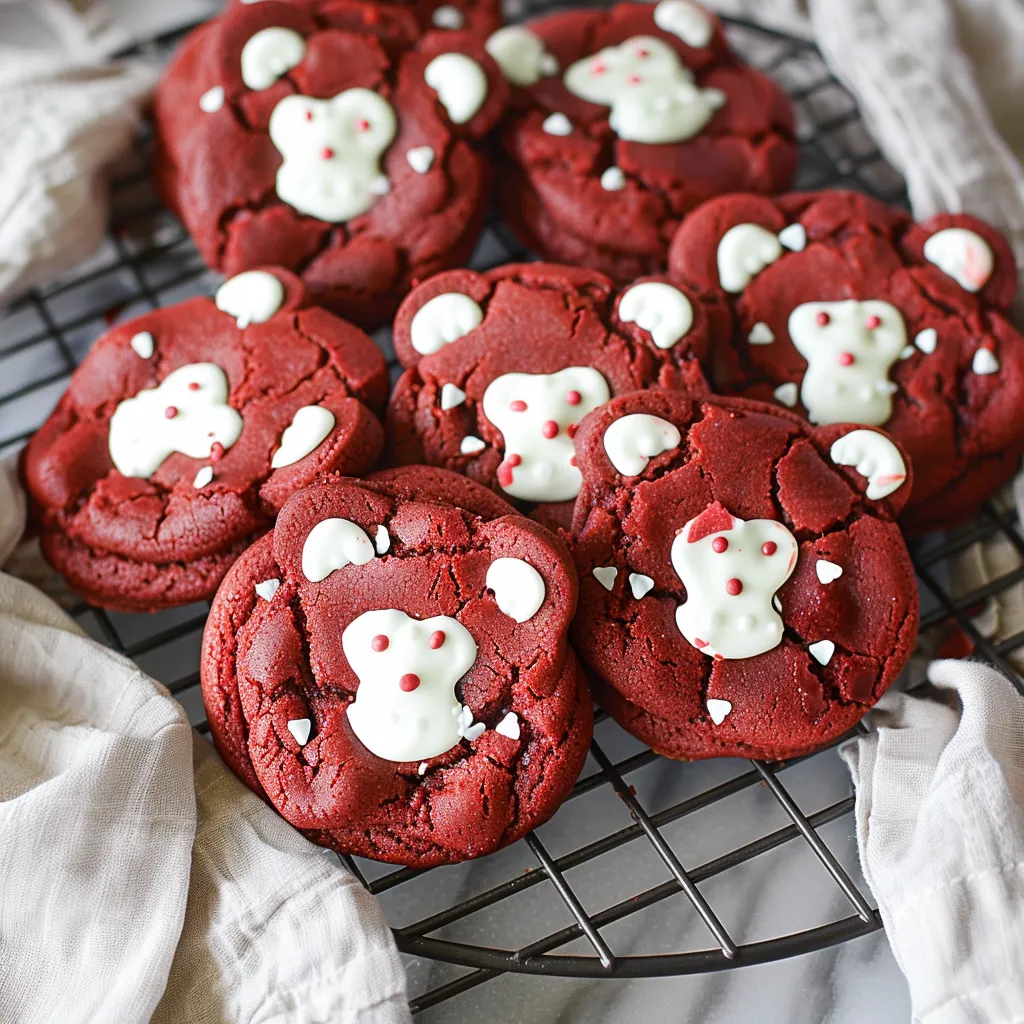
There’s something magical about baking cookies that conjures up warm memories and the aroma of sweet treats wafting through the house. I remember the first time I turned on the oven to make cookies — I was just a kid, standing on a chair, watching as my mom mixed and measured out the ingredients. Fast forward a few years, and here I am, still baking, but now I’m the one measuring the ingredients and creating my own recipes. One of my favorites to whip up for gatherings and cozy evenings is Red Velvet Bear Cookies. They are not only adorable but also pack a delicious punch that brings a smile to everyone’s face. Plus, how can you resist those little bear shapes? They bring a playful spirit to cookies and are perfect for any occasion — from a casual movie night to a festive get-together!

Why You’ll Love This Recipe
Now, you might be wondering, what makes this recipe worth your time? Well, my dear friends, these cookies are like a little hug in your hands! They balance the tenderness of a classic cookie with the rich, chocolatey, and faintly tangy flavor of red velvet. What’s more, they’re simple to make, which is a blessing when you’re navigating a busy schedule or just craving a sweet treat without the fuss. Instead of spending hours in the kitchen, you can whip these up in no time, and they’re consistently a hit. Trust me, one bite, and you’ll feel like you’ve been transported straight to a cozy corner of a bakery!
What It Tastes Like
Imagine sinking your teeth into one of these Red Velvet Bear Cookies: the exterior has a slight crispness, while the inside is soft and chewy, melting in your mouth with each bite. The cocoa gives a gentle richness, complemented by a hint of vanilla, and that iconic red velvet tang that cozies up next to a dash of sweetness from the frosting. They taste like the love that went into making them—akin to the first warm bite of comfort after a long, hectic day. Honestly, they’re a perfect treat for unwinding and enjoyable enough to brighten even the gloomiest days!
Ingredients You’ll Need
- 2 1/2 cups all-purpose flour: This is the backbone of your cookies, providing structure.
- 1 cup granulated sugar: Ah, the sweet stuff! It adds that lovely sweetness and helps with texture.
- 1/2 cup brown sugar: This brings depth, moisture, and a bit of caramel flavor to the table.
- 1 cup unsalted butter, softened: Adds richness and a lovely texture.
- 2 large eggs: They bind everything together and help in creating a soft cookie.
- 1 tablespoon red food coloring: The star of the show! This gives you that signature red velvet hue.
- 1 teaspoon vanilla extract: Because every cookie deserves a touch of vanilla goodness.
- 1 teaspoon cocoa powder: Just enough to add cocoa flavor without overpowering the red velvet elements.
- 1/2 teaspoon baking soda: Helps the cookies rise perfectly.
- 1/2 teaspoon salt: Balances out the sweetness.
- 1 cup cream cheese frosting: For adorning our adorable bear cookies!
Optional Additions
- Chocolate chips: For the chocolate lovers out there, fold in some semi-sweet chocolate chips for an extra rich taste.
- Nuts: Walnuts or pecans give a delightful crunch and flavor contrast.
- Sprinkles: Add some festive touches by sprinkling colorful confetti on top of the frosting!
Special Garnishes
- Mini chocolate chips: These can be used as eyes for your bear cookies.
- Edible glitter: A fun finishing touch for parties!
Step-by-Step Instructions
Ready to bring your Red Velvet Bear Cookies to life? Let’s get started!
- Preheat the oven: Preheat your oven to 350°F (175°C). This makes sure your cookies bake evenly.
- Mix the dry ingredients: In a bowl, whisk together the flour, cocoa powder, baking soda, and salt. Set it aside, but don’t skip this step— it allows for even blending later!
- Cream the butter and sugars: In a large mixing bowl, cream the softened butter with granulated and brown sugar until it’s fluffy. This should take about 2-3 minutes. Enjoy those little moments when the machine is whisking away—it’s where the magic starts!
- Add the eggs and extracts: Beat in the eggs, food coloring, and vanilla. Watch the mixture turn into a beautiful deep red — it’s like seeing magic happen in real-time!
- Combine wet and dry ingredients: Gradually stir the dry ingredients into the wet mixture. Mix until just combined—overmixing can lead to tough cookies. Give it a quick taste. Mmm, love that contrast of flavors already!
- Shape your bears: Using a cookie scoop (or just your hands), form small balls and slightly flatten them. If you have bear-shaped cookie cutters, this is the time! Otherwise, remember, they don’t have to be perfect—bear cookies can be a little funny shaped and still be delightful!
- Bake: Place the cookies on a parchment-lined baking tray and bake for 8-10 minutes until the edges are set. They’ll look puffy and soft—trust me, that’s the sweet spot!
- Cool and frost: Let your cookies cool on a wire rack. Once cooled, pipe or spread the cream cheese frosting on top and add mini chocolate chips for eyes!
- Serve and enjoy: Gather your friends, family, or just cozy up on the couch with a stack of cookies. Each bite will be a warm reminder of the joy baked into these little bears!
Recipe Variations
If you’re feeling creative and want to switch things up, here are a few variations to consider:
- Swap the cream cheese frosting for a light vanilla buttercream for a different flavor experience.
- Add a touch of mint extract to the batter for a refreshing twist.
- Make them into sandwich cookies and fill them with whipped cream or ice cream for a delightful dessert.
Serving & Storage Tips
These cookies are best enjoyed fresh out of the oven, but they’ll stay soft in an airtight container for up to a week. You can also freeze the dough for later—just scoop the balls onto a baking sheet, freeze until solid, then pop them into a bag. This way, you’ll always have cookie dough ready whenever the craving hits! Just bake them directly from the freezer; you may need to add a couple of extra minutes to the bake time.
Helpful Tips
- Don’t rush the cooling process—warm cookies can lead to melted frosting disasters!
- Watch the baking time closely. Oven temperatures can vary, and you want to catch them just as they start to set.
- If crafting shapes, consider chilling the dough briefly before cutting; it makes it easier to handle.
Special Equipment
- Stand mixer or hand mixer: This tool saves time and effort in creaming the butter and sugars—trust me, your arm will thank you!
- Cookie scoop: Perfect for portioning out even cookies. No one wants a cookie that’s twice the size of another. (And trust me, the ‘professional’ look is always appreciated.)
- Piping bag: This helps you add beautiful designs to your frosting, giving those bears a unique personality!
Frequently Asked Questions
Can I make these cookies in advance?
Absolutely! You can prepare the dough ahead of time and refrigerate it for up to 48 hours or freeze it for up to three months. Just remember, baking from frozen may require a couple of additional minutes in the oven.
What if I don’t have red food coloring?
If you’re not keen on using food coloring, you could play around with natural alternatives like beet juice for color. However, the flavor may shift slightly, so keep that in mind!
Could I use a different frosting?
Definitely! While the cream cheese frosting pairs perfectly with these cookies, you can use whipped cream, chocolate ganache or even a simple glaze. The flavor possibilities are endless!
How do I make my cookies soft and chewy?
Here’s the secret: don’t overmix the dough, and don’t bake them too long. They should be soft when you take them out of the oven, as they will continue to set on the baking sheet.
What can I do with leftover cookies?
These cookies are delightful on their own, but you can crumble them over ice cream for an unexpected dessert or even layer them in a trifle with whipped cream and fruit – just a delicious way to use up the leftovers!
Conclusion
And there you have it! Red Velvet Bear Cookies are not just treats; they’re sweet bites of happiness that bring joy to every occasion. Whether you’re celebrating a birthday, holiday, or just a regular Tuesday, these cookies will add a special charm to your day. I love making them for my family gatherings, and I can already see the smiles on everyone’s faces as they take a bite. The best part? They’re easy enough that the kids can help in the kitchen—making memories one cookie at a time! I can’t wait to hear how your baking adventure goes, so please share your stories or modifications in the comments below. Happy baking!
Print
Irresistible Red Velvet Bear Cookies Bake Memorable Treats
- Total Time: 25 minutes
- Yield: 24 cookies 1x
Description
Delight in red velvet bear cookies that create lasting memories Perfect for any occasion these treats are a delicious twist on classic cookies
Ingredients
Instructions
Notes
Red Velvet Bear Cookies are adorable, delicious, and pack a rich chocolatey flavor with a hint of vanilla and a cream cheese frosting that brings smiles to every occasion.
- Prep Time: 15 minutes
- Cook Time: 10 minutes
- Category: Dessert
- Cuisine: American
Nutrition
- Serving Size: 24 cookies
- Calories: 150
- Sugar: 10 grams
- Fat: 7 grams
- Carbohydrates: 20 grams
- Fiber: 0.5 grams
- Protein: 2 grams


