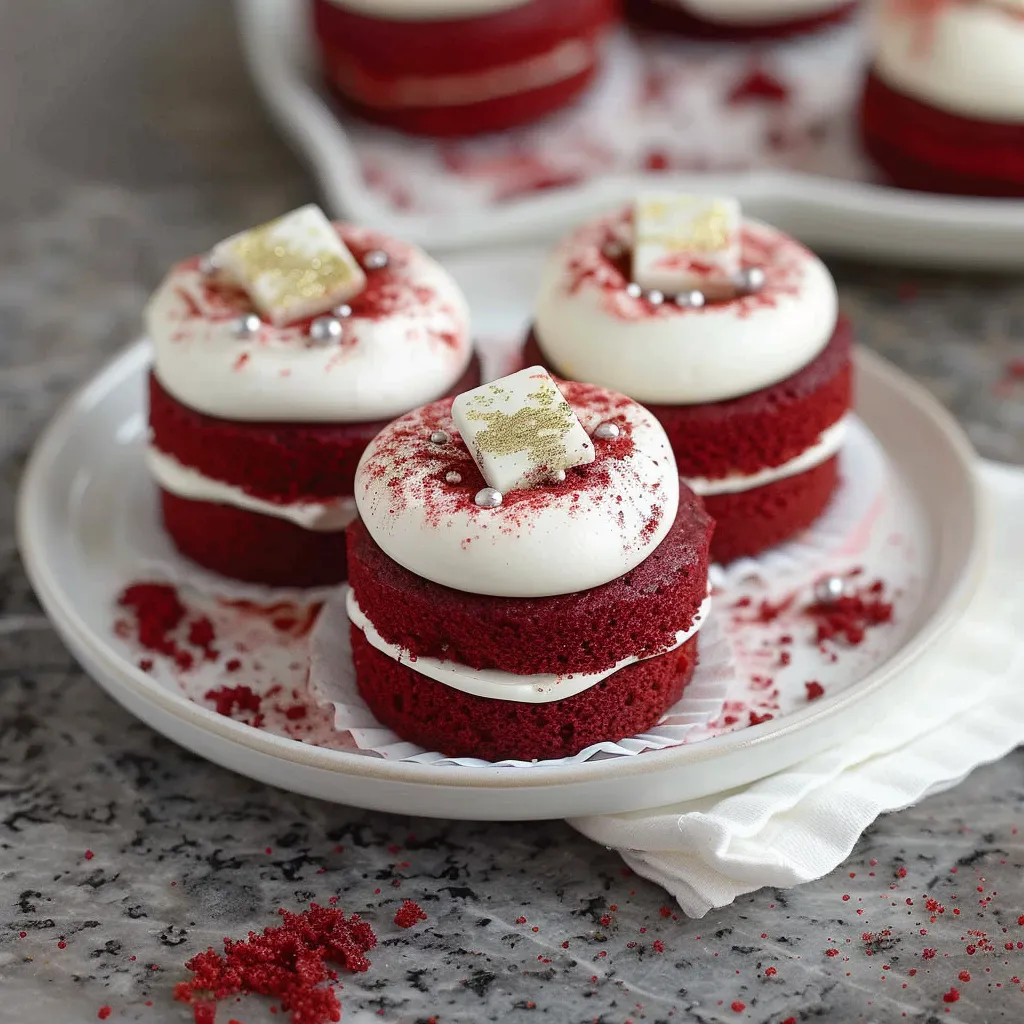
Ah, red velvet cake—it’s that special dessert that calls to mind cozy gatherings and family celebrations. Just imagine it: a sunny afternoon, friends and laughter filling the air, and there you are, pulling out a tray of these delightful red velvet cake minis. They’re perfectly portioned, adorable little bites that beckon you to take just one more (or maybe two). My journey with red velvet cake started during a cheerful winter holiday, with my aunt’s legendary recipe. It’s a cake that sings of love, warmth, and a touch of magic, and the mini version is just as captivating. Today, I’m excited to share with you a recipe that not only simplifies the classic but also amps up the charm. Get ready for something special!

Why You’ll Love This Recipe
Let’s be honest—life can get hectic and sometimes chaotic, right? That’s where these red velvet cake minis step in like a culinary superhero. They save time without skimping on flavor or presentation. Picture this: a dessert that feels like something you’d expect in a fanciful bakery but is crafted right in your own kitchen. Each mini cake is soft, velvety, and frosted to perfection, easily winning over your friends and family. Plus, they’re just the right size. No towering slices or cake leftovers to worry about—just grab one and go! What’s not to love about that?
What It Tastes Like
Let’s talk flavors for a second. The taste of red velvet cake is a beautiful blend of rich cocoa, a hint of tanginess from the buttermilk, and a slight sweetness that dances on your tongue. It’s moist, airy, and oh-so indulgent. Biting into one of these mini cakes is like a big warm hug—you know the feeling, right? Its texture is akin to a gentle cloud, where each crumb melts against the roof of your mouth, leaving a subtle cream cheese frosting finish that lingers long after the last bite. You’ll find it impossible to stop at just one!
Ingredients You’ll Need
- 2 cups all-purpose flour: The backbone of your cake, lending the perfect structure.
- 1 cup granulated sugar: Sweetens the deal without overpowering the cocoa.
- 1 teaspoon baking soda: Helps the cake rise, giving it that fluffy texture.
- 1 teaspoon salt: Balances the sweetness, enhancing all the flavors.
- 1 teaspoon cocoa powder: Adds just a hint of chocolate flavor to keep things interesting.
- 1 cup vegetable oil: Keeps the cake moist and delightful.
- 1 cup buttermilk: The tangy goodness that makes your cake rich and tender.
- 2 large eggs: Adds binding and structure to your cakes.
- 2 tablespoons red food coloring: The star of the show that gives it that iconic hue!
- 1 teaspoon vanilla extract: A must-have to round out the flavors.
- 1 teaspoon white vinegar: Reacts with the baking soda for lift and a slight tang.
Optional Additions
- Dark chocolate chips: For an unexpected rich burst of chocolate in each bite.
- Nuts (like walnuts or pecans): For a lovely crunch.
Special Garnishes
- Extra cream cheese frosting: Drizzle or pipe for a beautiful finish.
- Crushed red velvet cake crumbs: Sprinkle on top for a touch of drama.
Step-by-Step Instructions
Let’s whip up these delightful mini cakes! Don’t be intimidated by the process—think of it like baking with a good friend by your side.
- Preheat your oven: First, crank up the heat to 350°F (175°C). Greasing and lining your mini muffin pan or silicone molds helps them release easily.
- Mix dry ingredients: In a medium bowl, sift together the flour, sugar, cocoa powder, baking soda, and salt. Sifting is not just for show—this keeps your cake light!
- Combine wet ingredients: In a separate large bowl, whisk together the oil, buttermilk, eggs, food coloring, vanilla extract, and vinegar until smooth. This is where the magic begins!
- Blend it all: Gradually add the dry mix to the wet mixture, stirring just until combined. Don’t overmix; a few lumps are entirely acceptable!
- Fill the pans: Use a small scoop or spoon to fill each cavity about 2/3 full. This leaves room for rising.
- Bake: Pop them in the oven and let them bake for about 15-18 minutes, or until a toothpick inserted in the center comes out clean. Your kitchen will smell heavenly during this time—trust me.
- Cool down: Once baked, let them sit for about 5 minutes in the pan before transferring them to a wire rack to cool completely. Patience is key; the frosting will slide right off if they’re warm!
- Frost & enjoy: Once cool, it’s time to decorate! Spread a dollop of cream cheese frosting on top of each mini. Feel free to pipe it on with a pastry bag for some flair!
Recipe Variations
If you’re feeling a little adventurous, there are plenty of fun twists you can add. Consider switching out the cream cheese frosting for a whipped vanilla or chocolate ganache for a different flavor profile. You could also add a little bit of espresso powder to the batter for a mocha vibe. Go wild with seasonal spices like nutmeg or cinnamon during the holidays! The possibilities are endless, truly.
Serving & Storage Tips
These red velvet cake minis are best enjoyed fresh, but they can last in an airtight container at room temperature for up to three days. If you want to keep them longer, toss them in the fridge for up to a week. Pssst, a little tip: microwaving them for about 10 seconds makes them feel warm and fresh again, like they just came out of the oven!
Helpful Tips
Let’s chat about the kitchen blunders that can happen and how to avoid them. One thing I learned the hard way? Don’t skip the vinegar; it creates that lovely tender crumb we adore in red velvet! Also, keep an eye on the baking time. Every oven is different—your beautiful cake might need a little less or a little more time than specified. And please, allow those minis to cool completely before frosting. Trust me, warm cake and frosting don’t mix well. Just… don’t do it!
Special Equipment
For this recipe, having a mini muffin pan or silicone molds is essential! They provide the perfect shape, and the non-stick variety means you can (hopefully) forgo the dreaded cake-sticking fiasco. A stand mixer or hand mixer will speed up the mixing process, but whisking by hand does build character—so don’t sweat it! And don’t forget about packaging! If you plan to share these sweet gems, some decorative boxes or clear bags make for an adorable presentation.
FAQ
Can I make this cake in a regular size?
Absolutely! Just adjust the baking time. For a standard cake, it typically takes 25-30 minutes at the same temperature. Keep that toothpick handy to check!
What if I can’t find red food coloring?
No worries! Some folks use beetroot powder as a natural alternative. Not only does it give a lovely shade of red, but it also adds a unique flavor.
Can these be frozen?
You can freeze them! Just wait until they are fully cooled and wrap them tightly in plastic wrap, then store them in a freezer bag. They can last up to three months in the freezer!
What’s a good substitute for buttermilk?
An easy substitution is mixing regular milk with a teaspoon of vinegar or lemon juice; let it sit for about 5-10 minutes to thicken slightly. Voila! Instant buttermilk.
Conclusion
There you have it—delicious, charming red velvet cake minis that are sure to impress friends and family alike. I adore making these for birthdays, holiday parties, or even a cozy night in when I’m craving something sweet. The joy of baking is not just in creating a culinary masterpiece, but also in sharing it with those we love. I’d love to hear how your mini cakes turn out, what unique twists you add, or your favorite memories connected to this dessert. Let’s connect in the comments below. Until next time, happy baking!
Print
Irresistible Red Velvet Cake Minis Delightful Mini Treats
- Total Time: 38 minutes
- Yield: 24 minis 1x
Description
Savor Red Velvet Cake Minis delightful mini treats perfect for any occasion Indulge in rich flavor ideal for parties or snacks Enjoy today
Ingredients
- 2 cups of all-purpose flour
- 1 cup of granulated sugar
- 1 teaspoon of baking soda
- 1 teaspoon of salt
- 1 teaspoon of cocoa powder
- 1 cup of vegetable oil
- 1 cup of buttermilk
- 2 large eggs
- 2 tablespoons of red food coloring
- 1 teaspoon of vanilla extract
- 1 teaspoon of white vinegar
- Dark chocolate chips (optional)
- Nuts (like walnuts or pecans) (optional)
- Extra cream cheese frosting (for garnish)
- Crushed red velvet cake crumbs (for garnish)
Instructions
- Preheat your oven to 350°F (175°C). Grease and line your mini muffin pan or silicone molds.
- In a medium bowl, sift together the flour, sugar, cocoa powder, baking soda, and salt.
- In a separate large bowl, whisk together the oil, buttermilk, eggs, food coloring, vanilla extract, and vinegar until smooth.
- Gradually add the dry mix to the wet mixture, stirring just until combined.
- Use a small scoop or spoon to fill each cavity about 2/3 full.
- Bake for about 15-18 minutes, or until a toothpick inserted in the center comes out clean.
- Let them sit for about 5 minutes in the pan before transferring them to a wire rack to cool completely.
- Once cool, spread a dollop of cream cheese frosting on top of each mini.
Notes
Delightful red velvet cake minis that are perfectly portioned and sure to impress friends and family alike.
- Prep Time: 20 minutes
- Cook Time: 18 minutes
- Category: Dessert
- Cuisine: American
Nutrition
- Serving Size: 24 minis
- Calories: 150
- Sugar: 12g
- Fat: 7g
- Carbohydrates: 22g
- Fiber: 0g
- Protein: 2g


