Gather ‘round, dear friends! Let’s take a moment to get cozy as we talk about one of my all-time favorite treats: Red Velvet Cookie Cups. Picture this: it’s a crisp Sunday afternoon, the sun is gently filtering through the kitchen window, and I’m in a flour cloud of happiness, ready to whip up something special. There’s a hint of nostalgia in the air, reminding me of my childhood love for red velvet cake, slathered with cream cheese frosting. But today, I’m switching things up with a twist: introducing the cookie cup version. These delightful little treats are perfect for cozy gatherings or simply when you need a touch of sweetness in your day. So grab your favorite mug of hot cocoa, and let’s dive into the delightful world of Red Velvet Cookie Cups!

Why You’ll Love This Recipe
Now, why should you take a moment from your busy life to whip up these cookie cups? Well, first of all, they are ridiculously simple to make! You’ll feel like a baking genius without having to spend hours in the kitchen. Imagine presenting these charming cookie cups at your next family gathering or brunch; I guarantee they’ll be the stars of the show, and you’ll bask in the compliments.
Furthermore, each bite is a delightful hug in the shape of a cookie. With a soft, chewy texture and a rich cocoa flavor, these treats perfectly blend that iconic red velvet taste with the ease of a cookie. Plus, who can resist that dreamy cream cheese frosting that brings everything together? It’s a little moment of joy that tastes like home, reminiscent of celebrations and cherished memories. So trust me when I say: this isn’t just another cookie; it’s an experience!
What It Tastes Like
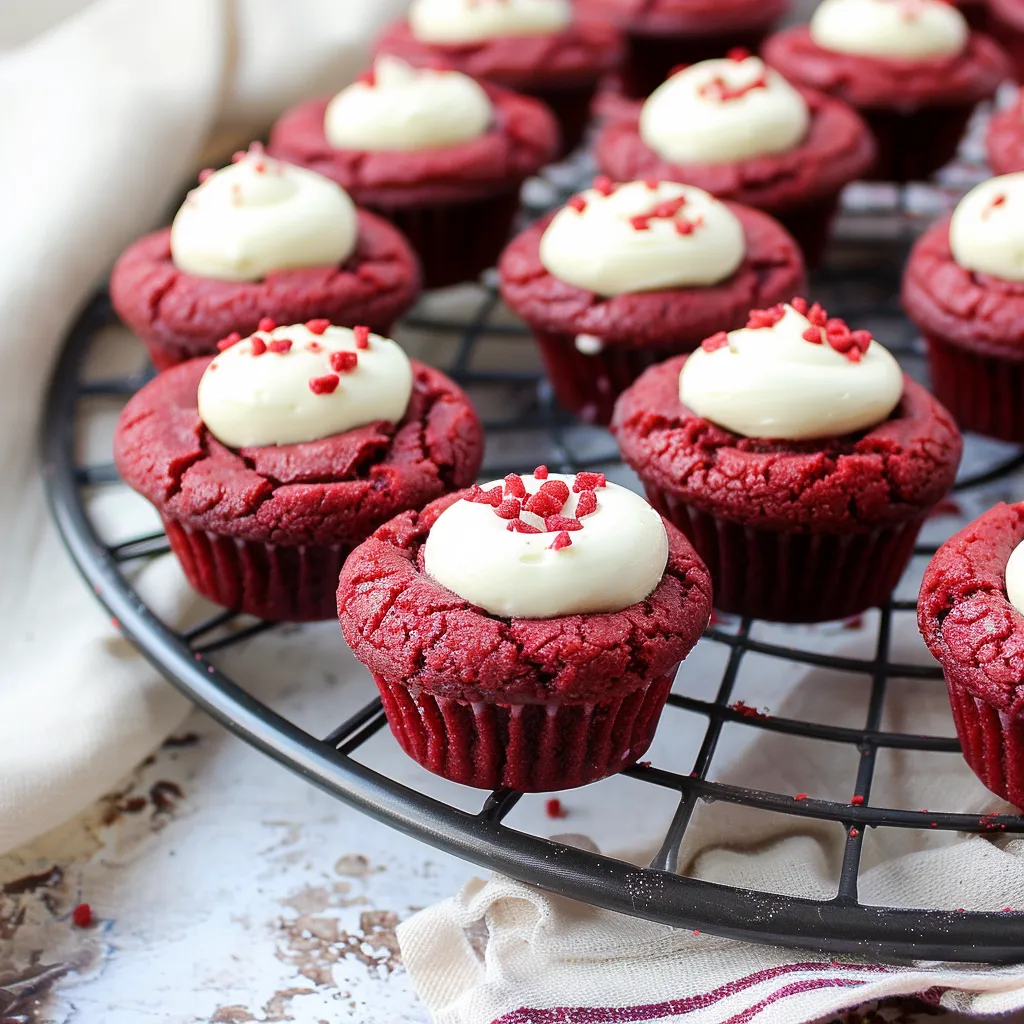
Oh, let me paint a picture for you. Upon the first bite, you’re greeted with a soft, tender cookie bursting with a subtle cocoa flavor. It’s as inviting as a warm hug after a long day. The slight tanginess from the cream cheese frosting adds a delightful contrast, pulling you into a blissful state of taste euphoria. The red color isn’t just for show, my friends. It’s a visual treat that plays into the whimsy of it all, making each bite feel festive and special. Each cookie cup is like those moments of joy that sneak up on you unexpectedly—sweet, a bit nostalgic, and a sprinkle of deliciousness that leaves you wanting more!
Ingredients You’ll Need
- 1 1/2 cups all-purpose flour: The backbone of our cookie, giving it structure and that lovely crumbly texture.
- 1/2 cup unsweetened cocoa powder: Adds depth and a rich chocolate flavor that pairs perfectly with the red velvet.
- 1/2 teaspoon baking soda: Helps the cookie rise, lending it that soft, chewy consistency.
- 1/4 teaspoon salt: Just a pinch to balance all those sweet flavors.
- 1/2 cup unsalted butter, softened: Adds creaminess and flavor. Don’t skimp here!
- 1 cup granulated sugar: Sweetness is essential, and sugar is our best friend in this recipe.
- 1 large egg: Binds it all together and adds moisture.
- 1 tablespoon red food coloring: The star of the show, giving our cookies that iconic hue!
- 1 teaspoon vanilla extract: A hint of warmth and sweetness.
- 1/2 cup cream cheese, softened: To make that dreamy topping!
- 1/4 cup powdered sugar: Sweetens the cream cheese and makes it spreadable.
Optional Additions:
- Chocolate chips: Who wouldn’t want a little ooey-gooey chocolate surprise?
- Nuts: Chopped pecans or walnuts for a little crunch if you’re feeling adventurous.
Special Garnishes:
- Red sprinkles: For that festive touch.
- Fresh berries: Blueberries or raspberries provide a lovely tart counterpoint.

Step-by-Step Instructions
Let’s roll up our sleeves and get those cookie cups baking. Follow me through this delicious journey—trust me, it’s going to be a great ride!
- Preheat your oven to 350°F (175°C). This is essential; no one likes a half-baked cookie, right?
- In a bowl, whisk together the flour, cocoa powder, baking soda, and salt. Set it aside, letting it mingle in all its dry glory.
- In a separate bowl, cream together the softened butter and granulated sugar. You want this to be light and fluffy—about 2-3 minutes. Don’t rush this step—it’s where the magic happens!
- Add in the egg, red food coloring, and vanilla extract, mixing until well combined. Look at that vibrant color—how can you resist?
- Slowly add the dry ingredients into the wet mixture, stirring gently. Your dough should start to come together beautifully.
- Now, here comes the fun part: grab about a tablespoon of dough and press it into a muffin pan, trying to create a little cup shape. Don’t worry about perfection; they’ll taste great regardless.
- Bake for about 10-12 minutes. Keep an eye on them—the smell alone will have your friends flocking to the kitchen.
- Let the cookie cups cool for a few minutes before gently removing them from the pan. A little patience will go a long way here!
- While they cool, take a moment to whip up that cream cheese frosting. Beat together the softened cream cheese and powdered sugar until smooth and fluffy.
- Once the cups are completely cool, generously dollop or pipe that cream cheese frosting into each cookie cup. The more, the merrier!
Recipe Variations
Feeling a little creative? There are so many fun ways to switch things up with these Red Velvet Cookie Cups. Try adding a swirl of peanut butter into your cream cheese frosting for a nutty twist. Or, how about adding a splash of espresso powder to your dough for a coffee-infused delight? Swap out the cream cheese frosting for a classic buttercream if you prefer something sweeter. You can even make mini versions for bite-sized treats that are perfect for parties!
Serving & Storage Tips
Once your adorable cookie cups are all frosted, they’re ready to impress. These treats are best enjoyed fresh, but if you happen to have leftovers (I won’t judge!), store them in an airtight container in the fridge for up to 3 days. If you want to reheat them, just pop them in the microwave for a few seconds, and that warm, gooey frosting will make them taste like they were just made! And as for creative leftovers? Use crumbled cookie cups as a topping for ice cream or mix them into yogurt for a delightful dessert!
Helpful Tips
Let me share some wisdom from my kitchen trials (and errors). First off, don’t overmix your dough; it’ll make the cookies tough. Aim for a just-mixed consistency. Also, make sure your butter is softened but not melted—it’ll yield the softest cookies. If you’re feeling brave, you can try using a different mix of food coloring to create a fun speckled effect or even use natural dyes if that’s more your style! Most importantly, enjoy the process; it’s not just about the end result but the joy of baking.
Special Equipment
While you don’t need a whole fancy kitchen to make these cookie cups, there are a few tools that make life so much easier! A good quality muffin pan is essential to create those perfect cup shapes. I recommend using a silicone spatula; it’s fantastic for mixing and scraping down the sides of your bowl. And if you want to get fancy, a piping bag will give you a beautiful frosting finish. Trust me, it makes all the difference!
Frequently Asked Questions
Can I use a different frosting?
Absolutely! You can take a swing at a classic buttercream or even a whipped cream topping if you’re in the mood. Just keep in mind the flavors you want to pair with the red velvet!
Can I make these ahead of time?
You can definitely prepare the cookie cups a day in advance and frost them just before serving. They taste best the same day they’re made, but the frosting will hold up in the refrigerator for a day or two.
How do I prevent them from sticking to the pan?
Using a non-stick muffin pan helps, but I suggest greasing the pan lightly for extra assurance. If you’re really looking to avoid a sticky situation, silicon molds work wonders!
Can I freeze the cookie cups?
Yes! You can freeze the unbaked dough for up to 3 months. Just allow them to thaw before baking! I don’t recommend freezing the frosted cookie cups, as the frosting won’t hold up after thawing.
Conclusion
So there you have it! Red Velvet Cookie Cups that are not only a treat for your taste buds but a warm hug for your soul. Every time I make these, I’m reminded of the joy that comes from simple ingredients and a little creativity in the kitchen. They’re perfect for celebrations or as a little pick-me-up after a long day. I’d love to hear how you make them your own or stories of joy these cookie cups brought to your gatherings. Bake up some love and let’s keep this delicious journey going. Happy baking, friends!
Print
Delicious Red Velvet Cookie Cups Irresistible Dessert Delight
- Total Time: 32 minutes
- Yield: 12 servings 1x
Description
Savor the magic of Red Velvet Cookie Cups These irresistible desserts are a musttry for any sweet tooth craving a delightful treat
Ingredients
Instructions
Notes
Red Velvet Cookie Cups that are not only a treat for your taste buds but a warm hug for your soul. Perfect for gatherings or as a little pick-me-up.
- Prep Time: 20 minutes
- Cook Time: 12 minutes
- Category: Dessert
- Cuisine: American
Nutrition
- Serving Size: 12 servings
- Calories: 180
- Sugar: 15g
- Fat: 7g
- Carbohydrates: 30g
- Fiber: 1g
- Protein: 2g


