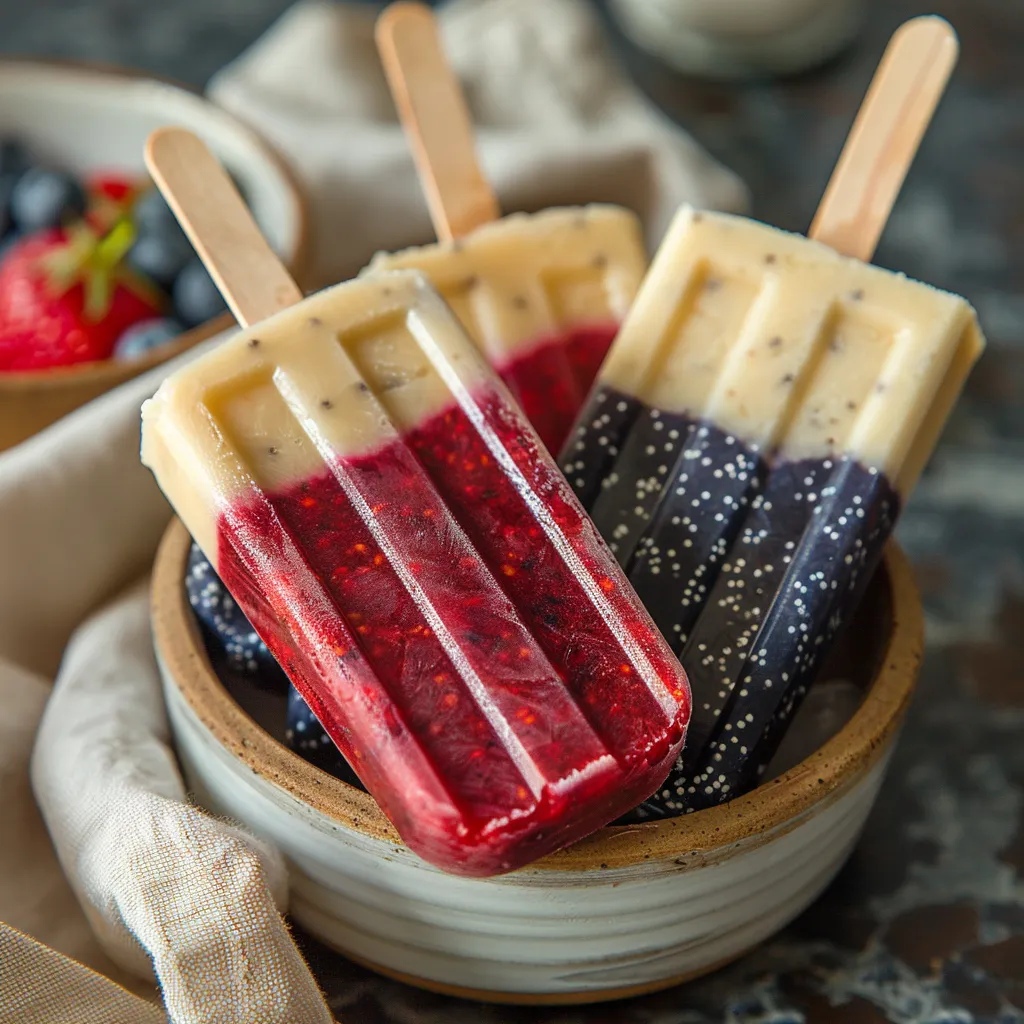
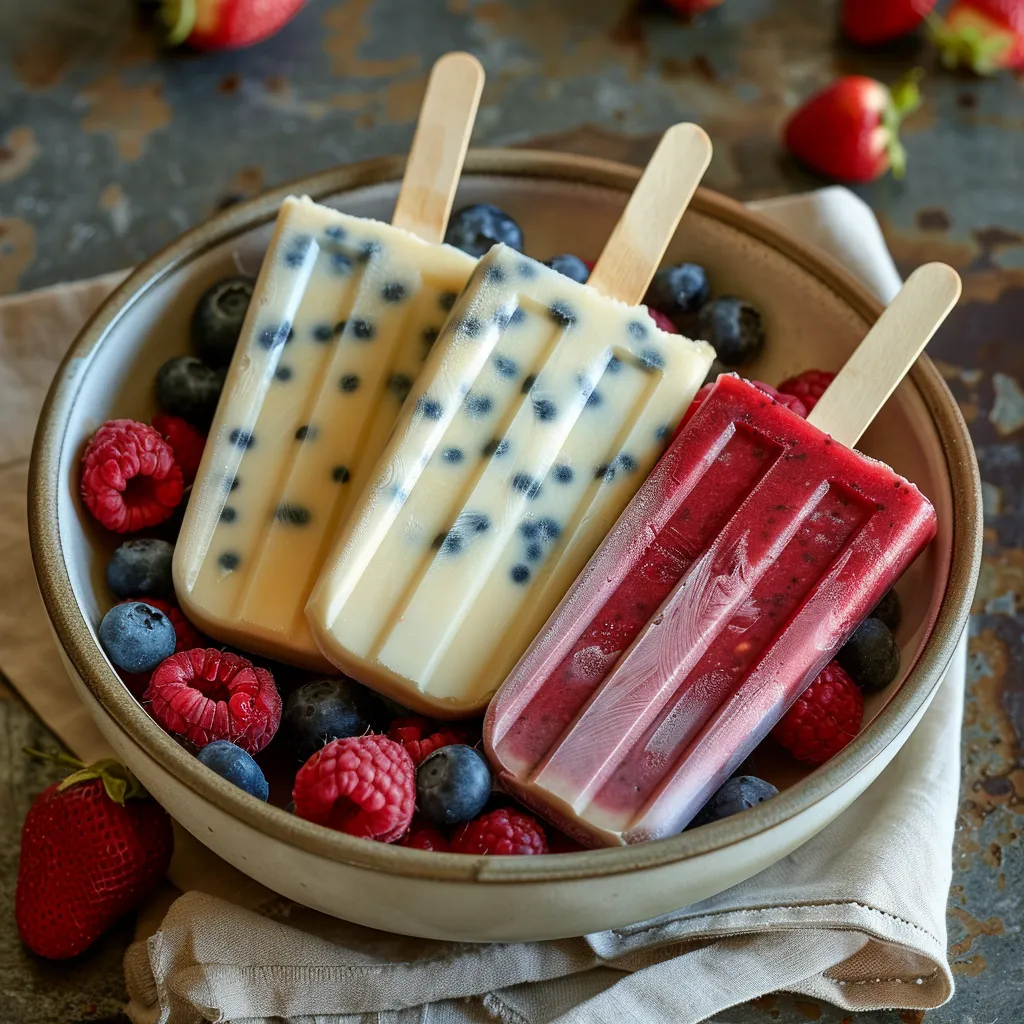
Summer is upon us, and what better way to celebrate the season than with a refreshing, delicious treat? Red, White, and Blue Popsicles are the perfect way to beat the heat while showcasing a fun, festive flair. Ideal for parties, family gatherings, or just because you want something sweet, these vibrant popsicles will delight both kids and adults alike. With simple ingredients, they’re easy to whip up and even easier to enjoy. Let’s dive into why these popsicles should be your go-to summer dessert!
Why You’ll Love This Recipe
There are a number of reasons you’re going to love making Red, White and Blue Popsicles:
- Colorful and Fun: The stunning red, white, and blue layers create a visually appealing dessert that’s sure to impress.
- Customizable: You can adjust the sweetness and fruit combinations to suit your family’s tastes or dietary needs.
- Healthy Option: Made from wholesome ingredients like fruits and natural sweeteners, these pops are a better alternative to store-bought options.
- Easy to Make: With just a few steps, you’ll have a batch of delicious popsicles ready to freeze.
- Perfect for Celebrations: Whether it’s a Fourth of July barbecue or a summer birthday party, these popsicles add a festive touch to any occasion.
Ingredients You’ll Need
To get started on these tasty popsicles, here’s what you’ll need:
- Red Layer:
- 2 cups fresh strawberries, hulled and sliced
- 1 tablespoon honey or agave syrup (optional)
- 1 tablespoon lemon juice
- White Layer:
- 1 cup coconut milk (or plain yogurt)
- 1 tablespoon maple syrup (optional)
- Blue Layer:
- 2 cups fresh blueberries
- 1 tablespoon honey or agave syrup (optional)
- 1 tablespoon lemon juice
Step-by-Step Instructions
1. Prepare the Red Layer
In a blender, combine the strawberries, honey (if using), and lemon juice. Blend until smooth. If you prefer a chunkier texture, you can pulse the mixture a few times to leave small pieces of fruit.
2. Pour the Red Layer
Divide the strawberry mixture evenly among your popsicle molds, filling each about one-third full. Tap the molds gently on the counter to remove any air bubbles. Place in the freezer for about 1-2 hours, or until set.
3. Prepare the White Layer
While the red layer is freezing, mix together the coconut milk and maple syrup in a bowl or blender until combined. Once the red layer is set, take the molds out of the freezer.
4. Pour the White Layer
Carefully pour the white coconut milk mixture on top of the red layer, filling each mold to about two-thirds full. Again, gently tap the molds to prevent air pockets. Return to the freezer for another 1-2 hours, or until set.
5. Prepare the Blue Layer
In a clean blender, combine the blueberries, honey (if using), and lemon juice. Blend until smooth. Once the white layer is firm, remove the molds from the freezer.
6. Pour the Blue Layer
Pour the blueberry mixture on top of the white layer, filling each mold to the top. Insert popsicle sticks and return to the freezer for at least 4 hours, or until completely frozen.
7. Unmold and Serve
To remove the popsicles, run warm water over the outside of the molds for a few seconds. Gently pull on the popsicle stick to release the popsicle. Serve immediately and enjoy your colorful, tasty treat!
Serving and Storage Tips
Once you’ve mastered the art of making Red, White and Blue Popsicles, you might want to make a batch ahead of time. Here are some tips on serving and storage:
- Serving: These popsicles are best enjoyed fresh, but you can serve them up with whipped cream or additional fresh fruit on top for an extra special touch.
- Storage: Store any leftover popsicles in an airtight container in the freezer. They should keep well for up to 4-6 weeks. Just be sure to separate layers with parchment paper if you’re stacking them.
Helpful Tips
To ensure your popsicles turn out perfectly, consider the following tips:
- Fruit Quality: Use fresh, ripe fruit for the best flavor. If berries are out of season, frozen fruit can also be used.
- Sweetness: Adjust the sweeteners according to your taste. Some people love a tart popsicle; others prefer them sweet!
- Stick Handling: If you’re having trouble getting the sticks to stay upright, consider freezing each layer for a longer time before adding the next.
- Variety: Don’t hesitate to experiment with different fruit combinations, such as raspberries for red or kiwi for a green-layered version!
Frequently Asked Questions
Can I use different types of milk for the white layer?
Absolutely! You can use almond milk, yogurt, or any non-dairy alternative that suits your dietary preferences. Just keep in mind that this might alter the flavor slightly, so choose a base you enjoy!
How long can I keep the popsicles in the freezer?
These popsicles can last in the freezer for up to 4-6 weeks if stored in an airtight container. For the best flavor and texture, try to enjoy them within the first few weeks!
Can I make these popsicles without sugar?
Yes! You can easily skip the sweeteners and rely on the natural sugars found in the fruit. Ripe fruit will be sweeter on its own, so taste as you go to get the balance just right.
What can I do if I don’t have popsicle molds?
If you don’t have popsicle molds, consider using small plastic cups or even ice cube trays. Just be sure to insert toothpicks or craft sticks for easy handling!
How can I make these popsicles dairy-free?
Use coconut milk or almond milk in place of yogurt or regular milk in the white layer. This way, you can enjoy a delicious, dairy-free treat!
Conclusion
With their vibrant colors, refreshing taste, and healthy ingredients, Red, White, and Blue Popsicles are a quintessential summer dessert. Whipping up a batch is a breeze, and the joy of sharing them with family and friends adds to the fun. Whether you’re hosting a gathering or just looking for a sweet snack, these popsicles are sure to brighten your day. So gather your ingredients, turn on some music, and let the popsicle-making adventure begin! Enjoy every frozen bite!
Print
Delicious Red White Blue Popsicles for Your Summer Fun
- Total Time: 6 hours 15 minutes
- Yield: 6 servings 1x
Description
Enjoy Delicious Red White Blue Popsicles that bring summer fun to your gatherings Perfect for hot days these treats are a festive delight
Ingredients
Instructions
- Prep Time: 15 minutes
- Cook Time: 6 hours
- Category: Dessert
- Cuisine: American
Nutrition
- Calories: 100 calories
- Sugar: 10g
- Fat: 3g
- Saturated Fat: 3g
- Carbohydrates: 19g
- Fiber: 2g
- Protein: 1g


