Ah, St. Patrick’s Day! A time when green takes over our lives, from the clothes we wear to the food we enjoy. I still remember celebrating this quirky holiday as a child, clashing with my classmates over who could wear the most garish shade of green. One year, my mom surprised us with the most delightful cake pops, whimsically dipped in a shiny green coating and crowned with golden sprinkles. Everyone bit into their cake pop with the excitement usually reserved for candy, and the laughter filled our cozy kitchen for hours. Those sweet, vibrant treats became a hallmark of our family’s St. Patrick’s traditions. Today, I’m thrilled to share with you my take on this festive favorite: St. Patrick’s Day Cake Pops!
Why You’ll Love This Recipe
Imagine yourself standing in a warm kitchen, the smell of baked cake wafting through the air. The wonderful thing about these cake pops is how adaptable they are: you can whip them up fairly quickly and customize them to your heart’s content. Not only do they embody the spirit of St. Patrick’s Day with their playful colors, but they also bring a touch of joy to any gathering. Plus, let’s be honest, who doesn’t love a cake that’s served on a stick? These little bites of happiness are perfect for parties, casual get-togethers, or simply a sweet everyday treat to brighten your day! They save time on busy nights—yes, truly, they do— and each bite is like a tiny burst of joy, making your taste buds dance with delight!
What It Tastes Like
These cake pops have a delightful texture that’s soft yet firm enough to hold onto that stick. Picture this: you take your first bite, and it’s like hugging a fluffy cloud of cake that melts in your mouth. The sweetness is perfectly balanced with a touch of creaminess from the coating, creating a little bite-sized festival of flavors with every pop. Drizzled with contrasting chocolate, their taste is reminiscent of that first warm slice of cake right out of the oven, paired with the joy of festive gatherings filled with laughter. When you pop one in your mouth, it’s akin to stealing a taste of childhood—always comforting, always delightful.
Ingredients You’ll Need
- 1 box of cake mix (any flavor you adore): This forms the delightful base of your pops, adding moisture and sweetness.
- 3 large eggs: They contribute to the cake’s fluffiness and richness.
- 1 cup of water or milk: Milk will add a creamier texture, while water keeps it light.
- ½ cup of vegetable oil: This adds a wonderful moisture that keeps the cake tender.
- 1 container of frosting (store-bought or homemade): Acts as the glue to hold the cake pops together; plus, it adds even more delish flavor!
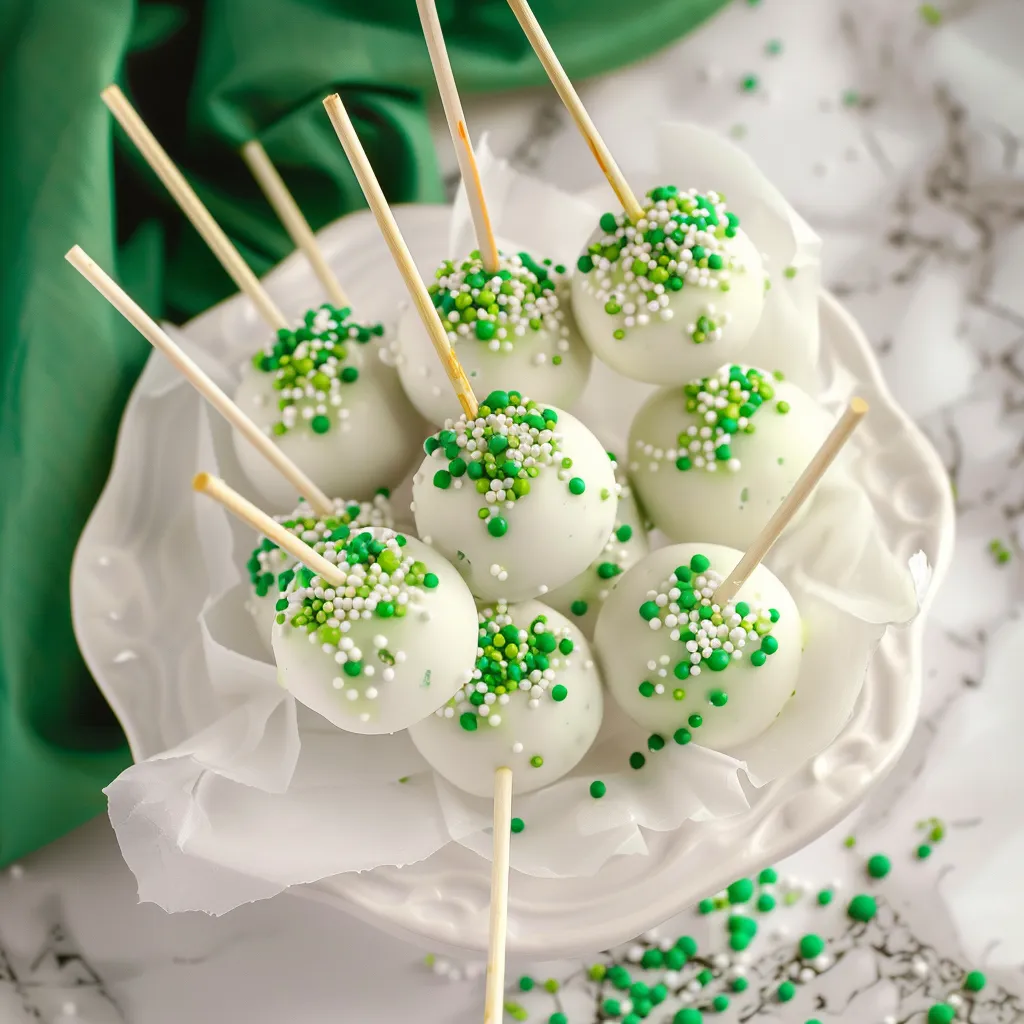
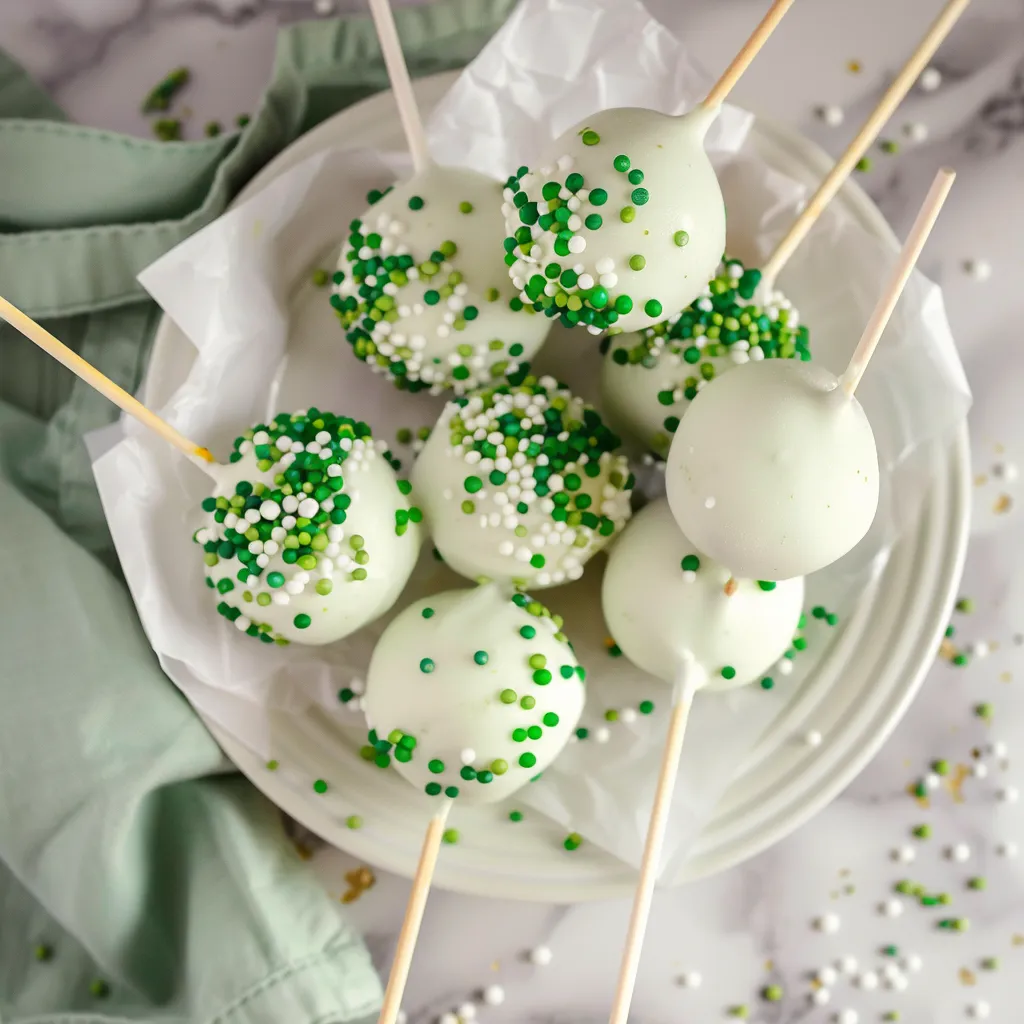
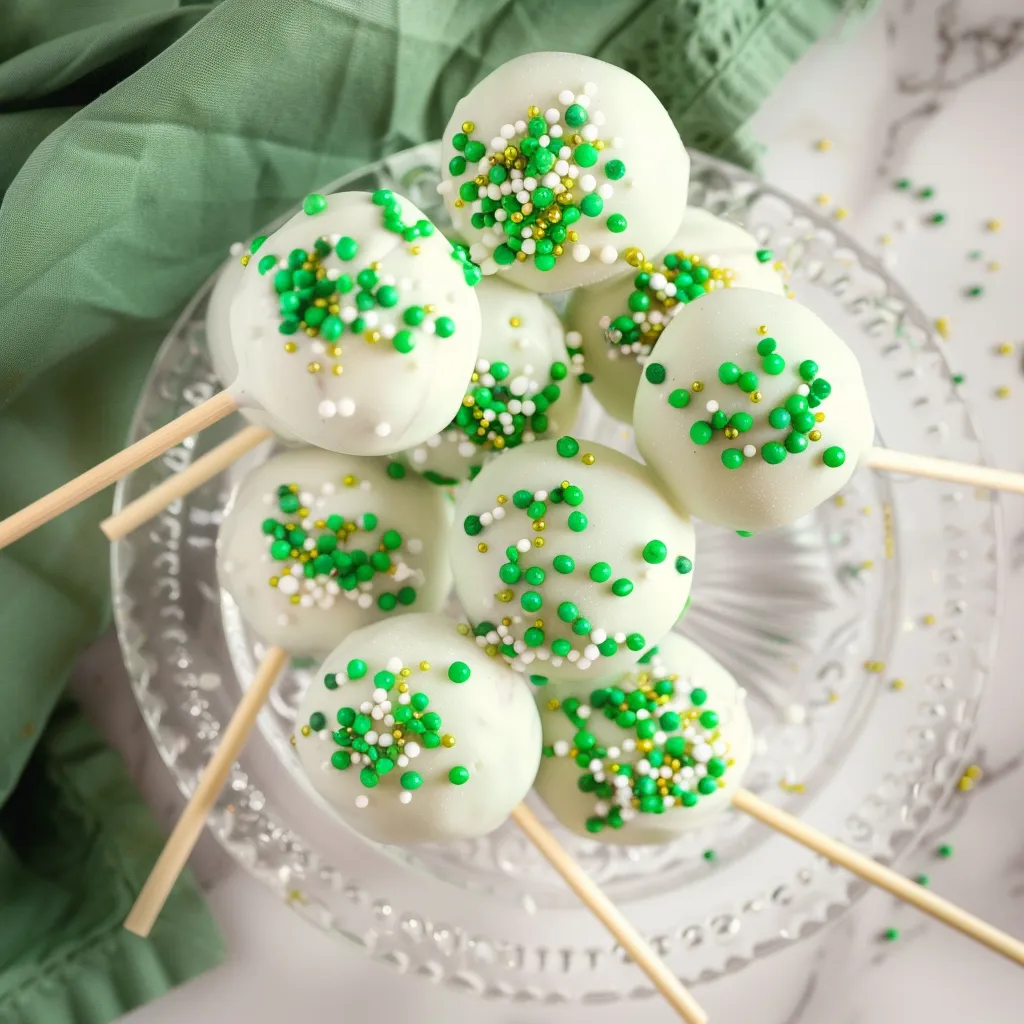
- 1 bag of green candy melts: These will give our pops their stunning green color and sweet coating.
- Sprinkles or decorative toppings (golden or festive): These are optional but definitely make every bite a little celebratory! Think of them as your cake pop’s party outfit.
Optional Additions: You could mix in chocolate chips or even a splash of peppermint extract for a delightful twist! Feel free to think outside the box, or the cake pop, rather!
Special Garnishes: Consider melting some contrasting chocolate (white or dark) to drizzle over for a decorative flair.
Step-by-Step Instructions
Okay, let’s roll up our sleeves and dive into the fun part! Making cake pops can be a little messy, but it’s all part of the charm. Here’s how to get started:
- Bake the Cake: Preheat your oven following the instructions on the cake mix box. Mix the ingredients—mix the cake mix, eggs, water or milk, and oil in a large bowl until nice and smooth. Pour it into a greased baking pan and bake it according to package instructions. Let it cool completely; this is a crucial step, so don’t skip it!
- Crumb the Cake: Once cooled, crumble the cake into a large bowl. You want to break it up until it’s a fine texture—no large chunks here! It’s like therapy, I promise!
- Add the Frosting: Grab your frosting and mix it into the crumbled cake. It’s best to start with half the container, and you can always add more if it feels dry. The mixture should be moldable but not too sticky.
- Form the Balls: Take small amounts of the cake mixture and roll them into balls (about 1 inch). Place these on a baking sheet lined with parchment paper.
- Chill the Pops: Pop the tray in the fridge for about 30 minutes. Chilling makes them firmer, which is essential for future dipping!
- Melt the Candy Coating: Follow the melting instructions for your green candy melts. It usually involves microwaving in small increments to avoid burning. You want a smooth, velvety consistency—like a warm hug for your cake pops!
- Dip Time: Dip the end of each lollipop stick into the melted candy and insert it halfway into each cake ball. This helps them stay secure. Now, dip each ball into the melted candy, twirling to ensure full coverage. Let the excess drip off before placing them back on the parchment paper.
- Add Sprinkles: While the coating is still wet, sprinkle on your decorative toppings. Get creative here; the more, the merrier!
- Let Them Set: Allow the pops to stand upright until the candy coating hardens. You can use a foam block or stand them in a cup!
And there you go! You’ve made yourself a batch of adorable, festive St. Patrick’s Day cake pops. Don’t rush this step—it’s where the magic happens!
Recipe Variations
If you’re feeling a little adventurous, why not switch things up? Here are a few ideas to inspire your creativity:
- Try different cake flavors like chocolate or vanilla and experiment with different colored candy melts.
- Instead of just frosting, mix in some peanut butter or cream cheese for an extra flavor punch!
- Make a fun rainbow cake pop by adding colored frosting in layers before rolling!
Serving & Storage Tips
These cake pops can be enjoyed fresh or can be made a day in advance—if you plan to impress guests! Just store them in an airtight container in the fridge where they’ll stay fresh for about a week. If you have any leftovers (which is a rarity in my house), they make fantastic snacks when you feel the afternoon slump creeping in. I have been known to discreetly grab one or two in the late afternoon for an instant pick-me-up.
Helpful Tips
Before you dive into making these delightful treats, here are a few handy tips learned from my adventures in the kitchen:
- Don’t skip chilling the balls. Skipping this step leads to droopy pops, and nobody wants that!
- Make the cake mixture moist enough to stick together; add more frosting if necessary.
- If the coating is too thick to dip, add a teaspoon of oil to the melted candy melts to thin it out. Just like life, a little flexibility goes a long way!
Special Equipment
While you can get by with the basics, having a few handy tools can save you time and a bit of mess:
- Cake Pop Stand: This will help your pops stay upright while they set. It’s worth its weight in gold during the cooling phase!
- Cookie Scoop: This handy little gadget will help make all your cake balls uniform in size; no one likes an uneven pop!
- Melted Chocolate/Coating Warmer: If you plan on making cake pops frequently, investing in this little appliance can make the melting process so much easier!
Frequently Asked Questions
Can I use a different type of cake mix?
Absolutely! Feel free to use any flavor you love. Chocolate, vanilla, or even a funfetti mix can add a delightful twist to your cake pops.
How do I store cake pops?
Store them in an airtight container in the fridge. They typically stay fresh for about a week, but good luck making them last that long!
Can I make these gluten-free?
Yes! Just swap out the regular cake mix for a gluten-free version, and you’re all set to celebrate!
Can I make them without sticks?
Sure! You can simply roll them into balls and skip the sticks, serving them in cupcake liners instead.
Conclusion
Making St. Patrick’s Day Cake Pops truly brings back the memories of joyous family celebrations, laughter, and, of course, sweet treats! Every pop is a reminder of how sometimes the simplest things can bring a smile to our faces. Whether you’re throwing a festive gathering or just want to bring a bit of joy to your weekday evening, these adorable cake pops will do the trick. I can already imagine you and your friends gathered around, excitedly sharing stories over these delightful snacks—who wouldn’t want to dive into that? I’d love to hear how yours turn out! Share your creations or any creative twists you come up with in the comments below. Happy St. Patrick’s Day and happy baking!
Print
Delicious St Patricks Day Cake Pops for a Festive Celebration
- Total Time: 1 hour 10 minutes
- Yield: 24 cake pops 1x
Description
Celebrate St Patricks Day with delightful cake pops Perfect for festive gatherings these treats add a sweet touch to your celebration
Ingredients
Instructions
Notes
A delightful recipe for St. Patrick’s Day Cake Pops, perfect for celebrations with vibrant colors and festive flavors.
- Prep Time: 45 minutes
- Cook Time: 25 minutes
- Category: Dessert
- Cuisine: Irish
Nutrition
- Serving Size: 24 cake pops
- Calories: 150
- Sugar: 15g
- Fat: 7g
- Carbohydrates: 23g
- Fiber: 0g
- Protein: 2g


