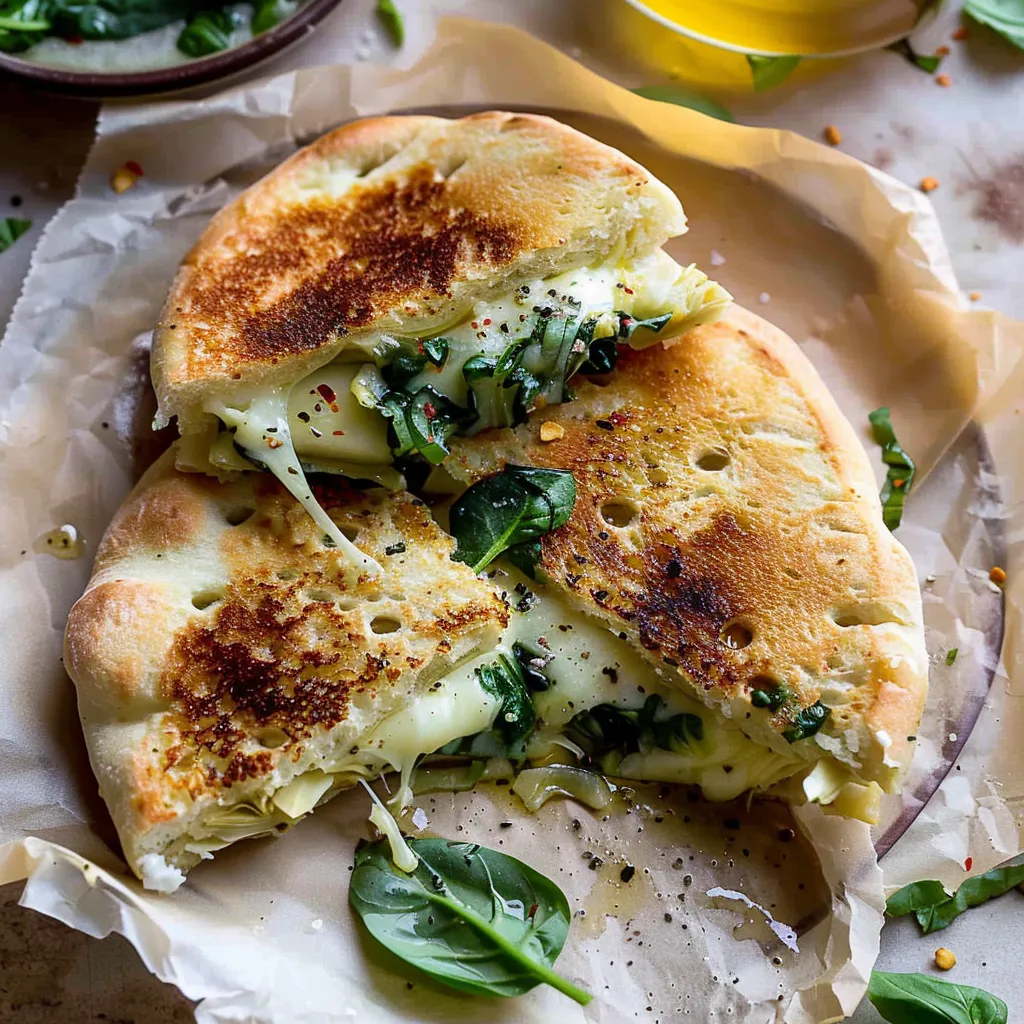
As the scent of melting cheese wafts through the kitchen, I can’t help but reminisce about lazy Sunday afternoons spent with friends, huddled on the couch, savoring comfort food that warms both the belly and the soul. This Spinach and Artichoke Pita Grilled Cheese has become a staple in my household—not just for its delightful taste but for the way it transforms any meal into a joyful celebration. It’s the unexpected twist on classic grilled cheese that combines nostalgia with a modern flair. Inspired by a beloved dip I can never say no to, this dish always feels like giving a big hug—especially on those brisk days when all you want is some cheesy goodness to bring you warmth. So, let’s dive in!
Why You’ll Love This Recipe
So, what’s the big deal about this Spinach and Artichoke Pita Grilled Cheese? Picture this: it’s that quick bite on a busy weeknight that tastes like something straight out of a fancy restaurant. Trust me, your taste buds are going to throw a little party. This recipe not only saves time but also satisfies those comfort-food cravings while packing in some nutritious greens. You get the creaminess from the cheese, the subtle crunch of the artichokes, plus the vibrant freshness of spinach—all inside crispy, warm pita pockets. And let’s not forget how easy it is to whip up; it almost feels like magic! You’ll be running back to your kitchen instead of the takeout menus, I promise.
What It Tastes Like
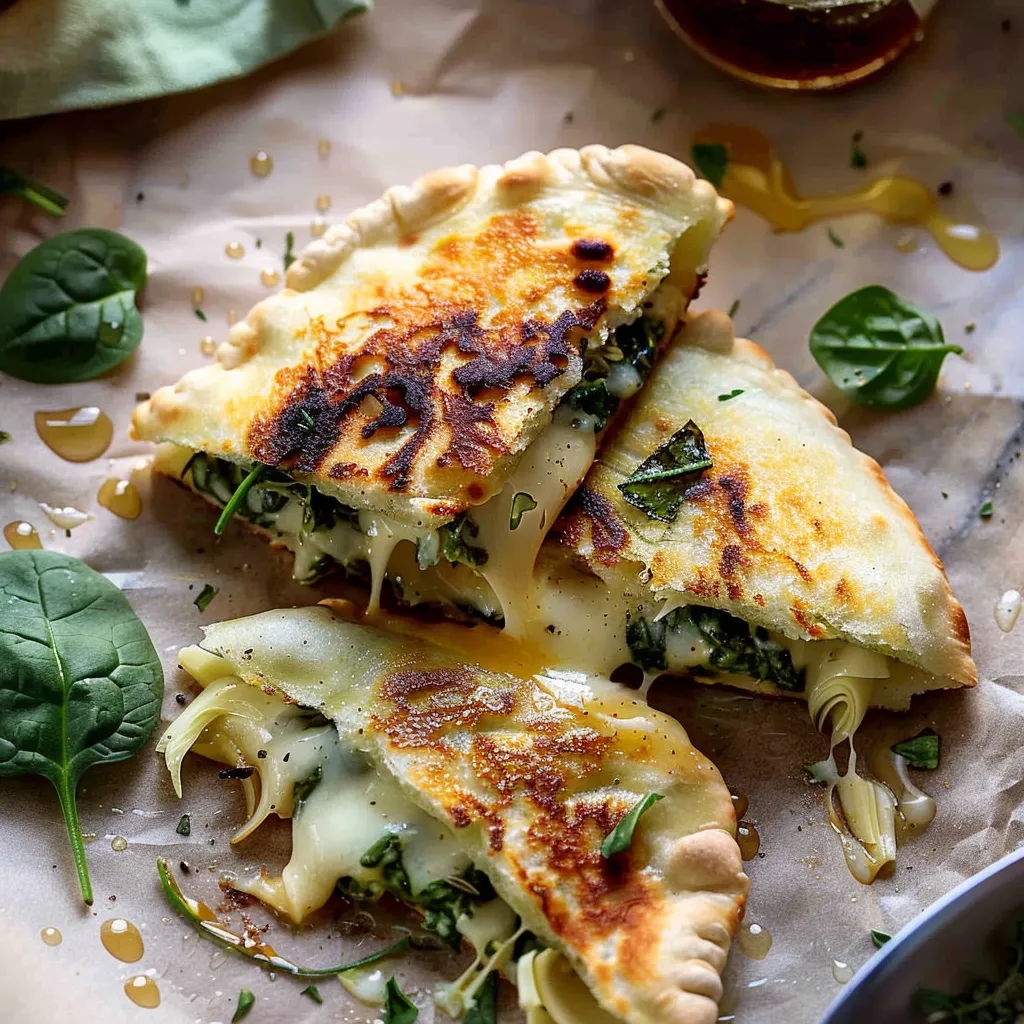
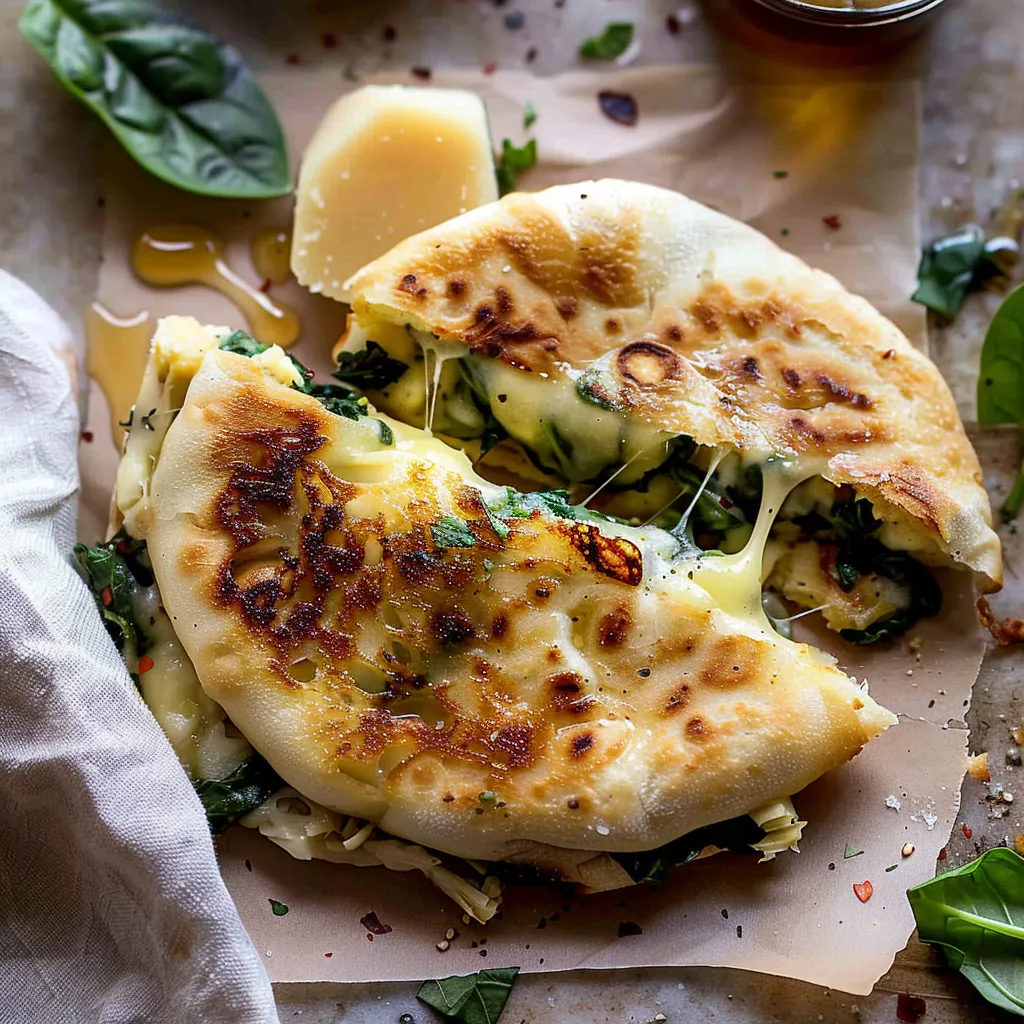
Let’s paint a picture of what you can expect with each bite. The outer crust is golden and crispy—just the right amount of crunch—while the inside is a melty treasure trove of cheese and succulent artichokes. When you break it open, that warm, gooey cheese oozes out like a rich sauce, begging you to dive right in. The spinach adds a fresh, earthy taste that balances the decadence, much like how sunshine brightens a rainy day. It’s a delightful medley; creamy, cheesy, with a satisfying textural contrast that dances around your palate. It’s like wrapping a cozy blanket around yourself after a long day—comfortable and oh-so satisfying.
Ingredients You’ll Need
- Pita bread (2 large): The perfect vessel for all that cheesy goodness.
- Spinach (1 cup, fresh or lightly cooked): Adds a vibrant green color and nutrition.
- Artichoke hearts (1 cup, canned or frozen): Brings a delightful tanginess and texture.
- Cream cheese (4 oz): Helps create a creamy base that holds everything together.
- Cheddar cheese (1 cup, shredded): Sharp and melty, it provides the classic cheesiness we crave.
- Garlic powder (1 tsp): Adds depth and flavor—because garlic makes everything better!
- Salt and pepper (to taste): Essential seasonings that bring all the flavors to life.
- Butter or olive oil (for grilling): To achieve that golden crispiness on the pita.
Optional Additions:
- Crumbled feta cheese for an extra zing.
- Slices of ripe tomato for a juicy burst.
Special Garnishes:
- Fresh dill or parsley, chopped fine, for a fragrant finish.
- A drizzle of balsamic reduction for a sweet tang.
Step-by-Step Instructions
Ready to dive into this deliciousness? Let’s get grilling!
- Prepare the filling: In a medium bowl, combine the artichoke hearts (drained and roughly chopped), fresh spinach, cream cheese, garlic powder, and half of the cheddar cheese. Mix well. A little elbow grease here will ensure everything is combined nicely.
- Season: Sprinkle in some salt and pepper to taste—the artichokes can be a tad salty on their own, so go easy at first.
- Assemble the Pita: Take each pita and carefully cut it in half, like you’re making a little pocket. Stuff each half with the cheesy mixture, aiming to fill them generously but not so much that they burst. Save a little cheddar to sprinkle on top!
- Get it sizzling: In a non-stick skillet, heat a bit of butter or olive oil over medium heat. Place the stuffed pitas in the pan seam-side down. Don’t rush this step—it’s where the magic happens! Let them toast for about 3–4 minutes until golden brown.
- Flip it! Gently turn them over and sprinkle the remaining cheddar on the top side—this will create a nice melty crust. Cook for another 3–4 minutes.
- Serve: Once both sides are crispy and the cheese is oozing, remove the pitas from the heat and let them sit for just a minute. Trust me, you don’t want to burn your tongue on that gooey goodness!
Recipe Variations
Feel free to get creative! Swap in different cheeses—like mozzarella for a gooey stretch or pepper jack for a spicy kick. You can also toss in some sautéed mushrooms for an earthy flavor or use your favorite pesto in place of cream cheese to give it a herby twist. And instead of pitas, why not try it on whole-grain bread or even a bagel? Endless possibilities await!
Serving & Storage Tips
Best served fresh and hot, but if you have leftovers (which is rare around here), wrap them tightly in foil or store them in an airtight container in the fridge for up to two days. To reheat, pop them in a toaster oven or on a skillet. Just keep an eye on them so they don’t get overly crisp—it’s all about keeping that delightful cheese melt, right?
You can also slice them into wedges for a fun appetizer that’s perfect for entertaining. Picture this: a cozy gathering, serving these delightful wedges alongside a nice glass of wine and some friends. Does it get any better?
Helpful Tips
Here are some of my learned-the-hard-way nuggets of wisdom:
- Don’t overstuff your pita—it might burst, and then it’s cheese everywhere instead of inside where you want it!
- Make sure your skillet isn’t too hot; medium heat allows the cheese to melt without burning the bread.
- If using frozen spinach, be sure to squeeze out excess moisture—it’s a soggy pita, and nobody wants that.
Special Equipment
- Non-stick skillet: This is your best friend for grilling. It prevents sticking and helps achieve that beautiful golden color.
- Spatula: A good spatula is crucial for flipping without dropping cheesy goodness on the floor.
- Mixing bowl: Essential for combining all those ingredients thoroughly; a sturdy one will do you well!
Frequently Asked Questions
Can I make this recipe vegan?
Absolutely! Substitute cream cheese with a cashew or tofu-based one and use vegan cheese for that cheesy stretch.
Can I freeze these pita sandwiches?
Yes, they freeze well! Assemble the pitas without cooking them, wrap tightly, and freeze for up to a month. Just thaw and cook them on the skillet when you’re ready!
How can I spice it up?
Add a pinch of red chili flakes or some diced jalapeños to the filling for a surprise kick!
What’s a good dipping sauce?
Consider a tangy yogurt sauce, baba ghanoush, or even a simple marinara for that extra twist. Yum!
Conclusion
This Spinach and Artichoke Pita Grilled Cheese isn’t just a meal; it’s a celebration of flavors, memories, and the joy of cooking. I adore how it brings friends and family together—perfect for a laid-back lunch, dinner, or even a midnight snack when the cheesy cravings strike. Whether you whip it up for a casual weeknight meal or serve it at a gathering, I guarantee it will leave everyone smiling. I can’t wait to hear how yours turns out, or any special twists you might add! Let’s keep this cozy cooking journey going; share your version or story in the comments below!
Print
Savory Spinach and Artichoke Pita Grilled Cheese Recipe Delight
- Total Time: 20 minutes
- Yield: 2 servings 1x
Description
Savor the rich flavors of spinach and artichoke in this creamy grilled cheese pita. A delicious twist on a classic that’s easy to make at home!
Ingredients
Instructions
Notes
This Spinach and Artichoke Pita Grilled Cheese is an unexpected twist on classic grilled cheese that combines nostalgia with a modern flair, perfect for comfort on brisk days.
- Prep Time: 10 minutes
- Cook Time: 10 minutes
- Category: Lunch
- Cuisine: American
Nutrition
- Serving Size: 2 servings
- Calories: 350
- Sugar: 2 grams
- Fat: 20 grams
- Carbohydrates: 30 grams
- Fiber: 4 grams
- Protein: 15 grams