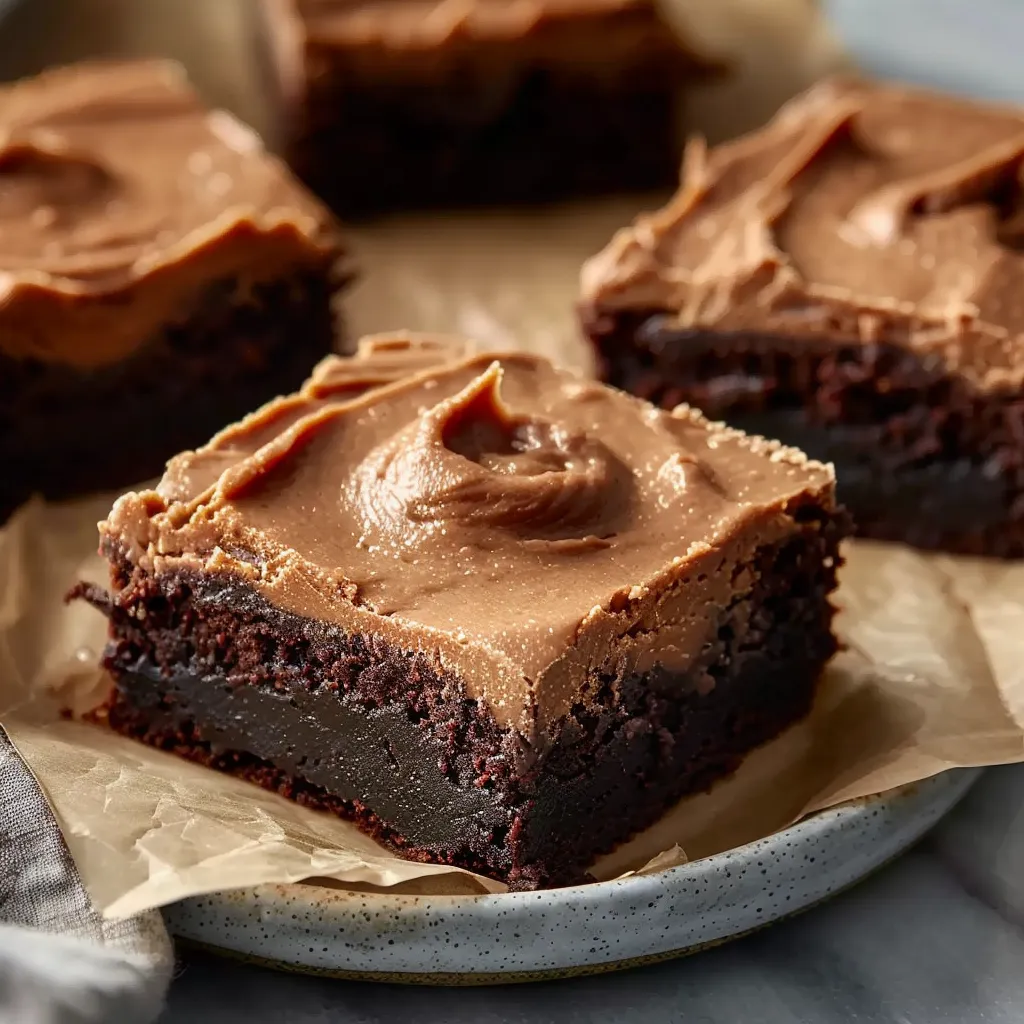
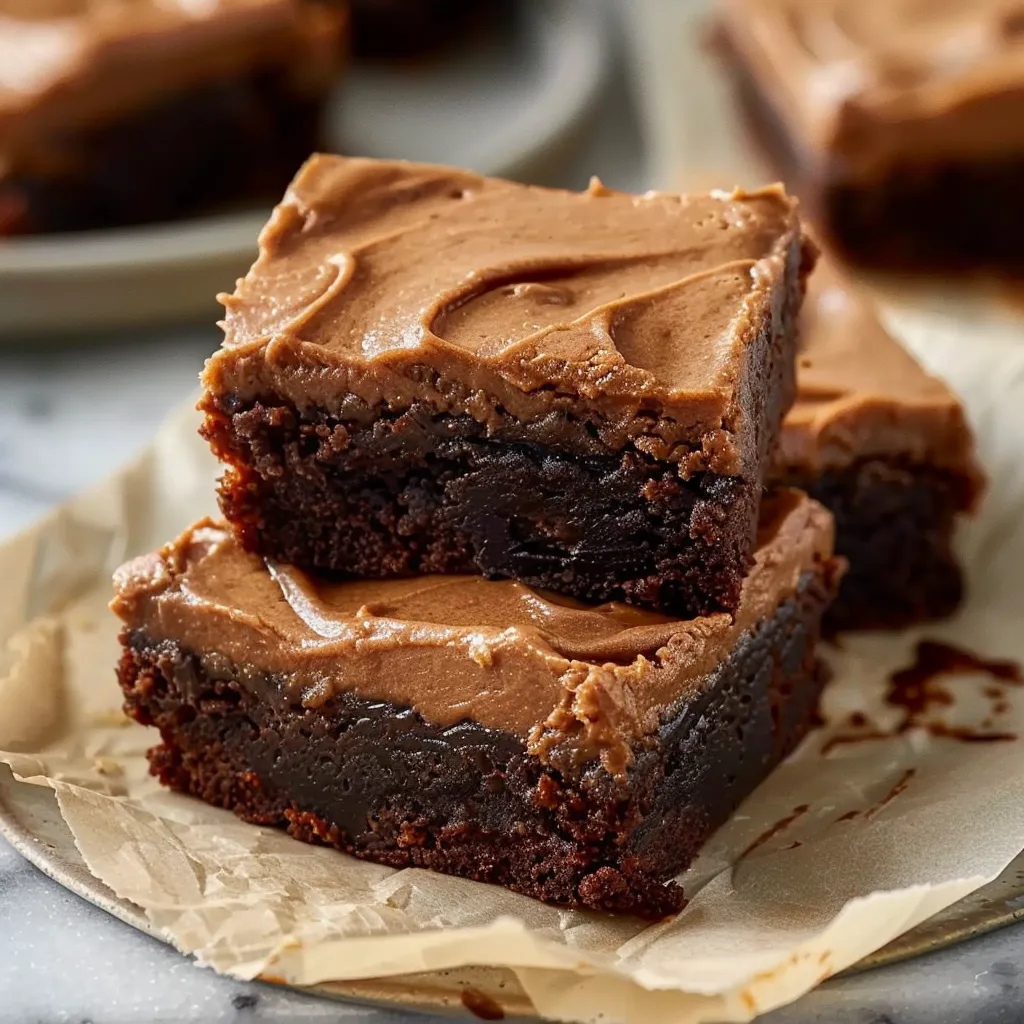
There’s something so comforting about sinking your teeth into a warm brownie, especially when chocolate and coffee come together in sweet harmony. I still remember the first time I whipped up a batch of coffee-infused brownies; my kitchen smelled like a cozy café, and I felt like a culinary rockstar. Back then, I was looking for a way to satisfy my sweet tooth without the guilt that usually comes hand-in-hand with indulgent treats. That’s when it hit me—what if I could sneak in protein, too? And thus, my love affair with these Coffee Protein Brownies began. Simple, scrumptious, and oh-so-satisfying, they are now my go-to treat for any gathering or a quiet night in.
Why You’ll Love This Recipe
Let me be straight with you: these brownies are packed with flavor while keeping nutrition in check. Imagine biting into a fudgy brownie that feels decadent yet gives you a little protein boost. Whether it’s the end of a long day or a mid-afternoon pick-me-up, these brownies transform tired spirits into elated ones. They’re perfect for busy nights when you need something quick but don’t want to lose that homemade charm. Plus, they’re loaded with coffee goodness that makes them the ideal companion to your morning coffee or an afternoon snack. Seriously, once you try them, I promise you’ll want them on repeat!
What It Tastes Like
Imagine this: a warm, fudgy brownie dissolving in your mouth like a hug on a plate, punctuated with bold coffee undertones that awaken your senses. It’s rich, it’s chocolatey, and the coffee adds an unexpected depth that elevates the experience. Each bite feels like a cozy blanket on a chilly day, and as you savor the moist texture, you can’t help but smile. The sweetness is balanced perfectly with a hint of bitterness from the coffee, making it almost like enjoying a well-crafted dessert at your favorite café, except you made it at home. It’s like every craving you’ve ever had rolled into one delightful, protein-packed treat.
Ingredients You’ll Need
- 1 cup almond flour: This provides a nutty aroma and keeps things gluten-free!
- 1/2 cup cocoa powder: For that rich chocolate flavor—we want it dark!
- 1 cup protein powder: I usually go for chocolate flavor to complement the brownie base.
- 1/2 cup maple syrup: Natural sweetness that binds the ingredients together.
- 1/4 cup melted coconut oil: For a lovely, subtle coconut flavor while keeping things moist.
- 1/2 cup brewed coffee: This is where the magic happens—giving the brownies that incredible depth!
- 1/4 teaspoon salt: Essential for enhancing all the flavors!
- 1 teaspoon vanilla extract: Because what’s baking without a hint of vanilla?
- 1/2 cup dark chocolate chips (optional): Because, yes please, let’s amp up the chocolate love!
Optional Additions: Feel free to toss in some nuts for crunch or replace the maple syrup with honey or agave for a different flavor profile.
Special Garnishes: A sprinkle of sea salt on top just before baking is a game changer, and a dusting of powdered sugar gives them a fancy finish.
Step-by-Step Instructions
Let’s get those aprons on, folks, and turn on the oven to 350°F (175°C). Here’s how we’ll create magic:
- Mix the Dry Ingredients: In a mixing bowl, combine the almond flour, cocoa powder, protein powder, and salt. Whisk them together until well blended, like they’re old friends having a good chat. Don’t skip this step; it’s where the magic begins!
- Combine Wet Ingredients: In another bowl, mix together your maple syrup, melted coconut oil, brewed coffee, and vanilla extract. Whisk like you mean it until it’s all smooth and harmonious.
- Combine Both Mixtures: Slowly pour the wet mixture into the dry and gently fold it together with a spatula. If you’re feeling adventurous, now’s the time to add those dark chocolate chips. You want to just combine until everything is moist—no need to overmix!
- Prepare Your Baking Dish: Grease a baking pan (an 8×8 square works beautifully) or line it with parchment paper for easy removal later. Pour the brownie batter in and spread it out evenly—this is your canvas!
- Bake: Pop your pan in the oven for about 25-30 minutes. You’ll know they’re ready when the top looks firm but a toothpick inserted into the center comes out with a few moist crumbs. Trust me, don’t overbake; we want gooey, not dry!
- Cool & Serve: Let them cool in the pan for at least 10 minutes before transferring to a cooling rack. Chop them into squares and savor that warm magic. Bonus points for serving with a scoop of ice cream!
Recipe Variations
Feeling adventurous? There’s so much room for creativity here! You can switch the almond flour for oat flour for a slightly different flavor, or even try adding some chopped nuts for crunch. If you want a sweeter brownie, drizzle some honey on top before baking for a caramelized finish. Want to make them festive? Add a sprinkle of cinnamon or swap in some seasonal spices like nutmeg or pumpkin spice in the fall.
Serving & Storage Tips
These brownies can be stored in an airtight container at room temperature for about 3 to 4 days (if they last that long!). If you want to keep them fresher longer, toss them in the fridge for up to a week. They also freeze beautifully—just wrap them individually in plastic wrap and then place them in a freezer bag. When you’re craving one, simply thaw at room temperature for a bit. Oh, and as for leftovers? You can crumble them over yogurt or oatmeal for a delightful breakfast treat!
Helpful Tips
We’ve all had those baking mishaps, right? Here are a few tips to help you avoid any potential disasters:
- Measure your ingredients correctly—baking is a science!
- Watch the baking time closely; every oven is different. You want that perfect gooey texture!
- If using a different protein powder flavor, keep in mind it may alter the taste. Chocolate is the safest choice to stay true to the brownie essence!
- Don’t skip cooling; brownies are too hot to handle right out of the oven!
Special Equipment
While you can certainly get by with the basics, here are a couple of tools that can make your brownie experience even better:
- Whisk: A good whisk will help you combine the wet ingredients smoothly without lumps. Plus, it’s fun to use!
- Spatula: A rubber spatula is perfect for folding and scraping the bowl to get every bit of that delicious batter.
- Baking Pan: I highly recommend using an 8×8 square pan for that ideal fudgy thickness. Round pans can lead to overbaking, and nobody wants that!
Frequently Asked Questions
Can I use a different sweetener instead of maple syrup?
Absolutely! Honey or agave syrup work well, but keep in mind that it might change the flavor slightly.
What can I substitute for almond flour?
You can use oat flour or whole wheat flour if you don’t have almond flour on hand. Just remember that it may affect the texture a bit.
How do I know when the brownies are done?
To check if they are done, insert a toothpick into the center; if it comes out with a few moist crumbs (not wet batter), they’re perfect!
Can I add nuts to the brownies?
Yes! Chopped walnuts or pecans would add a great crunch. Just fold them in right before you pour the batter into the pan.
How do I store leftover brownies?
Store them in an airtight container at room temperature for 3-4 days or in the fridge for up to a week. They also freeze well!
Conclusion
There you have it—my beloved Coffee Protein Brownies! I can’t tell you how much joy they’ve brought me over the years; they’re perfect for sharing with friends or savoring alone on a quiet evening with a good book. The warmth of the coffee and comfort of the brownies make for a delightful combination that’s hard to beat. Give them a try, and I’d love to hear your thoughts! What unique twists did you add? Don’t forget to share your version or a favorite memory of baking in the comments. Happy baking!
Print
Coffee Protein Brownies Recipe
- Total Time: 40 minutes
- Yield: 16 brownies 1x
Description
Satisfy your cravings with this tasty coffee protein brownies recipe, perfect for a healthy snack that boosts energy and flavor in every bite.
Ingredients
Instructions
Notes
These Coffee Protein Brownies are a delightful blend of chocolate and coffee, ensuring satisfaction without guilt, perfect for any occasion.
- Prep Time: 10 minutes
- Cook Time: 30 minutes
- Category: Dessert
- Cuisine: American
Nutrition
- Serving Size: 16 brownies
- Calories: 150
- Sugar: 6 grams
- Fat: 8 grams
- Carbohydrates: 12 grams
- Fiber: 4 grams
- Protein: 10 grams